
Admin Area
Admin area
To view and manage the entire system, navigate to the admin area. The admin area is the control centre that manages the clinic’s operations. This page is accessible to administrators and the role is given specific privileges. You can configure system settings, manage users and oversee clinic-wide activities.
Navigation
To view the admin area, click on the settings icon. Choose “Admin Area” from the list.
Staff Management
You can manage your staff accounts and assign roles and permissions.
Add new staff
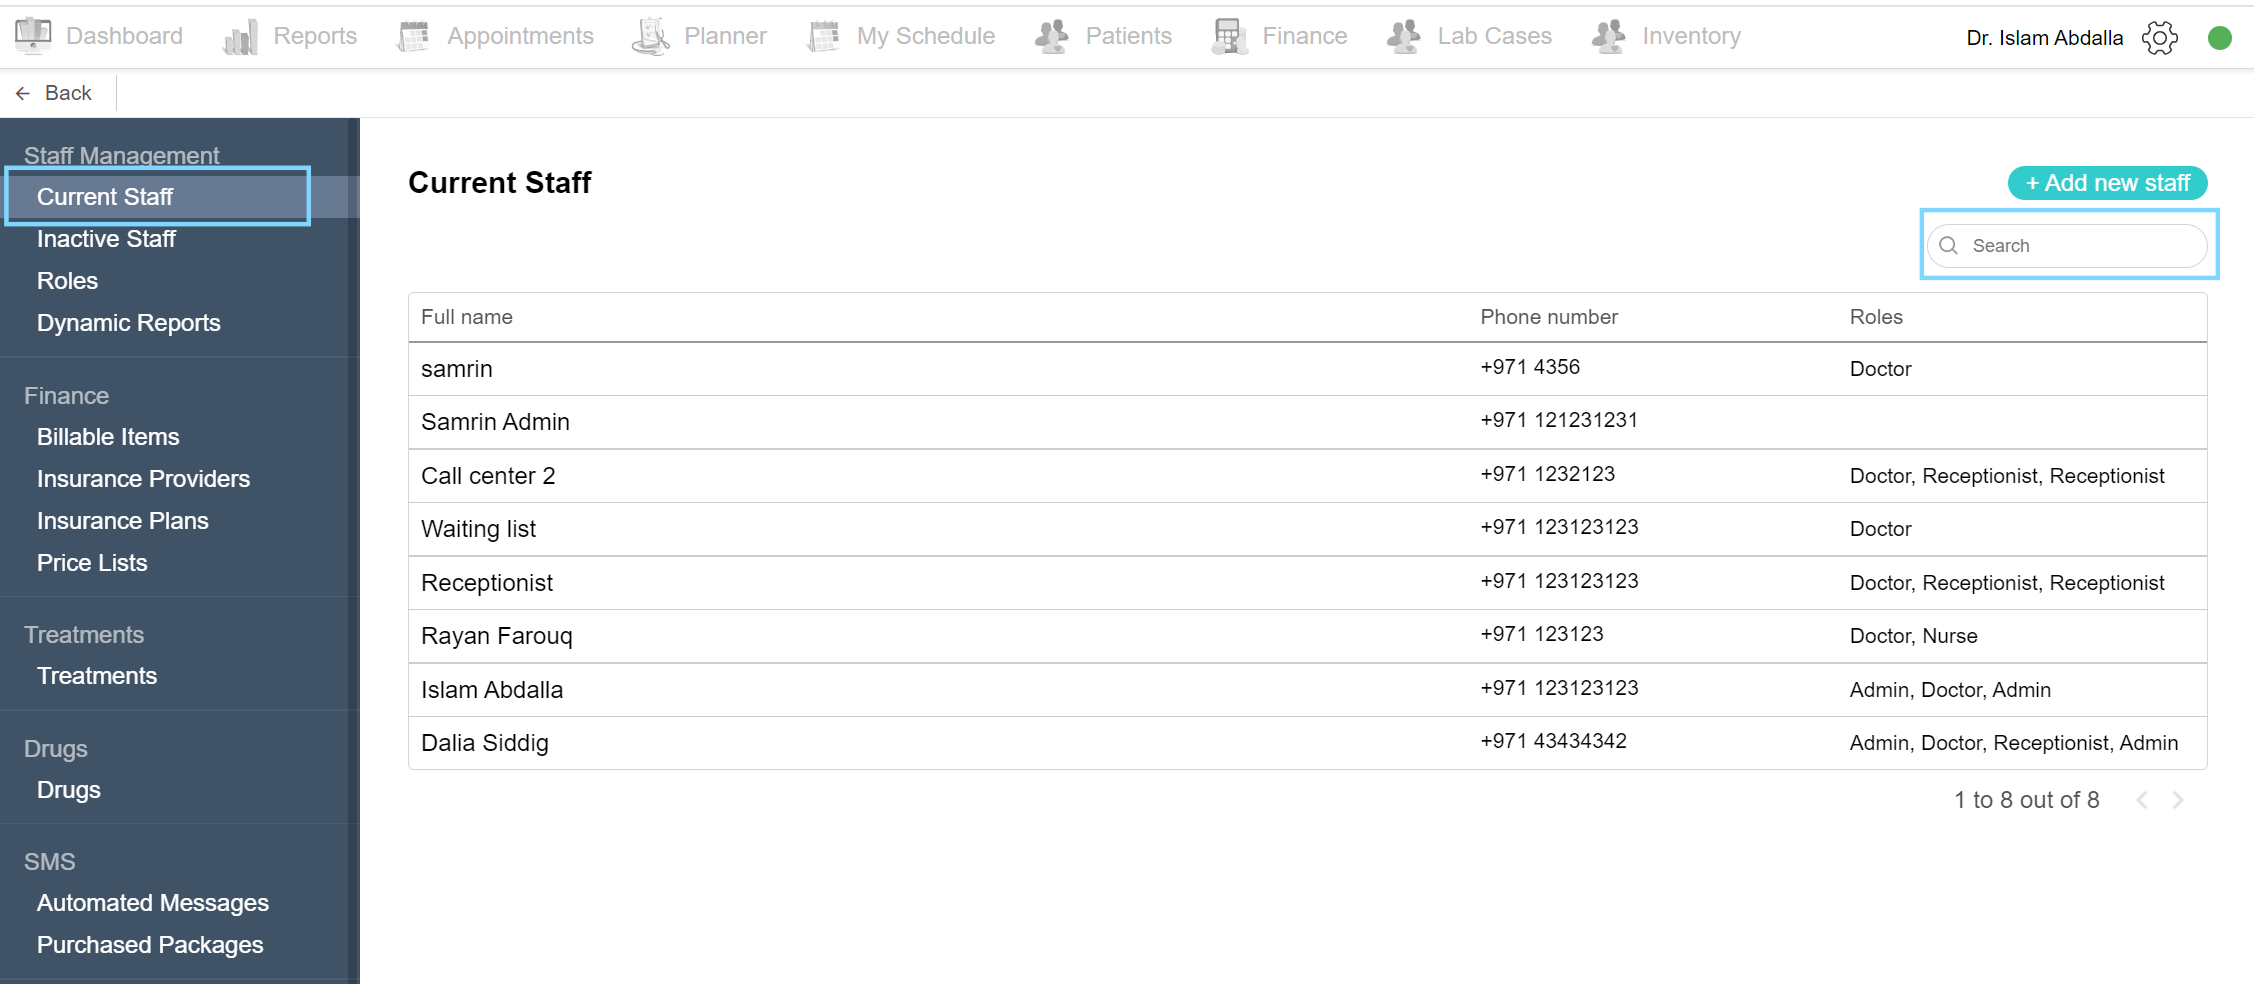
To add a new staff account to Balsam Medico, click on the settings icon and choose Admin Area from the list. Under the Staff Management section, click on Current Staff. This page shows the accounts currently used by each clinic. You will find their full name, phone number and role.
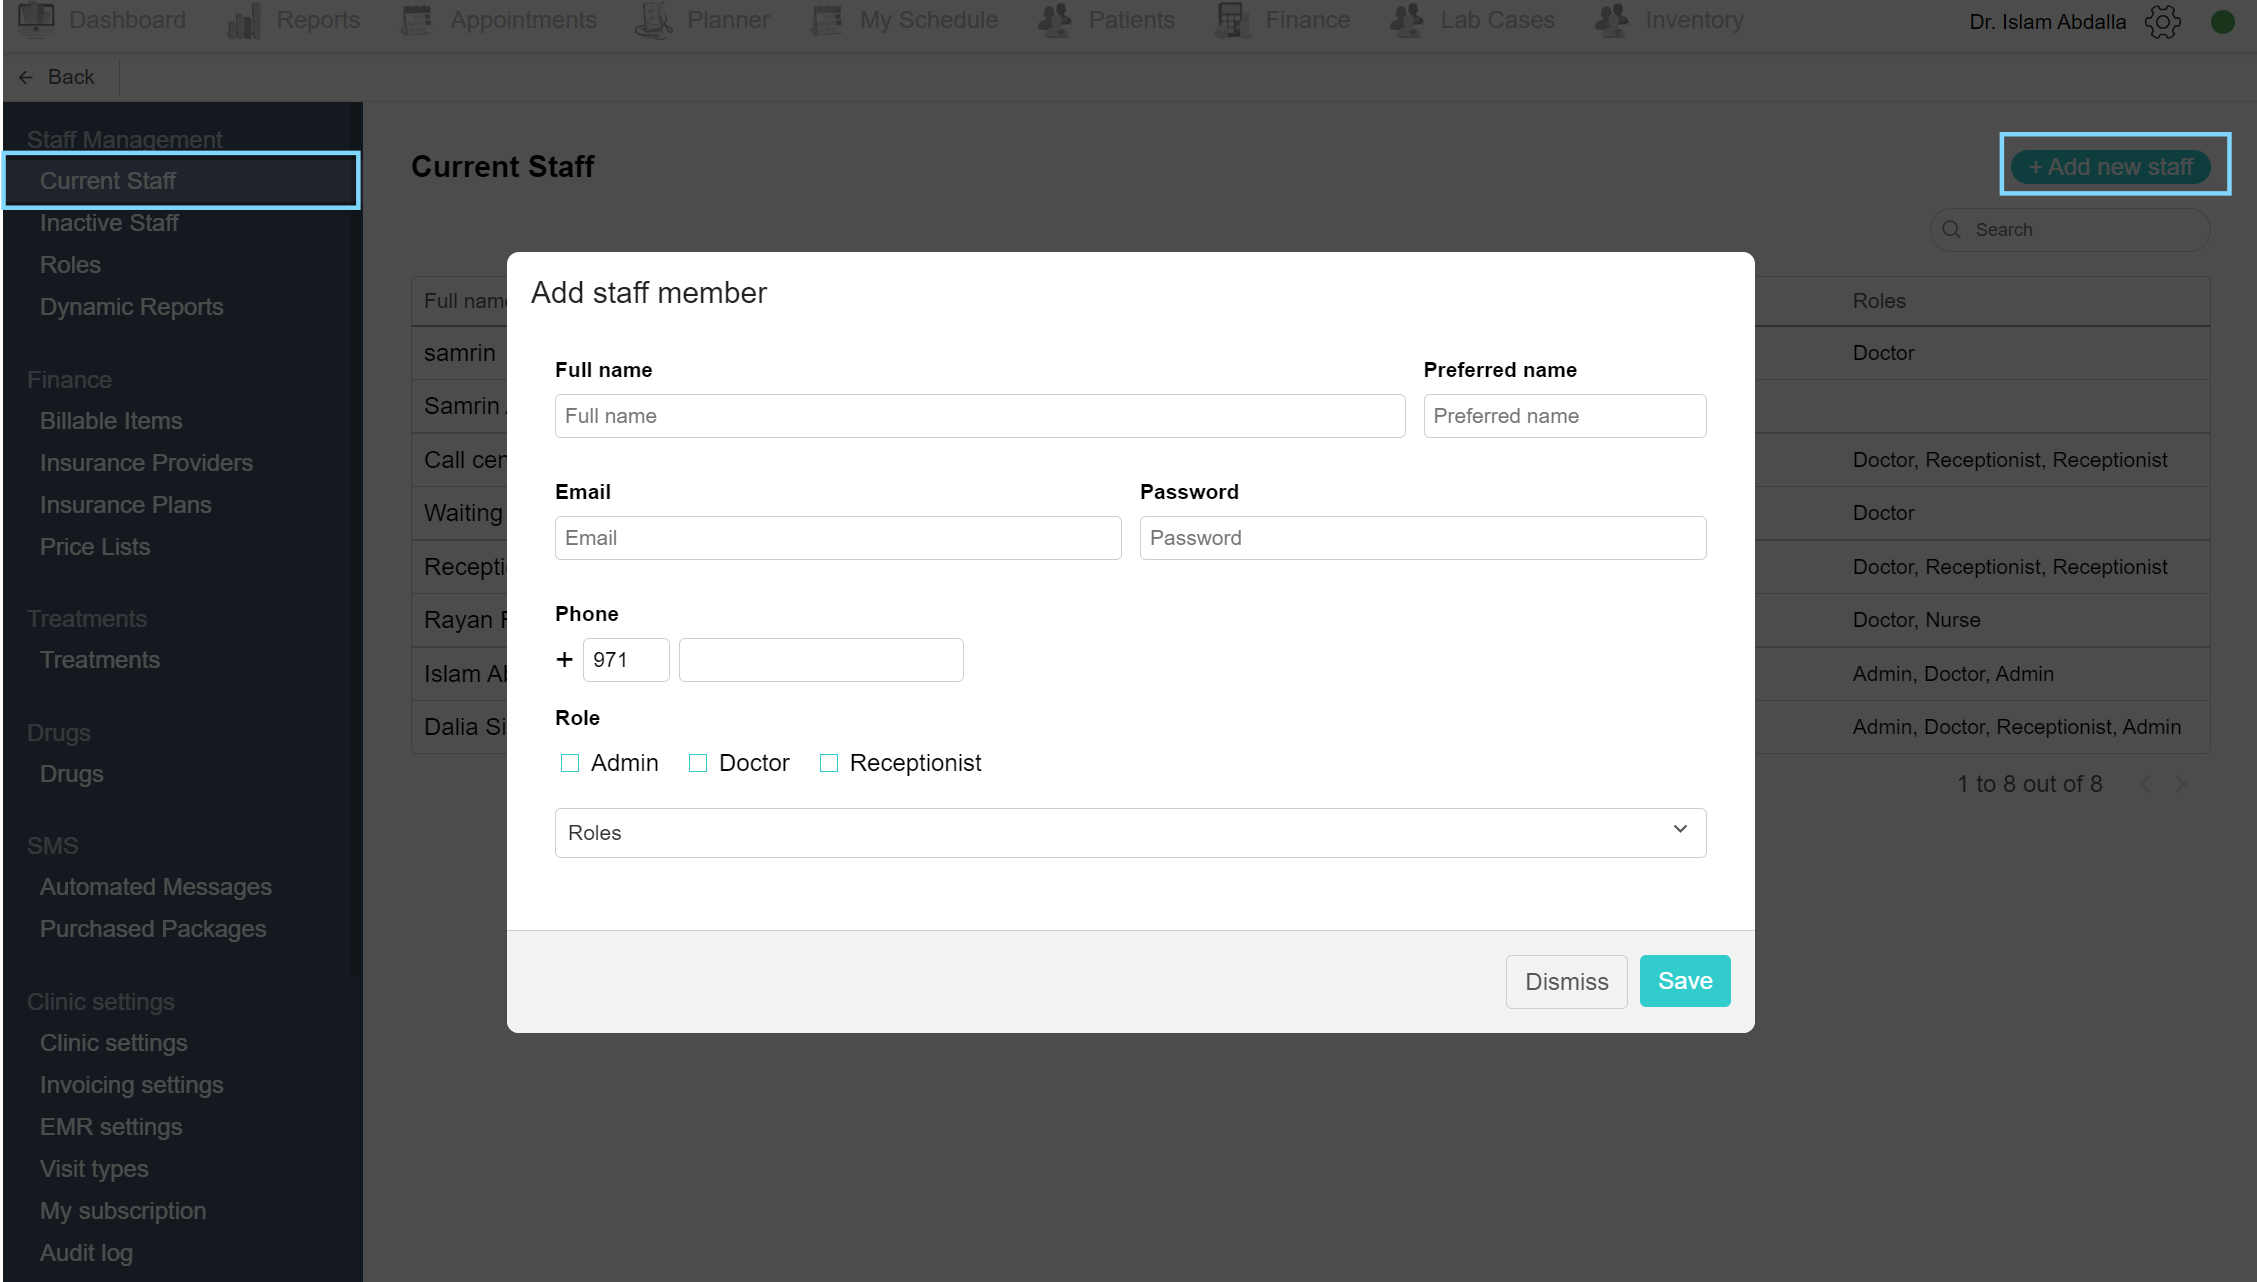
At the top of the page, click on ‘Add new staff’ to add a new account. An add new staff member popup box opens. Enter the staff’s details and assign them a password. Note the email is the username used to log into their accounts. Choose the roles from the existing checklist or the drop-down list. Each role has its information, fill in the fields shown to you. Finally, click Save. The staff member is now added and can log into their accounts using the email and password.
Search staff account
To search for a staff member's information, click on the settings icon and choose Admin Area from the list. Under the Staff Management section, click on Current Staff. Under the ‘Add new role’ button, click on the search field on the right of the page. Type the staff name or phone number to view the desired staff.
Edit staff
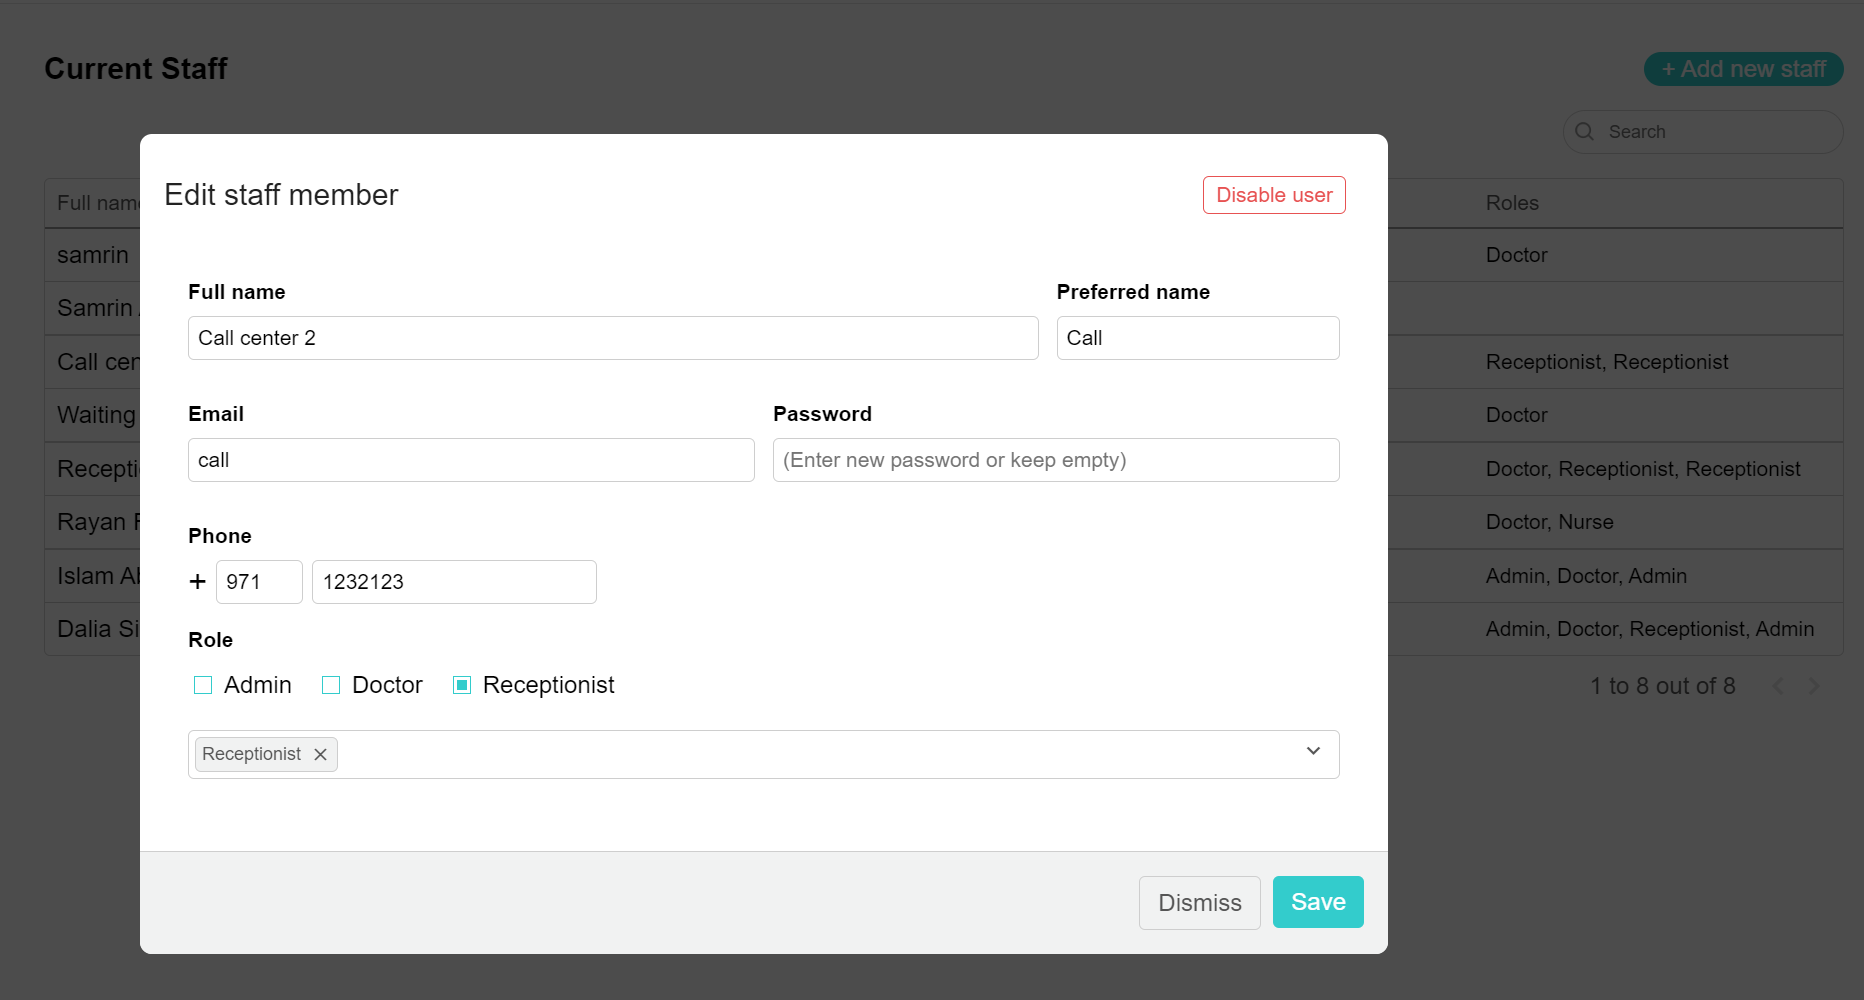
When you need to change a staff member's password or update their roles or working hours, for example, you can edit their information. To edit, click on the settings icon and choose Admin Area from the list. Under the Staff Management section, click on Current Staff. Search the staff name or choose from the list. An edit staff member popup box appears. Click on the desired field and edit as required. Finally, click Save.
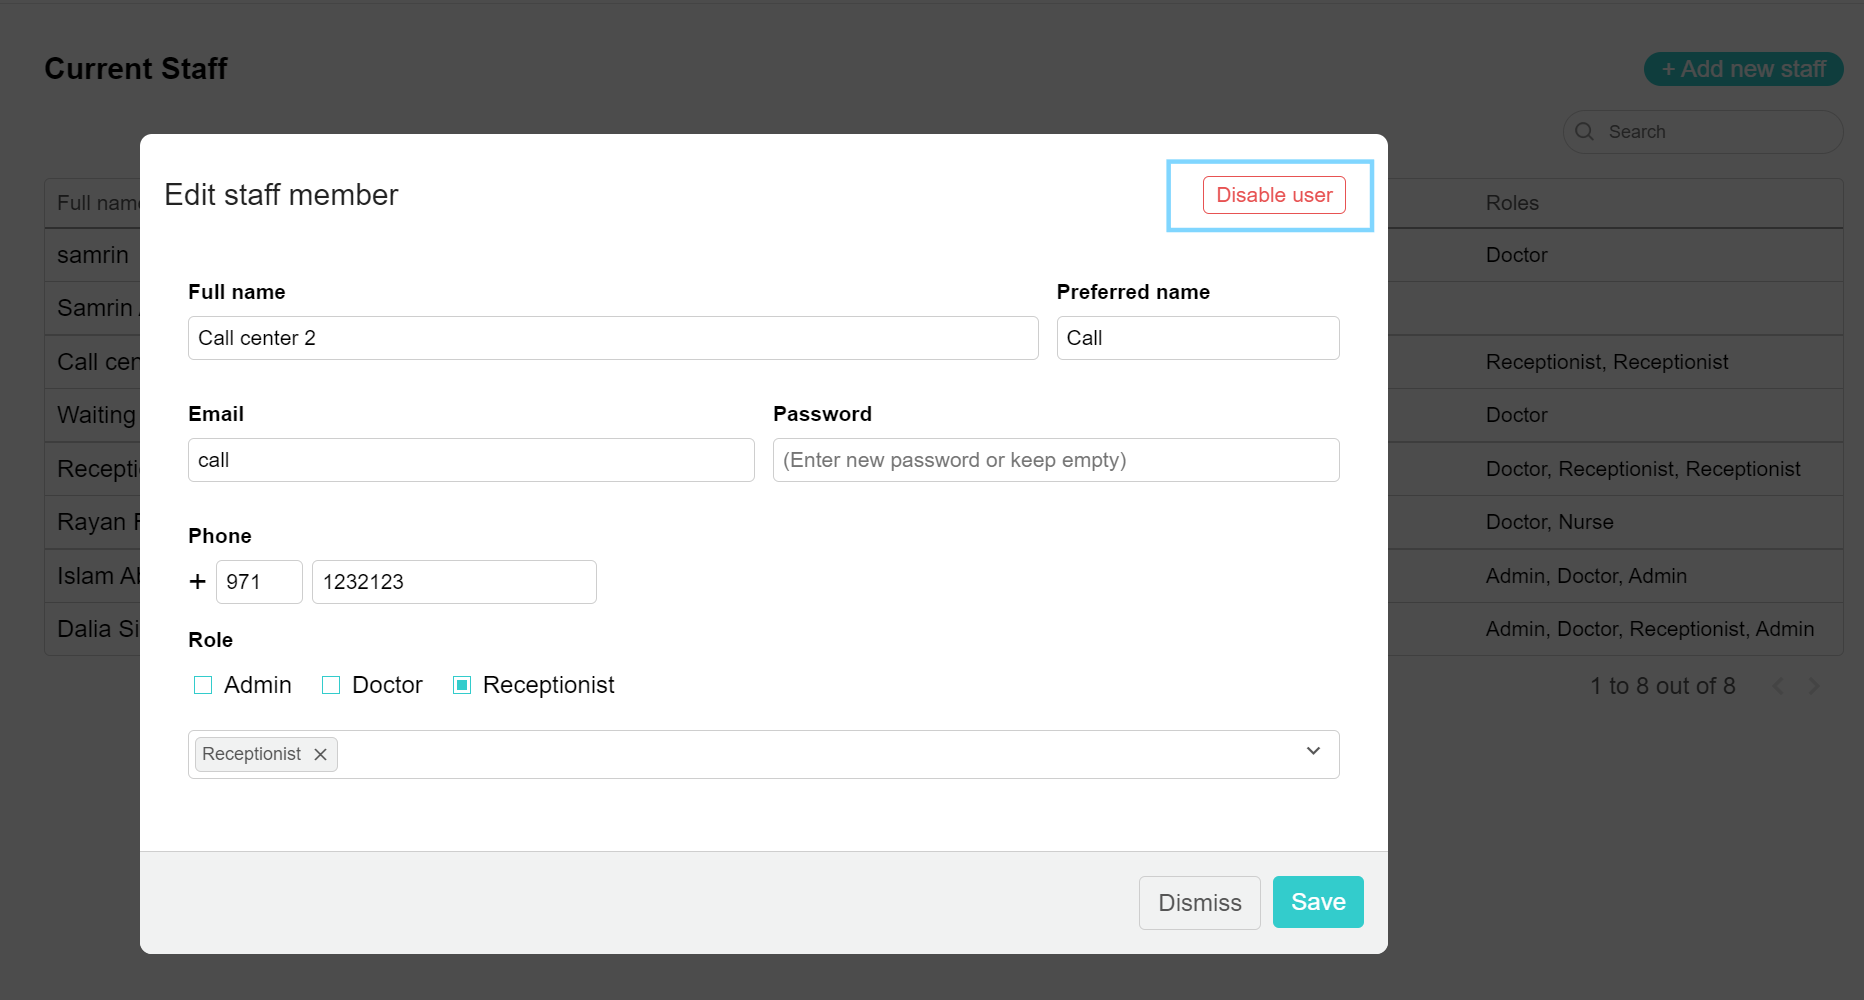
Disable staff account
To disable a staff account for various reasons, click on the settings icon and choose Admin Area from the list. Under the Staff Management section, click on Current Staff. Select the desired staff and click to view the edit staff member popup page. On the top right of the page, a red ‘Disable user’ button is found. Once clicked, a confirmation box appears, click ‘Disable user’ to confirm the action. The staff can no longer log into their account and their information can be found on the ‘Inactive Staff’ page.
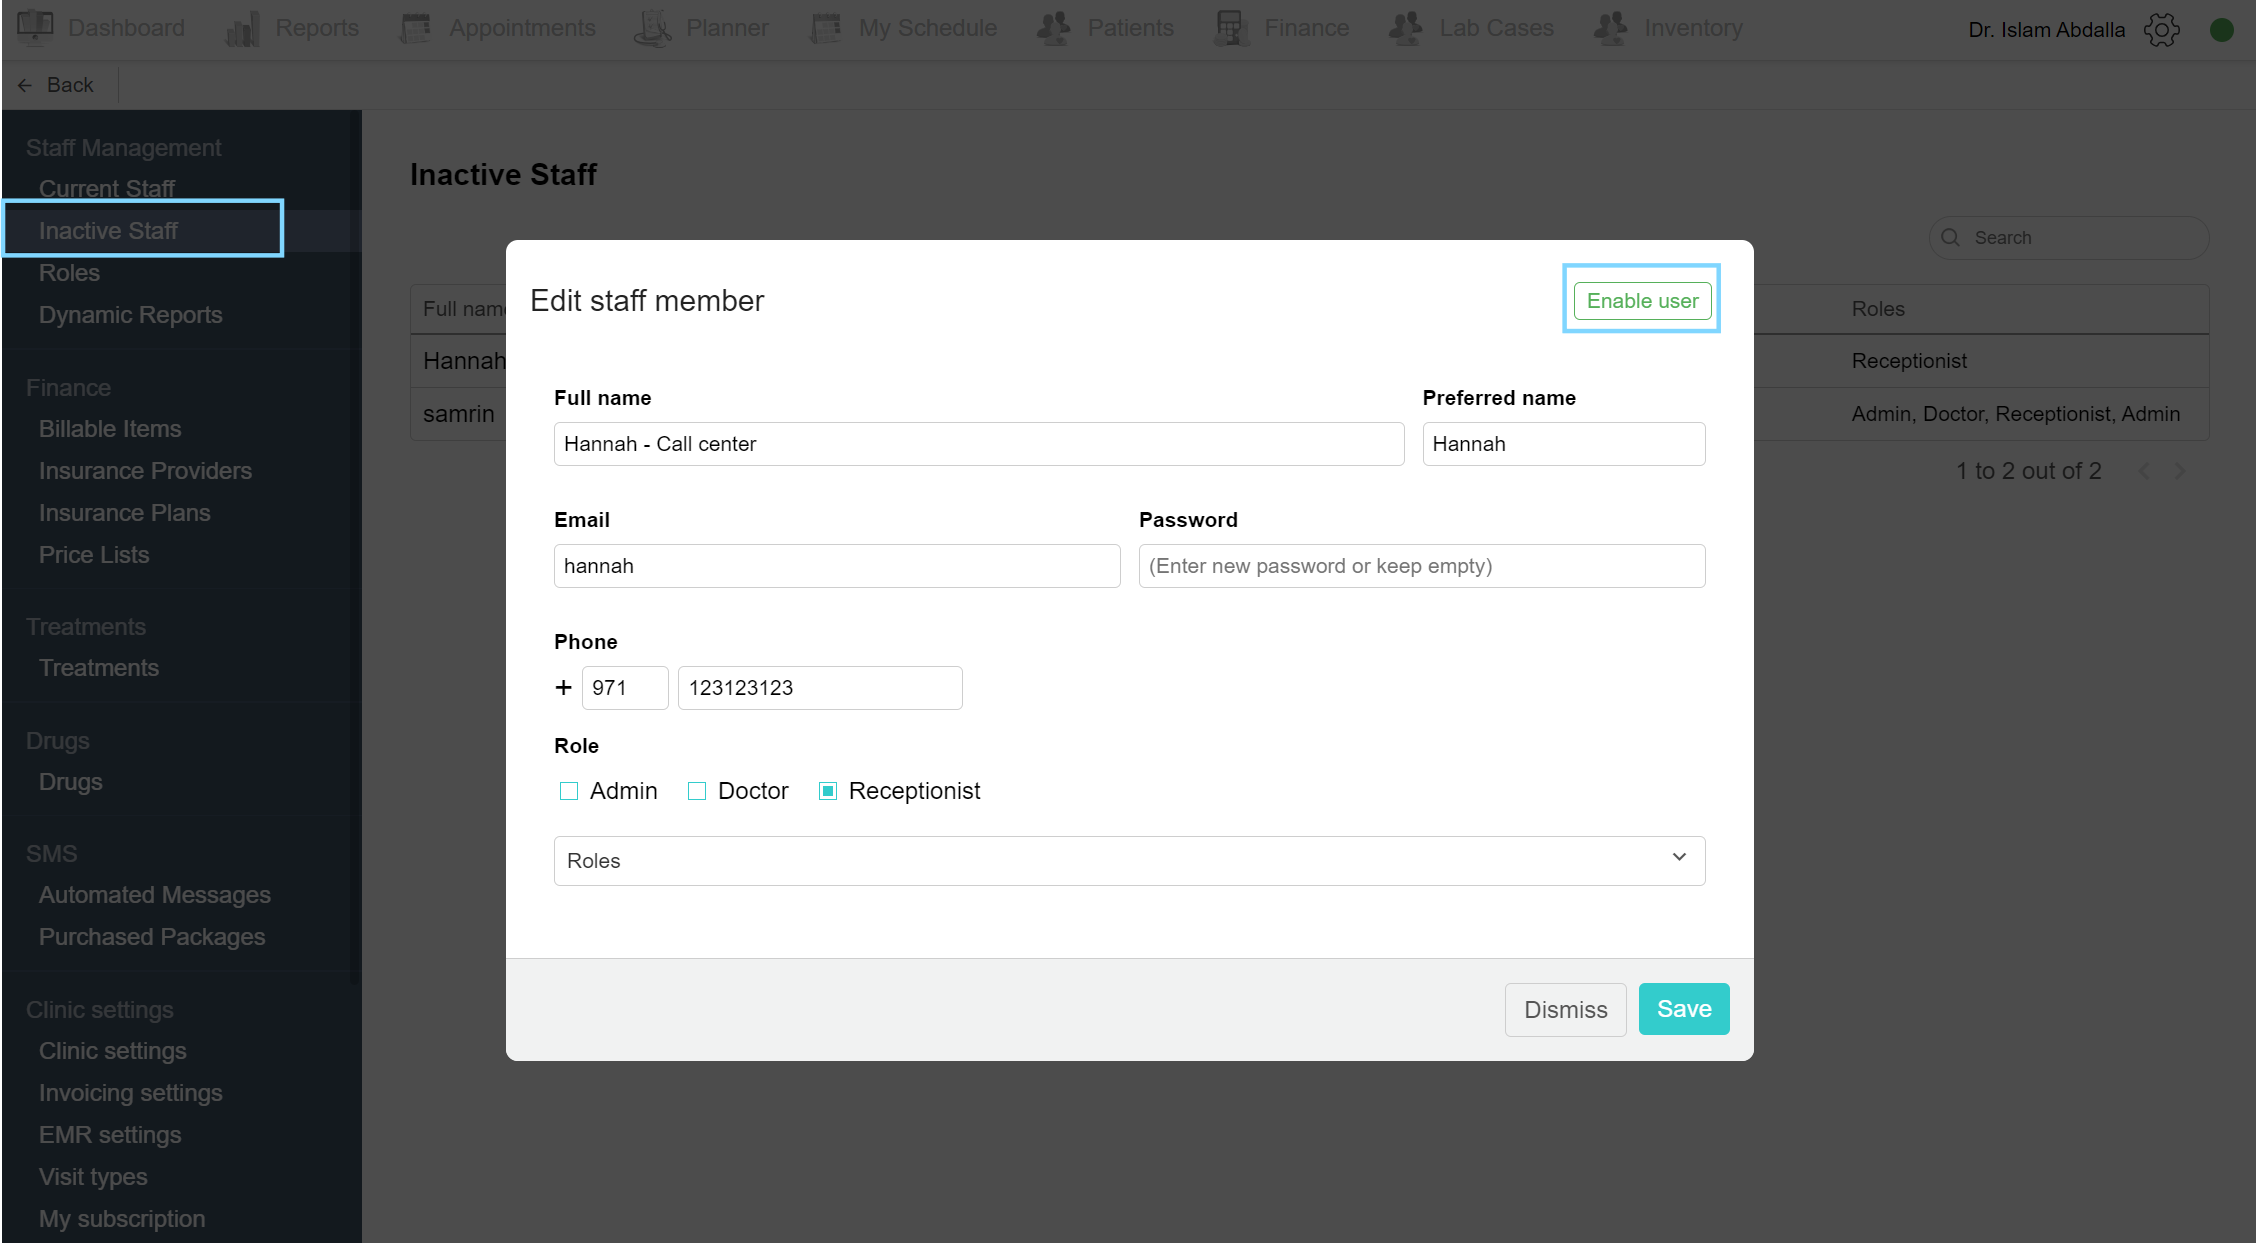
Enable staff
To enable a staff account back for various reasons, click on the settings icon and choose Admin Area from the list. Under the Staff Management section, click on Inactive Staff. A list of all the disabled accounts is shown. Select the staff you wish to enable and an edit staff member popup page appears. On the top right of the page, a green ‘Enable user’ button is found. Once clicked, a confirmation box appears, click the confirmation button and the staff member’s account is now restored. Their information can be found on the ‘Current staff’ page.
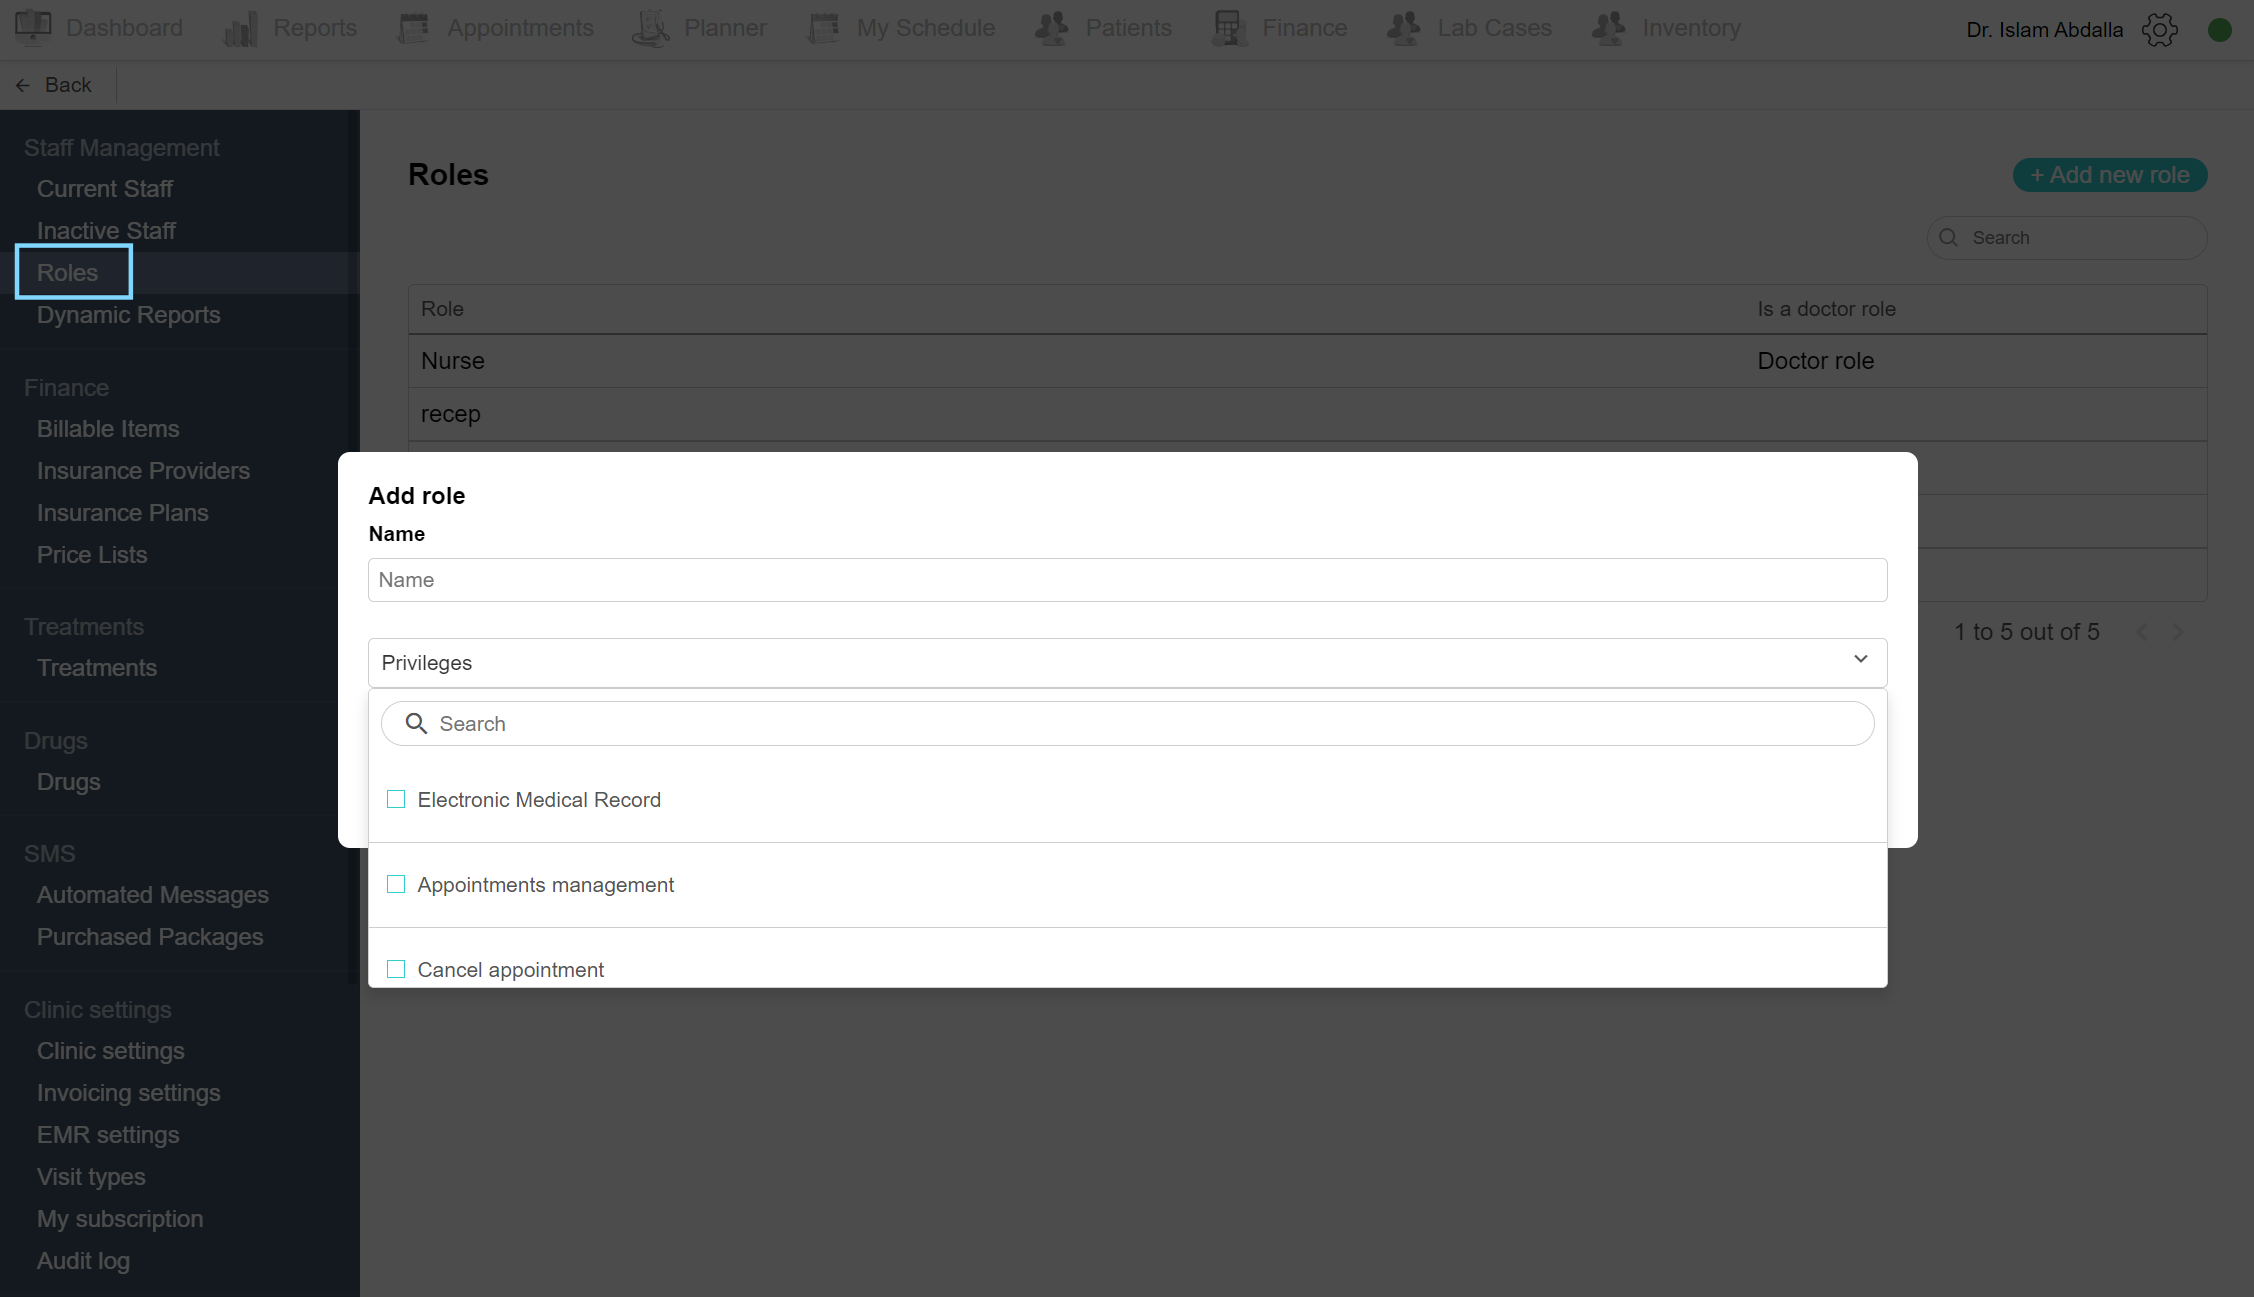
Add new role
In the Roles section in the introduction to Balsam Medico documentation, we’ve discussed what roles are. Roles are the different types of accounts in Medico, they are differentiated by the privileges given to each role. To add a new role to the system, determine the name of the role e.g. “Accountant” and what are you willing to give them access to in the system. Then click on the settings icon and choose Admin Area from the list. Under the Staff Management section, click on Roles. Here you will see a list of all the roles created. Click on ‘Add new role” found at the top right of the page. The ‘Add role’ popup box includes name and privileges, write the name of the role e.g. “Accountant” and select the privileges from the checklist. Privileges are what’s accessible to the role. For example, for our new role, we’ll choose the Finance privilege and Override invoice date lock privilege. You can choose as much as you need to. Finally, there is a “is a doctor role” option, this gives the account every privilege already set by us for the doctor account. Click save and now a new role has been added. You can set the role for the account in their information on the Current Staff page.
Edit roles
To add a privilege or remove one from the role, navigate the Admin Area from the settings icon. Under the Staff Management section, click on Roles. From the list of existing roles, choose your desired one. The edit role popup box shows up. You can change the name, and/or choose from the list of privileges found. Make the necessary changes and click Save.

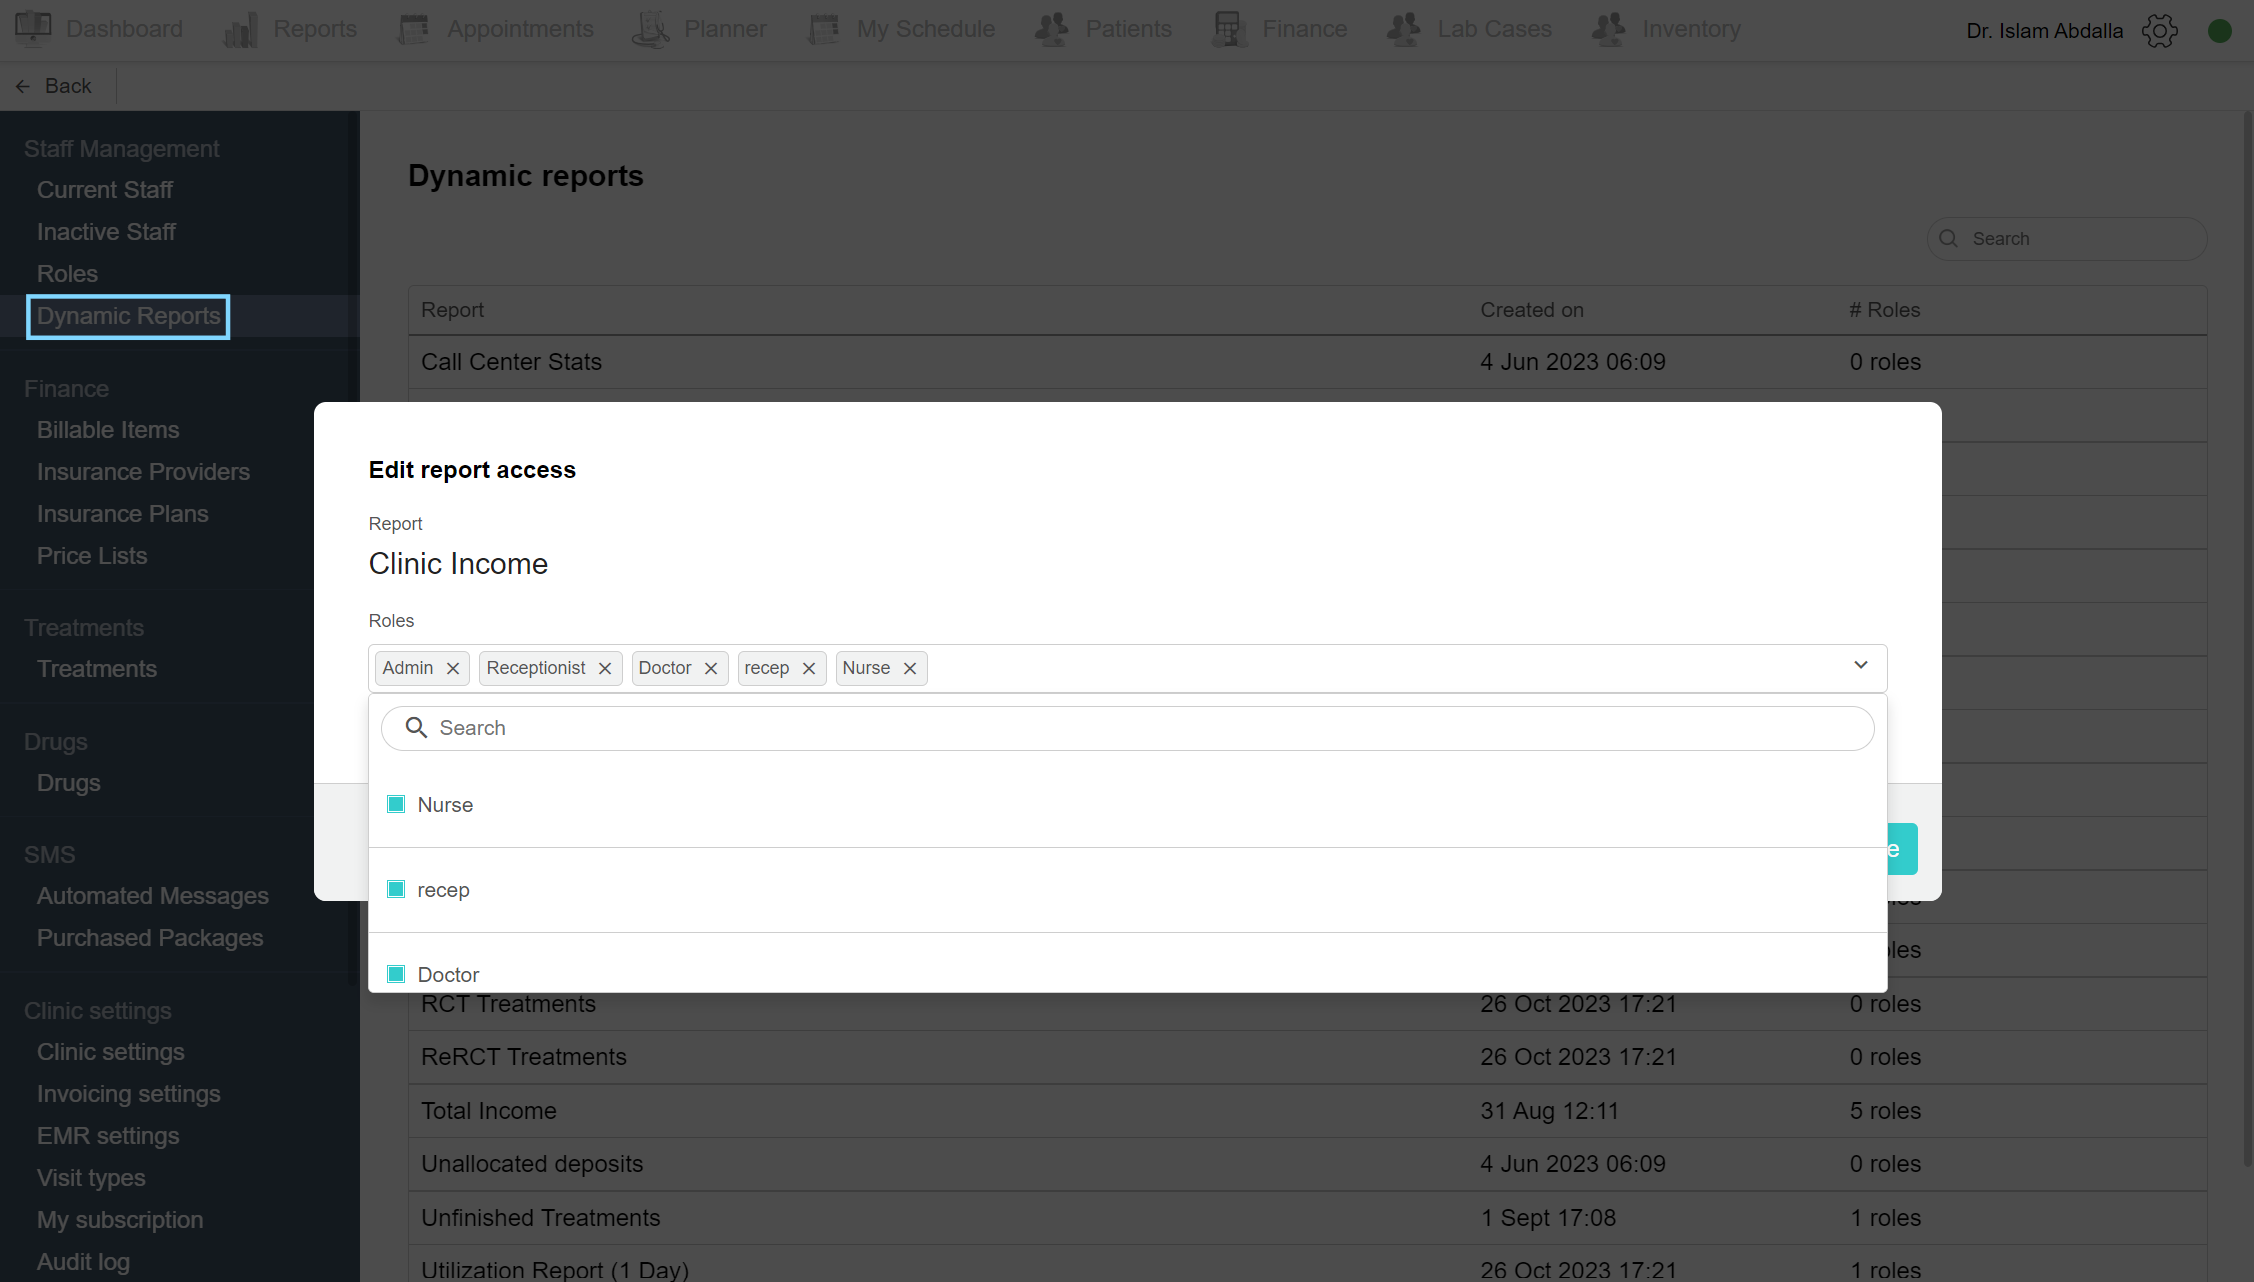
Assign dynamic reports to roles
When creating the dynamic reports, the reports are found in the Reports tab. But to show the reports to roles that don’t have access to the Reports tab, we assign them in the admin area. Navigate to the Admin Area via the settings list. Under the Staff Management section, click on Dynamic Reports. Here is a list of all the dynamic reports created for the clinic, with the creation date and number of roles that have access to every report. You can search for a specific report using the search field. Choose the desired dynamic report, and a popup box called “Edit report access” shows. From the roles checklist, select the wanted roles and click Save. Now every staff member that has the selected role can view the report in their profiles.
Finance
You can manage the finances of billable items and insurance.
Add billable items
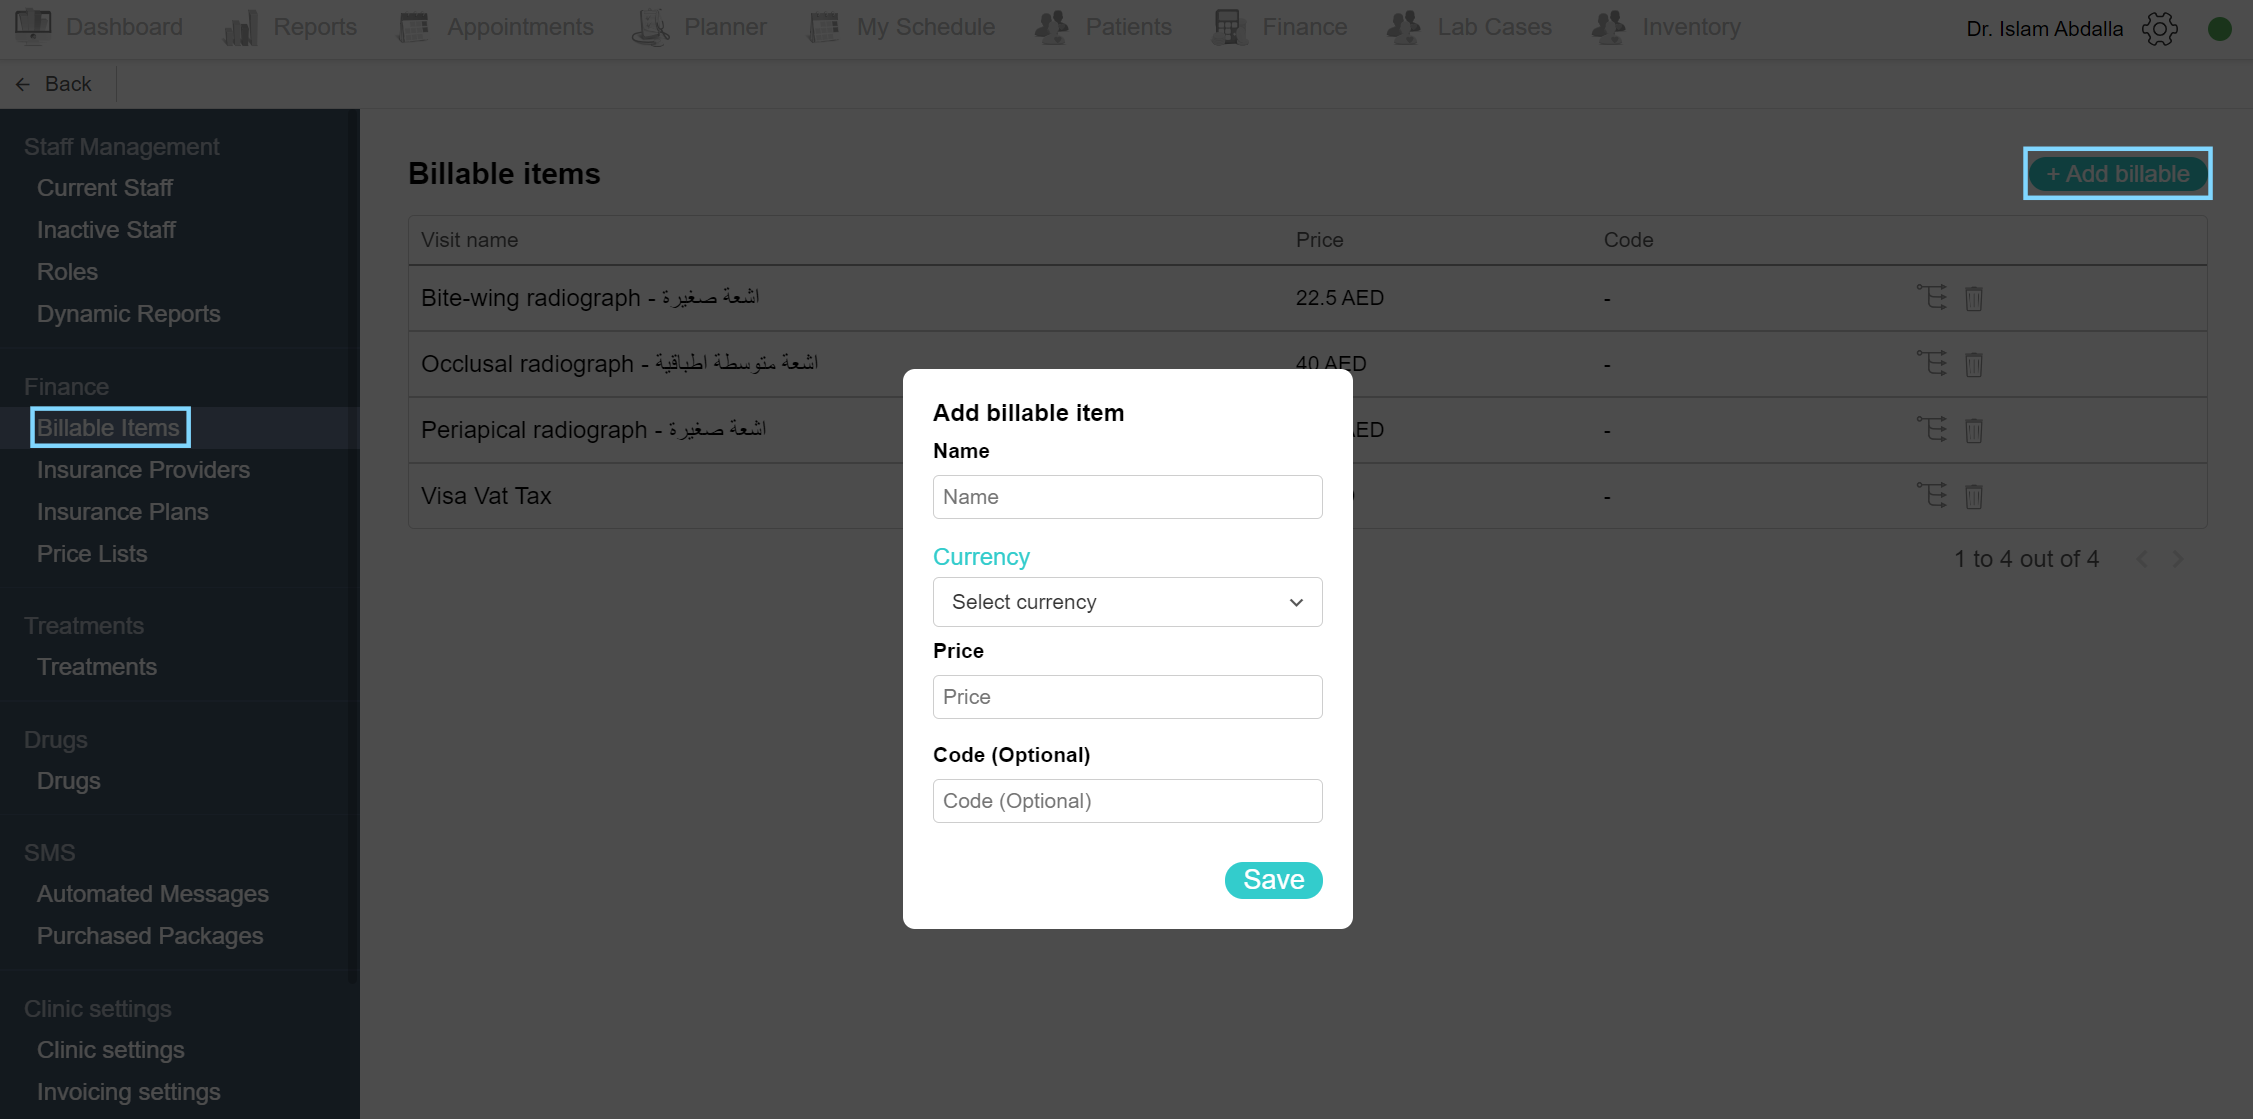
Billable items are products, services, or materials that can be charged to a patient. This can be added to the patient invoices. To add a new billable item, click on the settings icon and choose the Admin Area from the list. Under the Finance section, select Billable items. Here is a list of all the items added to the system. Click “Add billable” and a popup box appears. Name the item, add the price and click Save.
Edit billable items
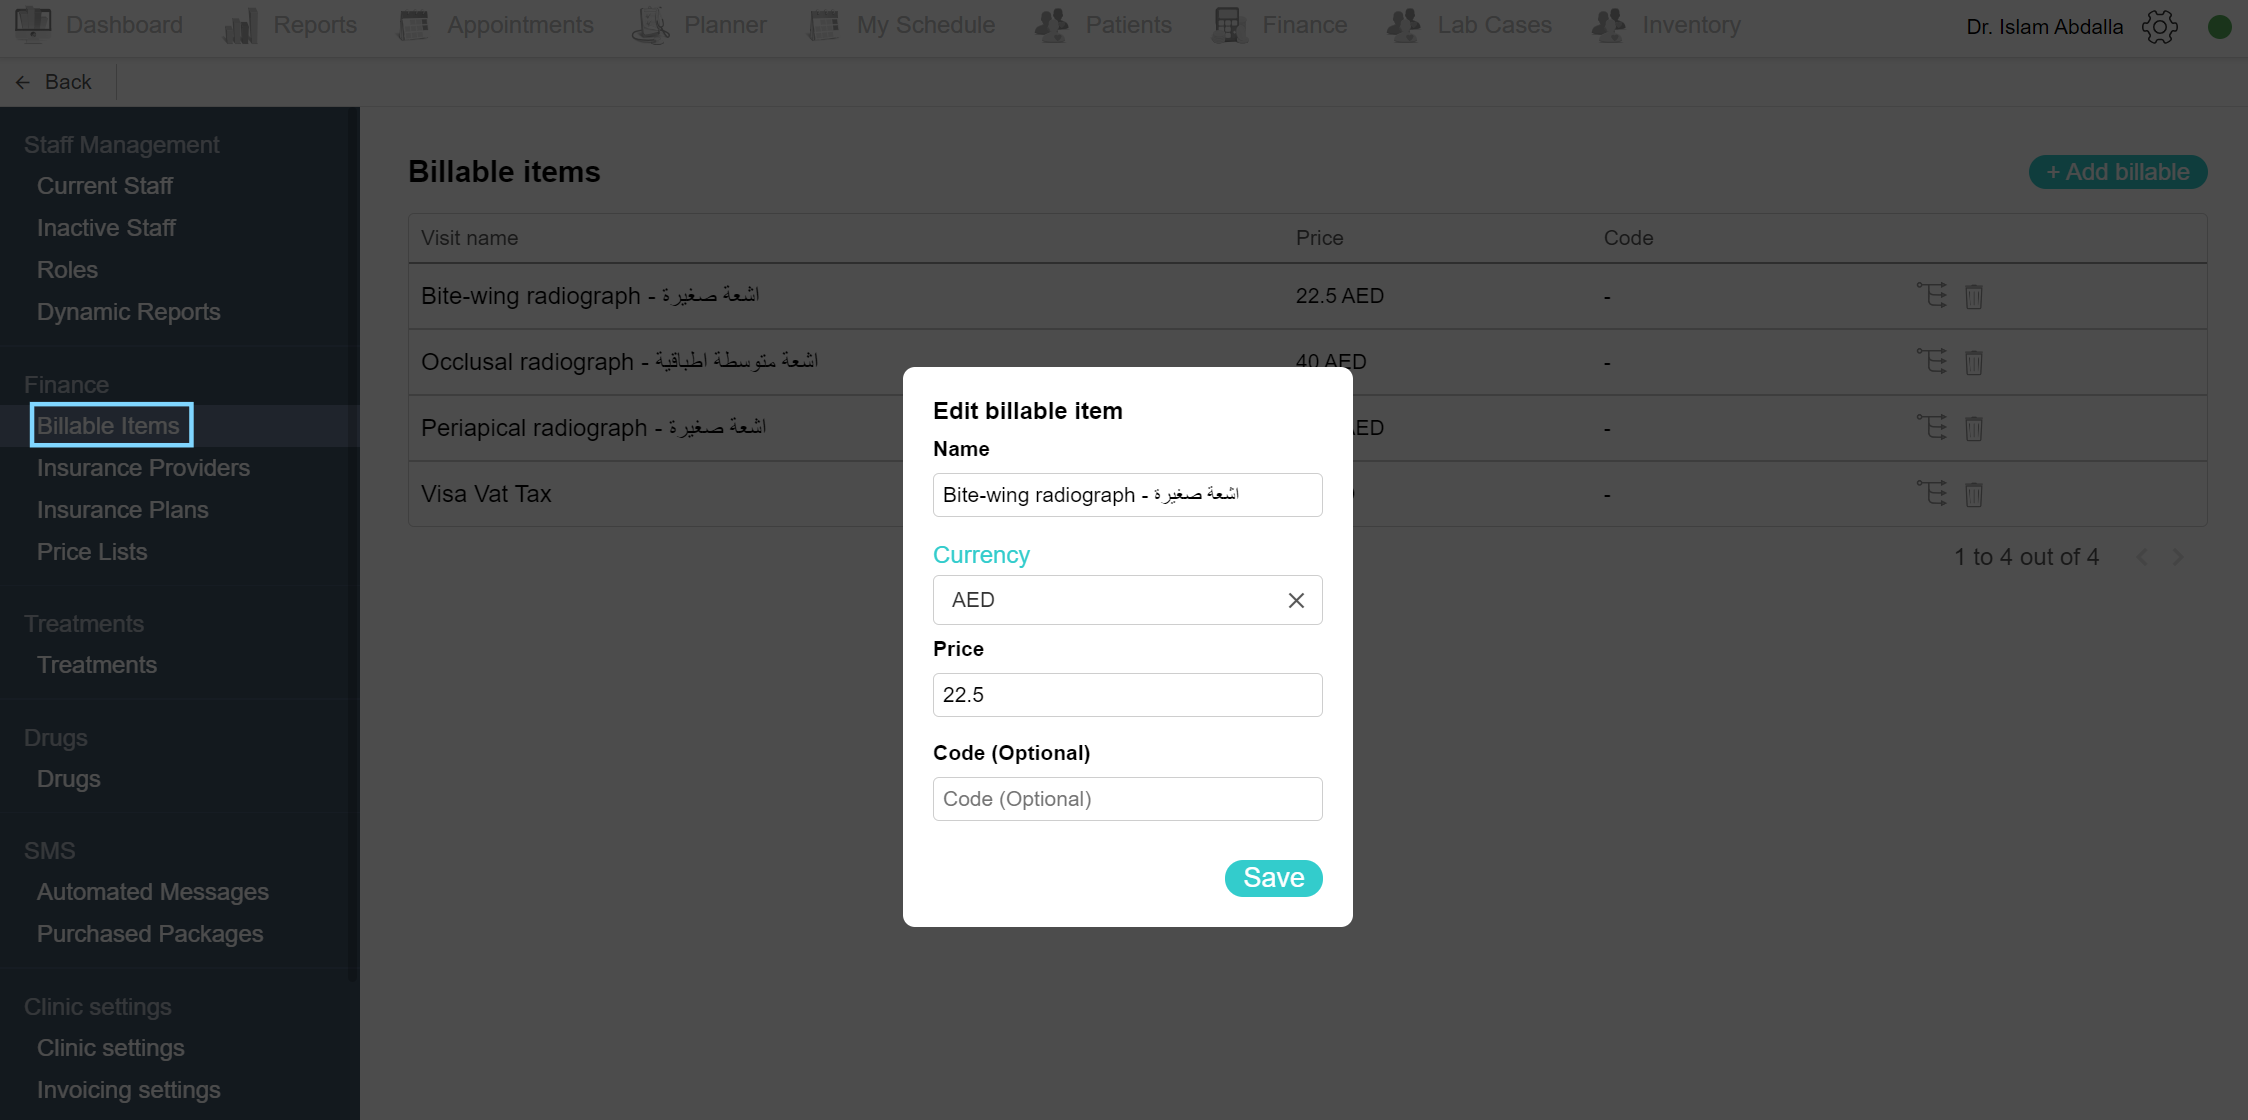
To edit the item, click on the settings icon and choose the Admin Area from the list. Under the Finance section, select Billable items. Click on the desired item, edit as needed and finally click Save.
Add insurance provider
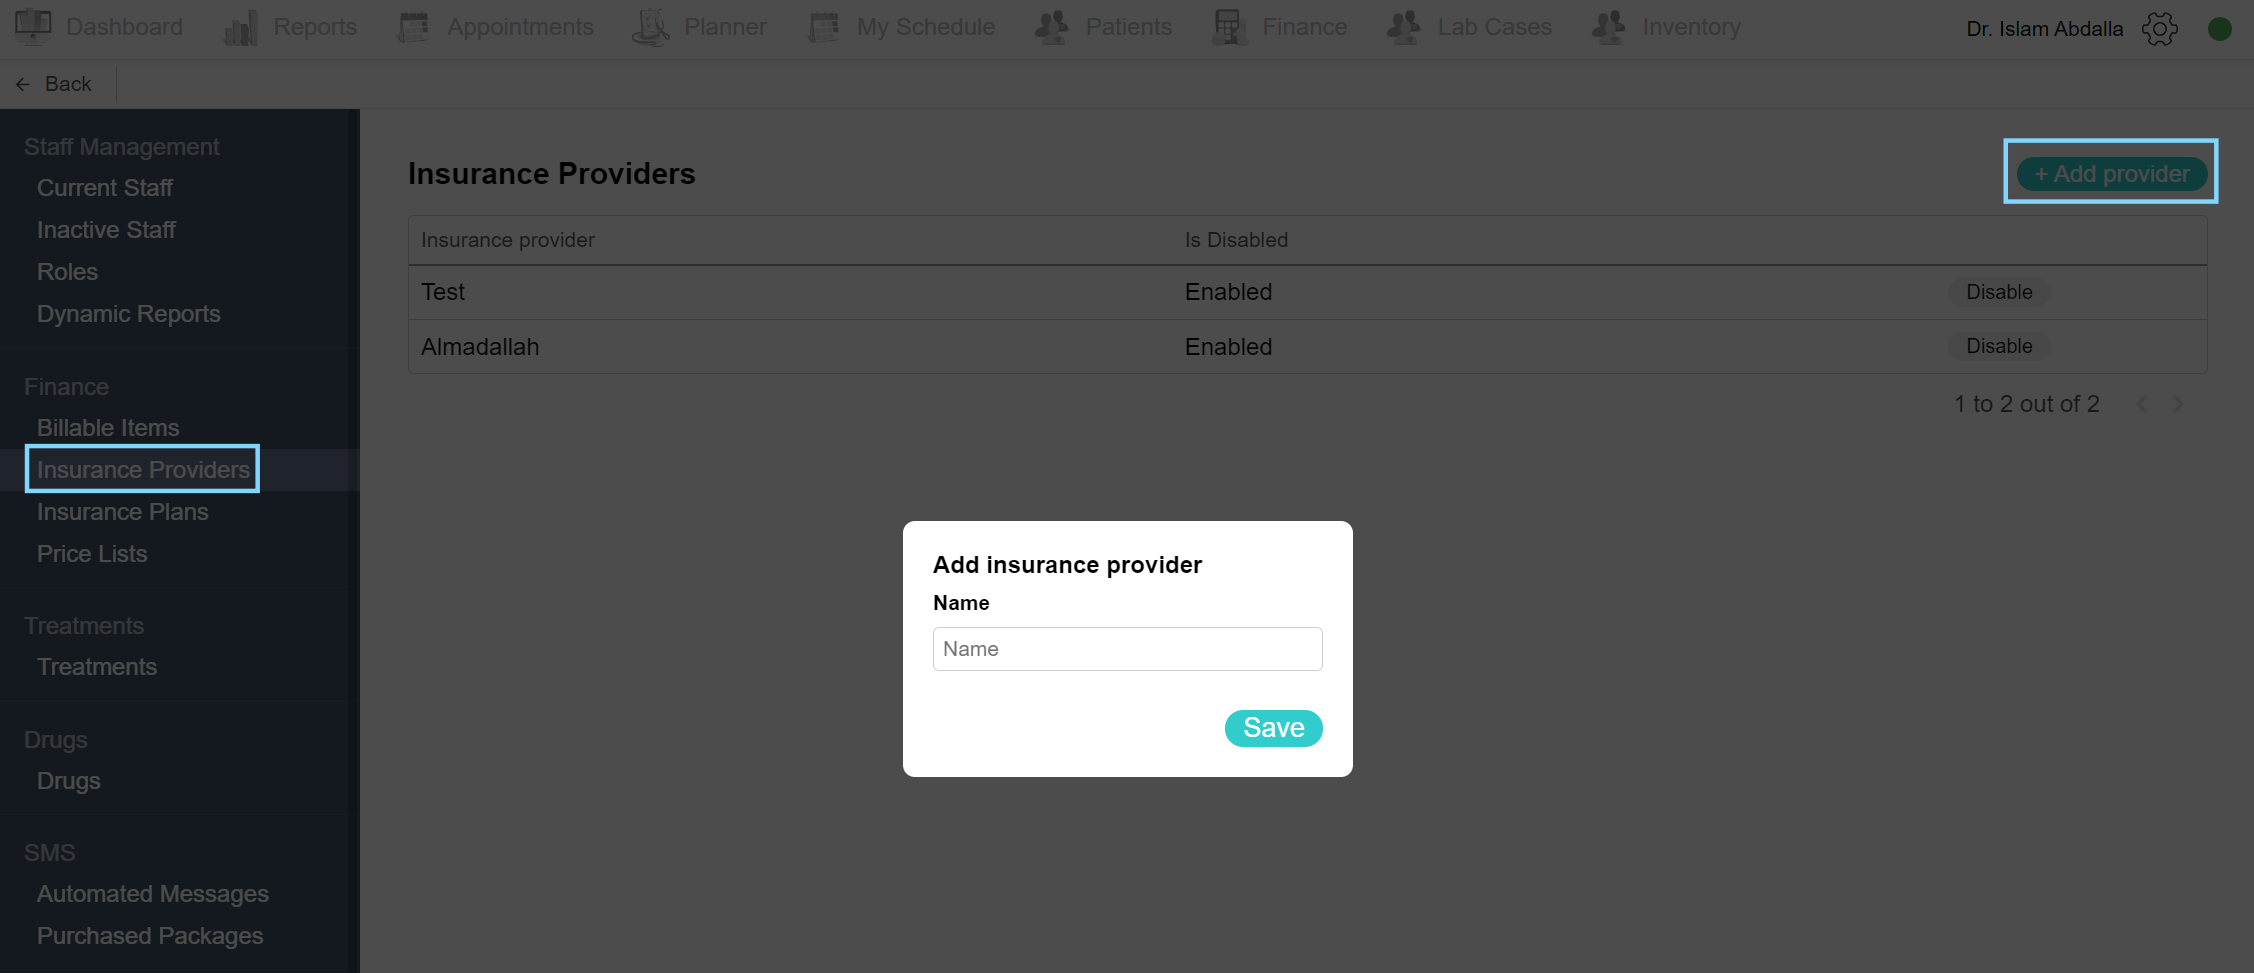
For clinics that cover insurance, you should add the insurance providers and plans into Balsam Medico. To add an insurance provider, click on the settings icon and choose the Admin Area from the list. Under the Finance section, select Insurance Provider. Here is a list of all the insurance providers added to Balsam Medico. Click “Add provider” to add a new insurance provider. Add the insurance provider’s name and click Save.
Disable insurance provider
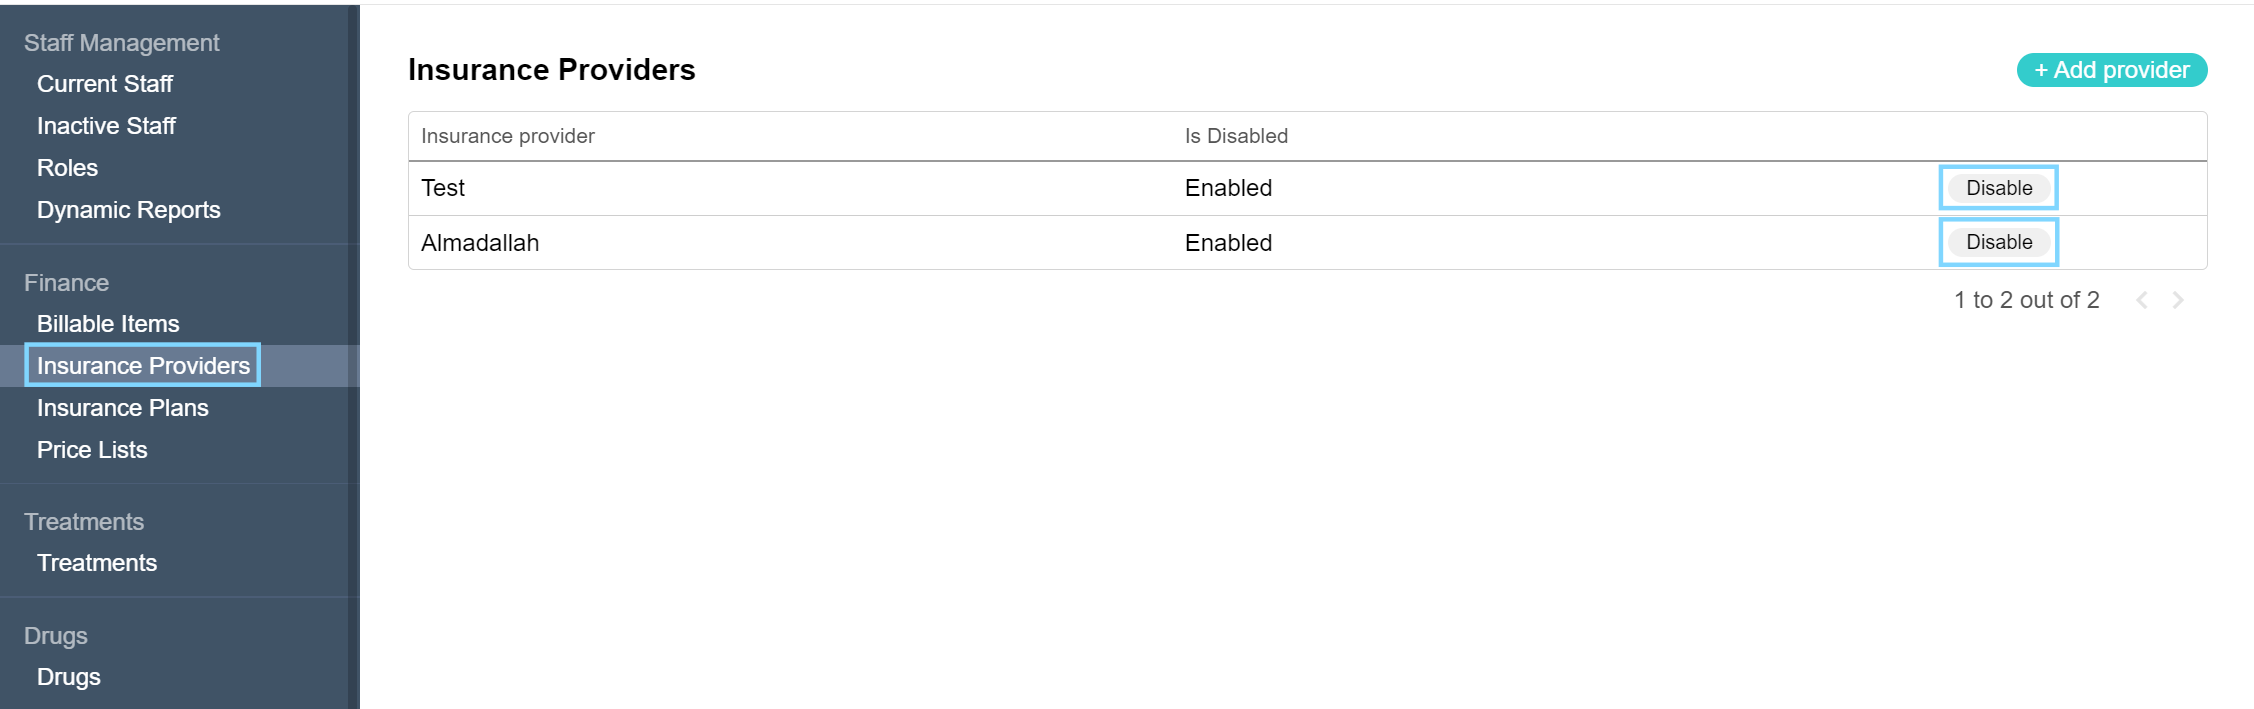
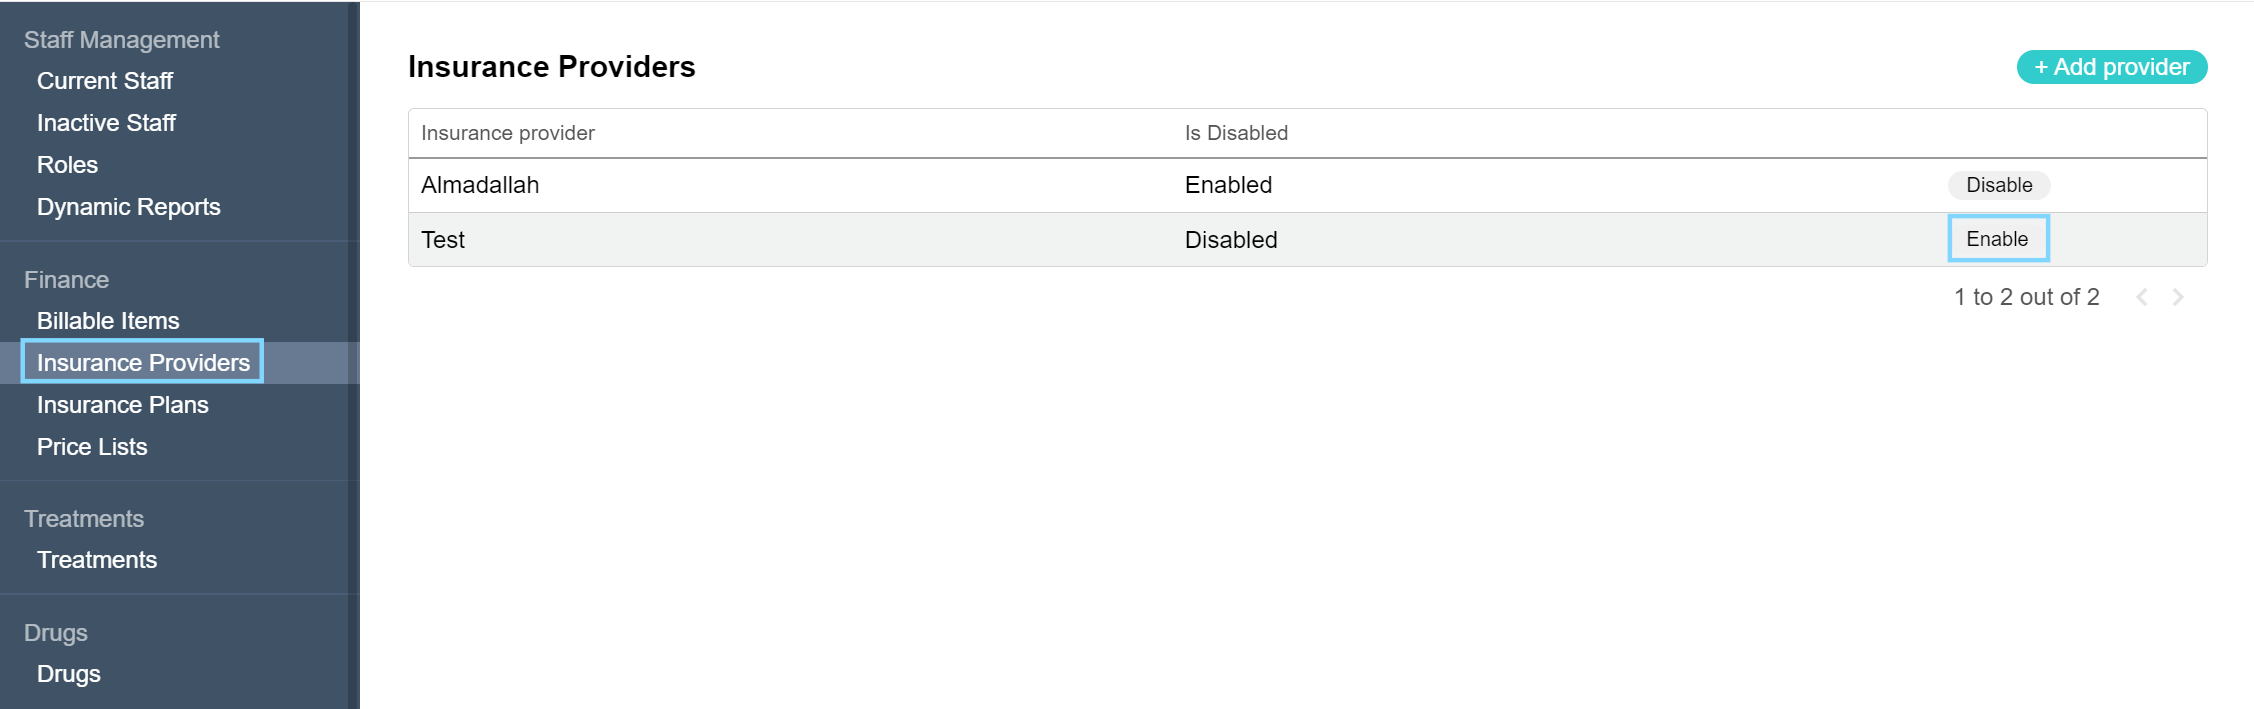
When an insurance provider is no longer covered by a clinic, you can disable the insurance provider. Click on the settings icon and choose the Admin Area from the list. Under the Finance section, select Insurance Provider. To disable a provider, select the desired and click on the Disable button. A confirmation box shows up, click the Disable button to confirm the action. Now the insurance providers’ information no longer shows anywhere in Balsam Medico.
Enable insurance provider
To enable an insurance provider, click on the settings icon and choose the Admin Area from the list. Under the Finance section, select Insurance Provider. Click on Enable in the desired insurance provider’s row and click Enable in the confirmation box.
Add insurance plans
After adding an insurance provider, you can now add the insurance provider’s plans. To add a new plan, click on the settings icon and choose the Admin Area from the list. Under the Finance section, select Insurance Plans. Click on the “Add insurance plan” button. Add the new plan name and select the insurance company from the drop-down list. Click the Create new plan button and now the plan is added to the list of insurance plans. Click on the new plan and edit as needed.
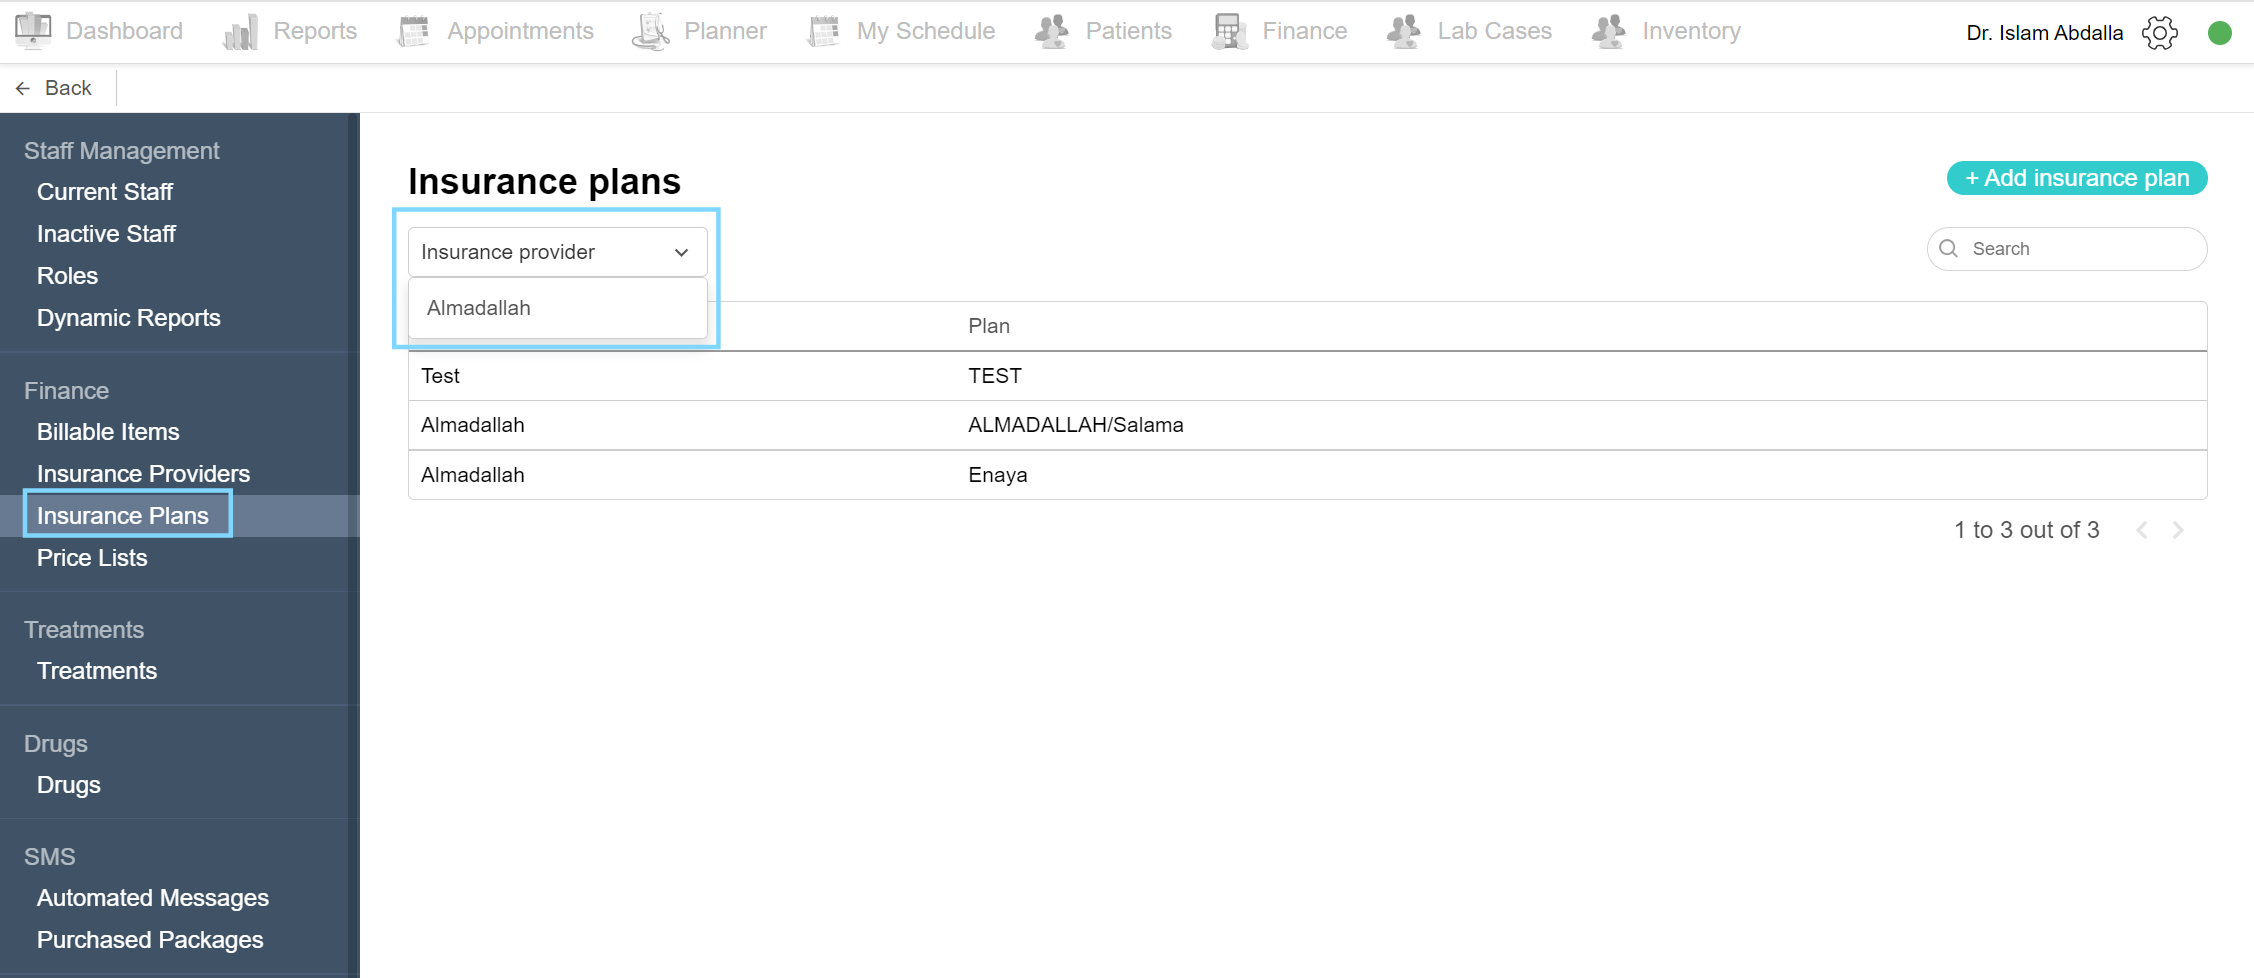
Filter by insurance provider
To view all plans under a specific insurance company, navigate to the Insurance Plans page in the Admin Area and a drop-down list of insurance providers is found above the plans. Choose the provider from the list and the insurance plans are filtered.
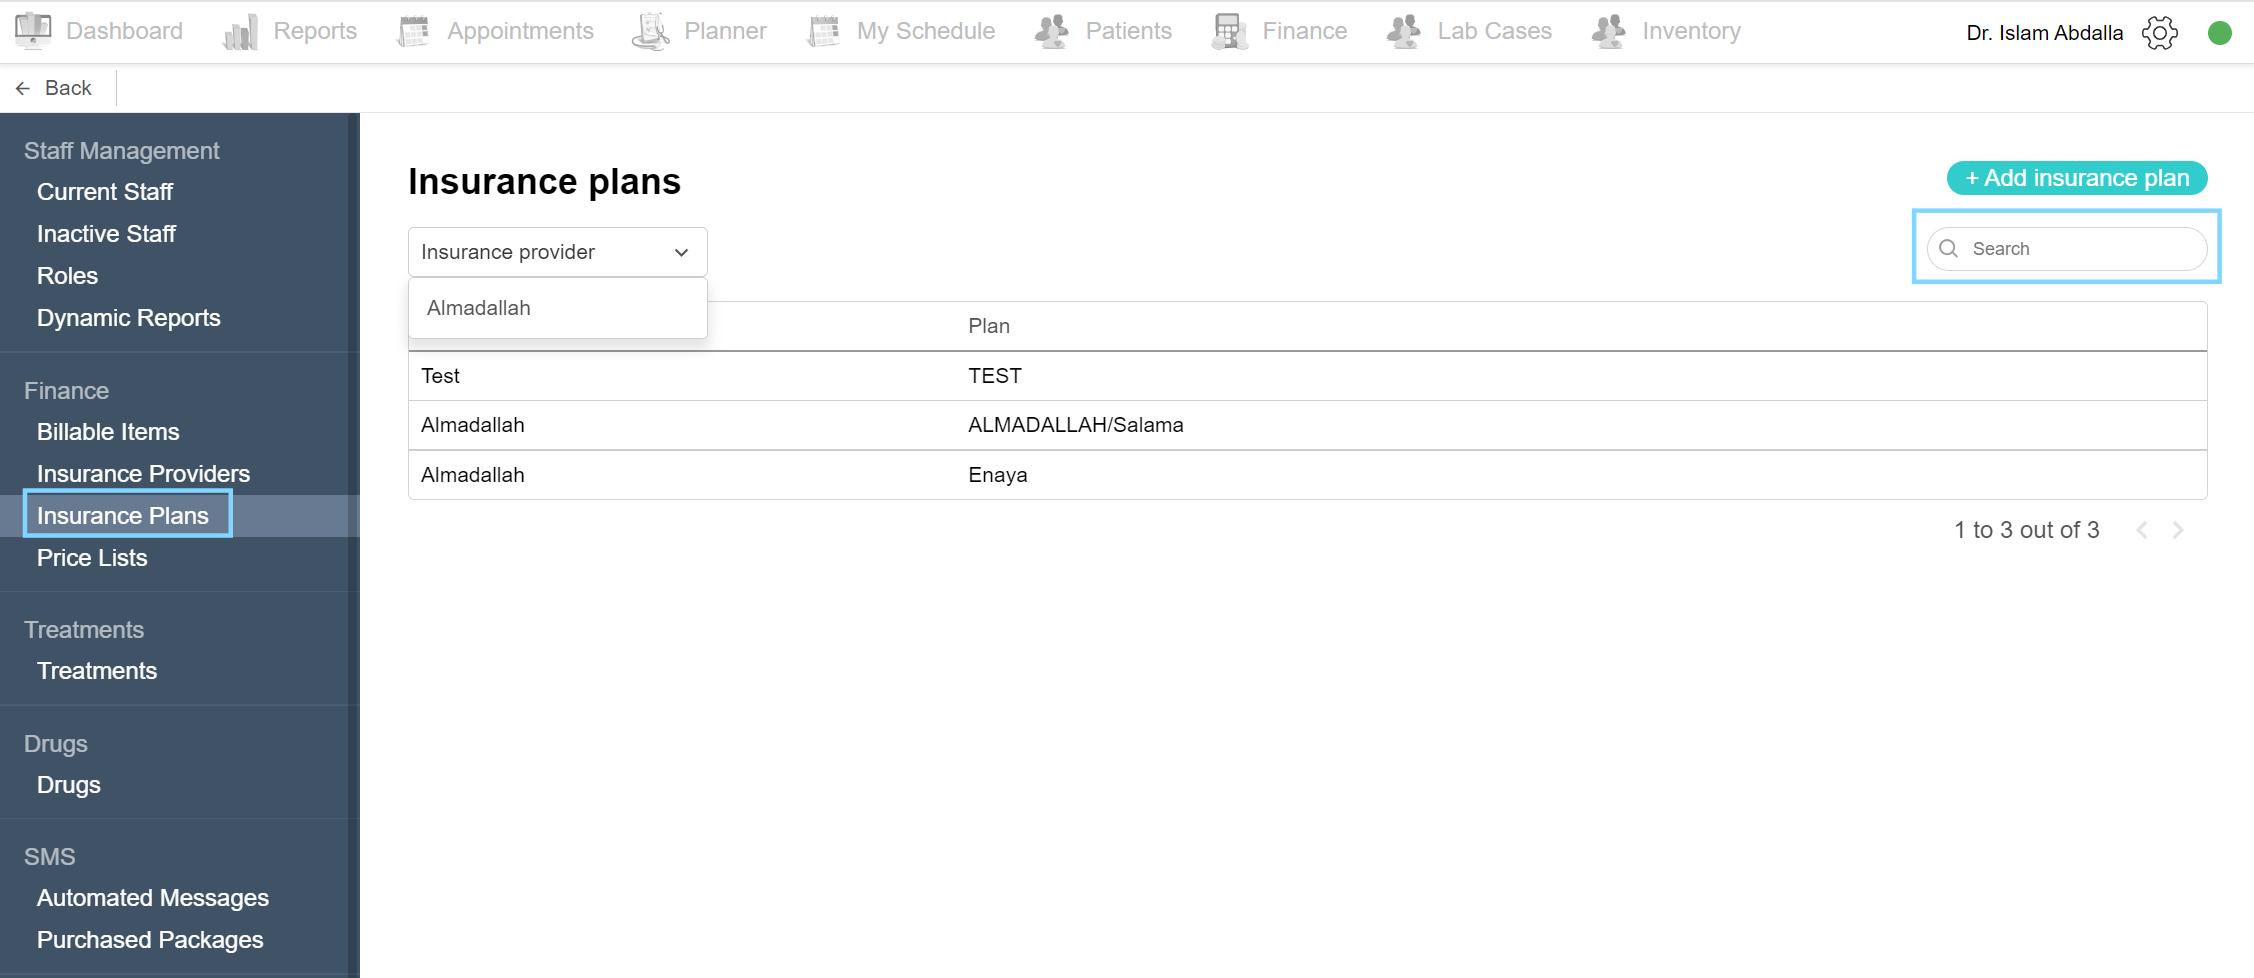
Search for insurance plans
To search for a specific insurance plan, navigate to the Insurance Plans page in the Admin Area. A search field is found above the insurance list. Type the name of the desired plan and it will appear in the list view.
View insurance plans
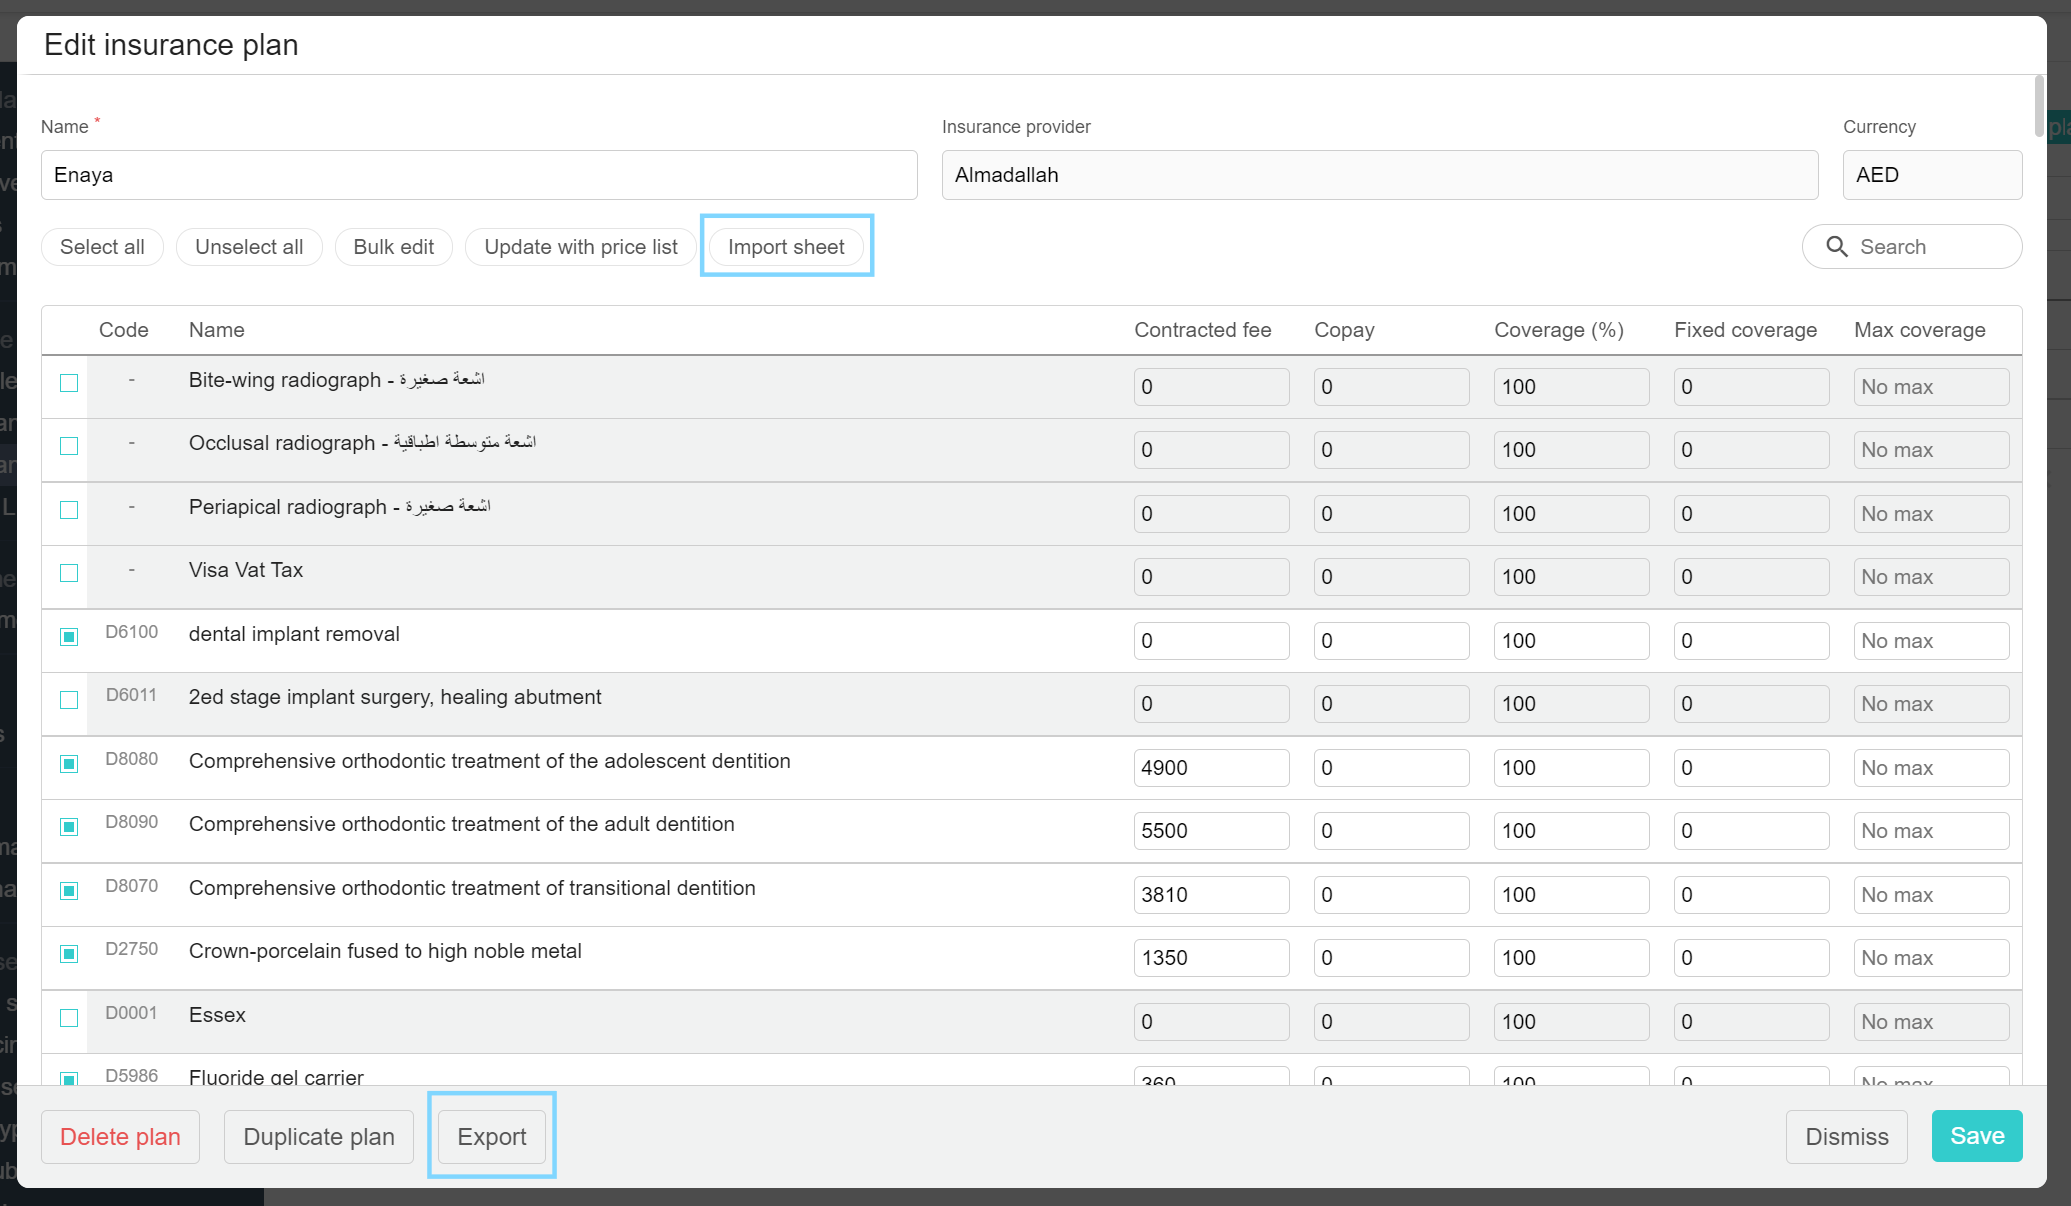
Click on the settings icon and choose the Admin Area from the list. Under the Finance section, select Insurance Plans. Click on the plan to view its details. In the insurance plan view, you can find the plan name and provider’s name at the top. Under that, you can find the options as follows:
-Select all: this is to select all the items in the plan
-Unselect all: this is to unselect all the items in the plan
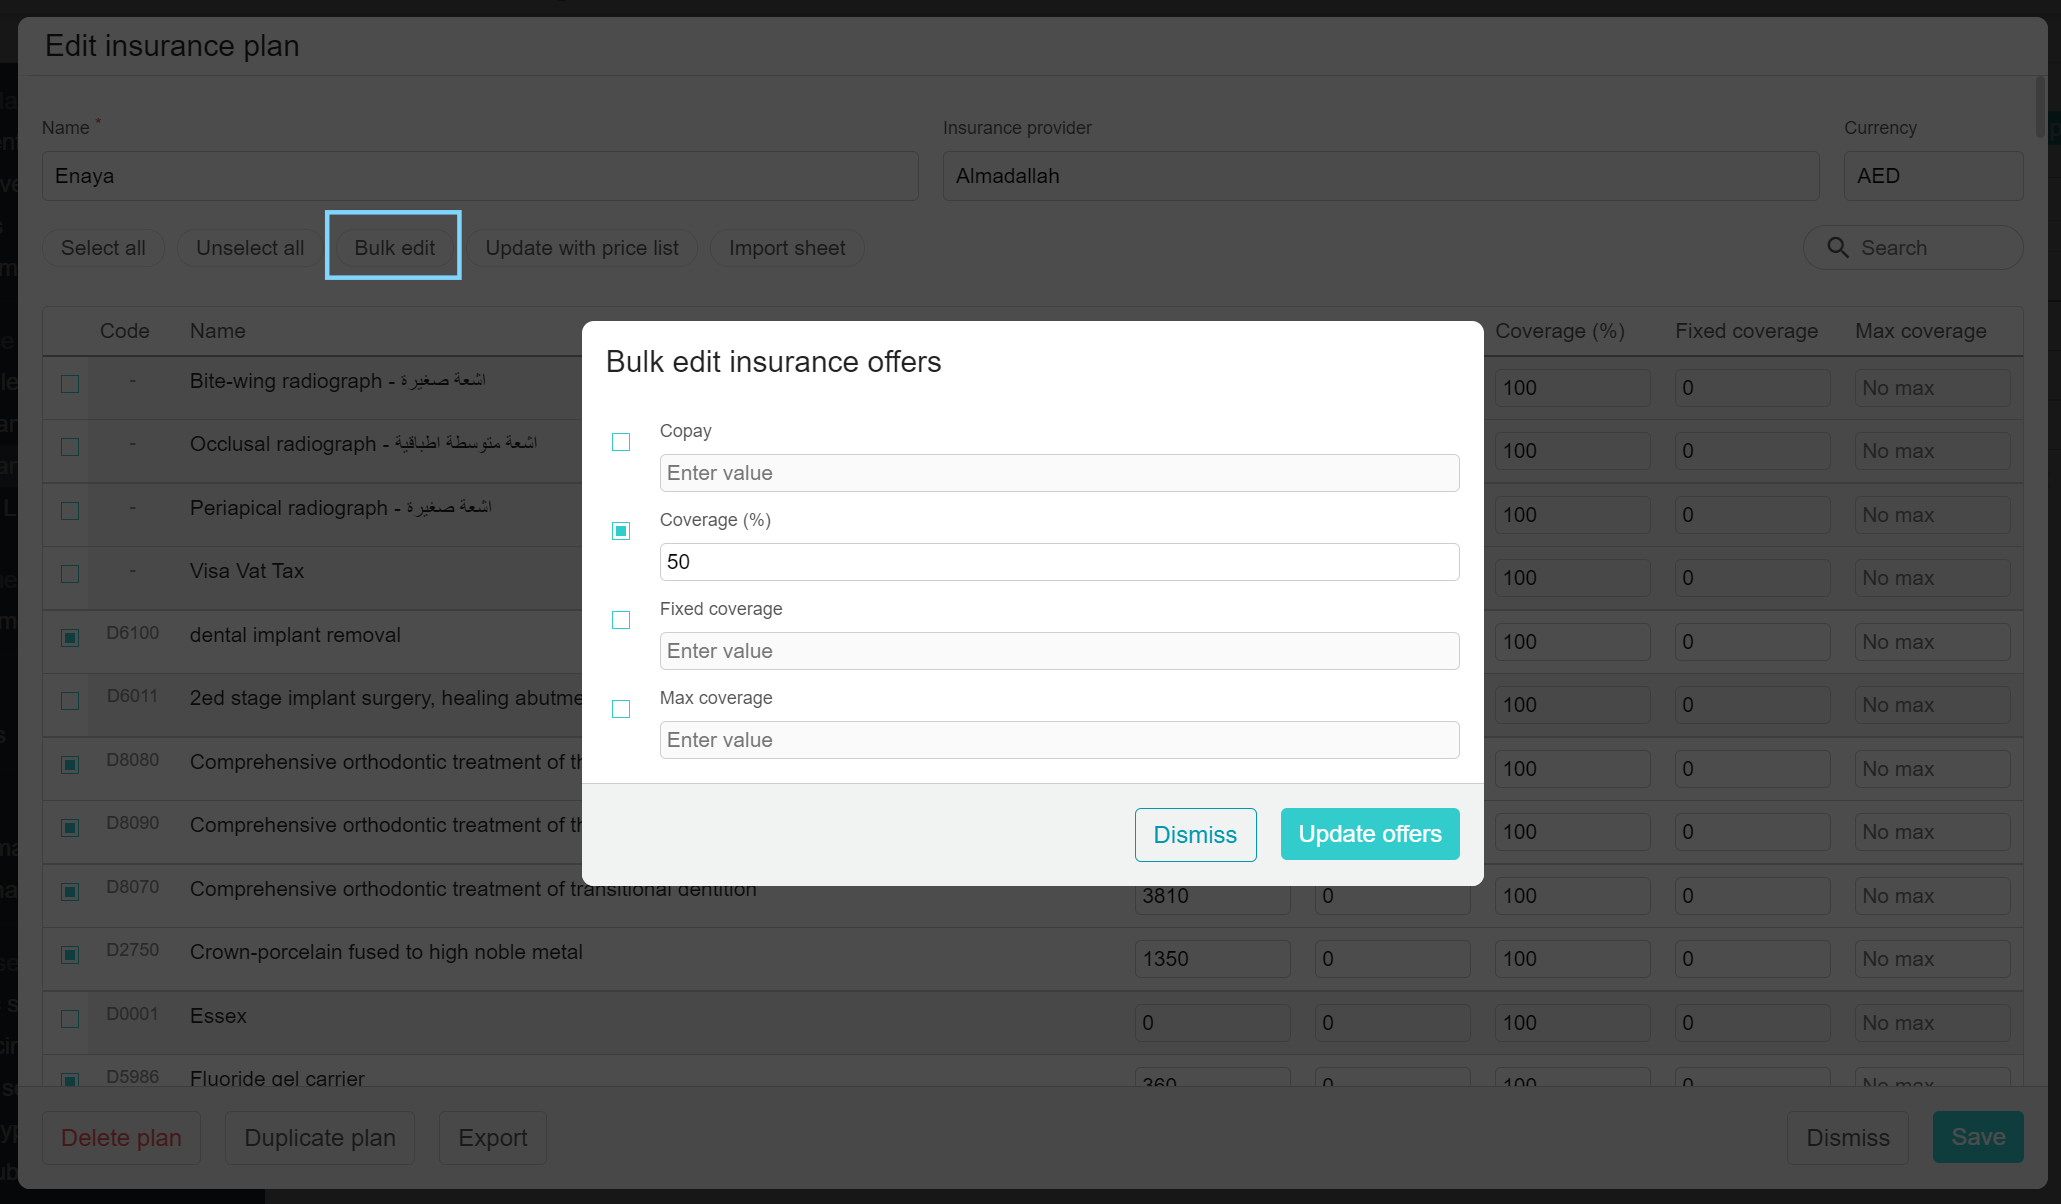
-Bulk edit: through here you can edit an entire column in the plan for example: click the Coverage (%) option and change the value to 100% to have the entire plan have 100% Coverage.
-Update with price list
-Import sheet
-Search: to search for a specific treatment or service name and/or code to view and edit the columns corresponding to it.
After those options, you can check the treatment and services list, and the columns corresponding to it. Lastly, there are the Delete plan, Duplicate plan and Export buttons.

Edit insurance plan
Click on the settings icon and choose the Admin Area from the list. Under the Finance section, select Insurance Plans. Click on the plan to view its details. In the insurance plan view, you can edit the details.
Bulk edit:
Click on the bulk edit button above the items list and a Bulk edit insurance offers popup box appears. Here you can edit an entire column of the items list instead of manually editing them one by one. Click on the box next to the title name. Enter the new value and click on Update offers. Now all the items have the same new value in the corresponding column. For example: If the plan coverage is 100% and you wish to change it. You can click on the Coverage (%) box, type 50% and click Update offers. Now all the items will have the new coverage of 50%.
Import and Export sheet:
To simplify the editing of the plan, we included the import and export sheet option. You can export the plan into a spreadsheet and edit it as preferred. To import the new sheet into Medico, open the plan and click on Import sheet. Next, upload the sheet and correspond the column index to the column title, for example in the spreadsheet, the code title is the second column in order, then in the column index drop-down list for Code, choose 2. Continue for the rest and click the Verify sheet. Finally to confirm, click the Import plan offers button and the plan is updated.
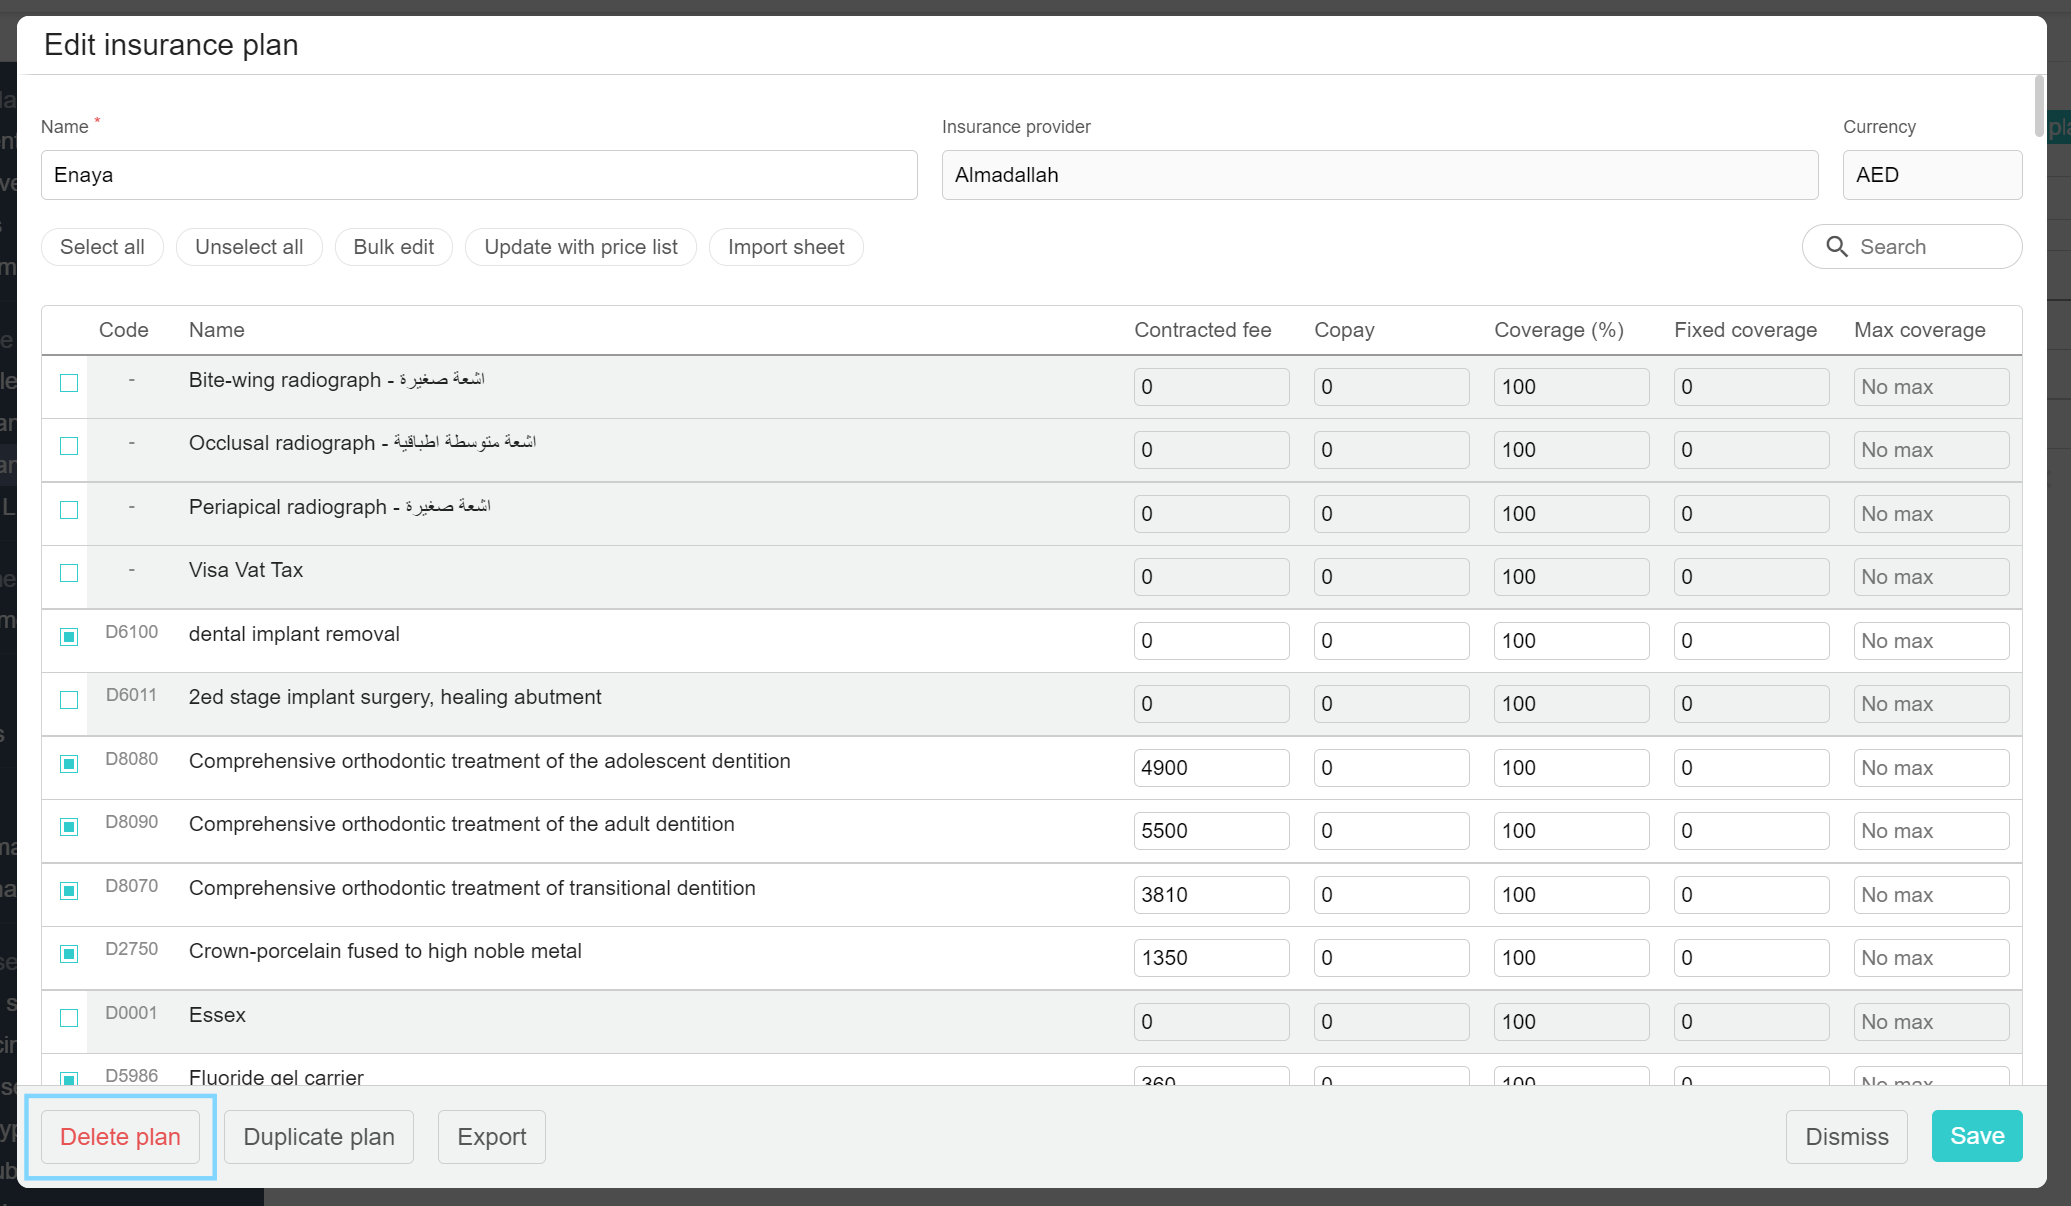
Delete plan:
When a plan is no longer in need, you can delete the plan. To do so, you can click on the insurance plan and click the Delete plan button found at the bottom of the page. A confirmation box appears and click on Yes, delete this plan to confirm the action.
Duplicate plan:
When a new plan is added under the same provider and it has the same prices as a previously added plan, you can just duplicate the previously added plan and change the name and then edit as needed. To duplicate a plan, click on the insurance plan view and click on Duplicate plan. In the popup box, name the new plan, edit the other columns as needed and finally click Create a new plan. Once done you will find the new plan in the plans list. Click on it, make any further edits you need and click Save.
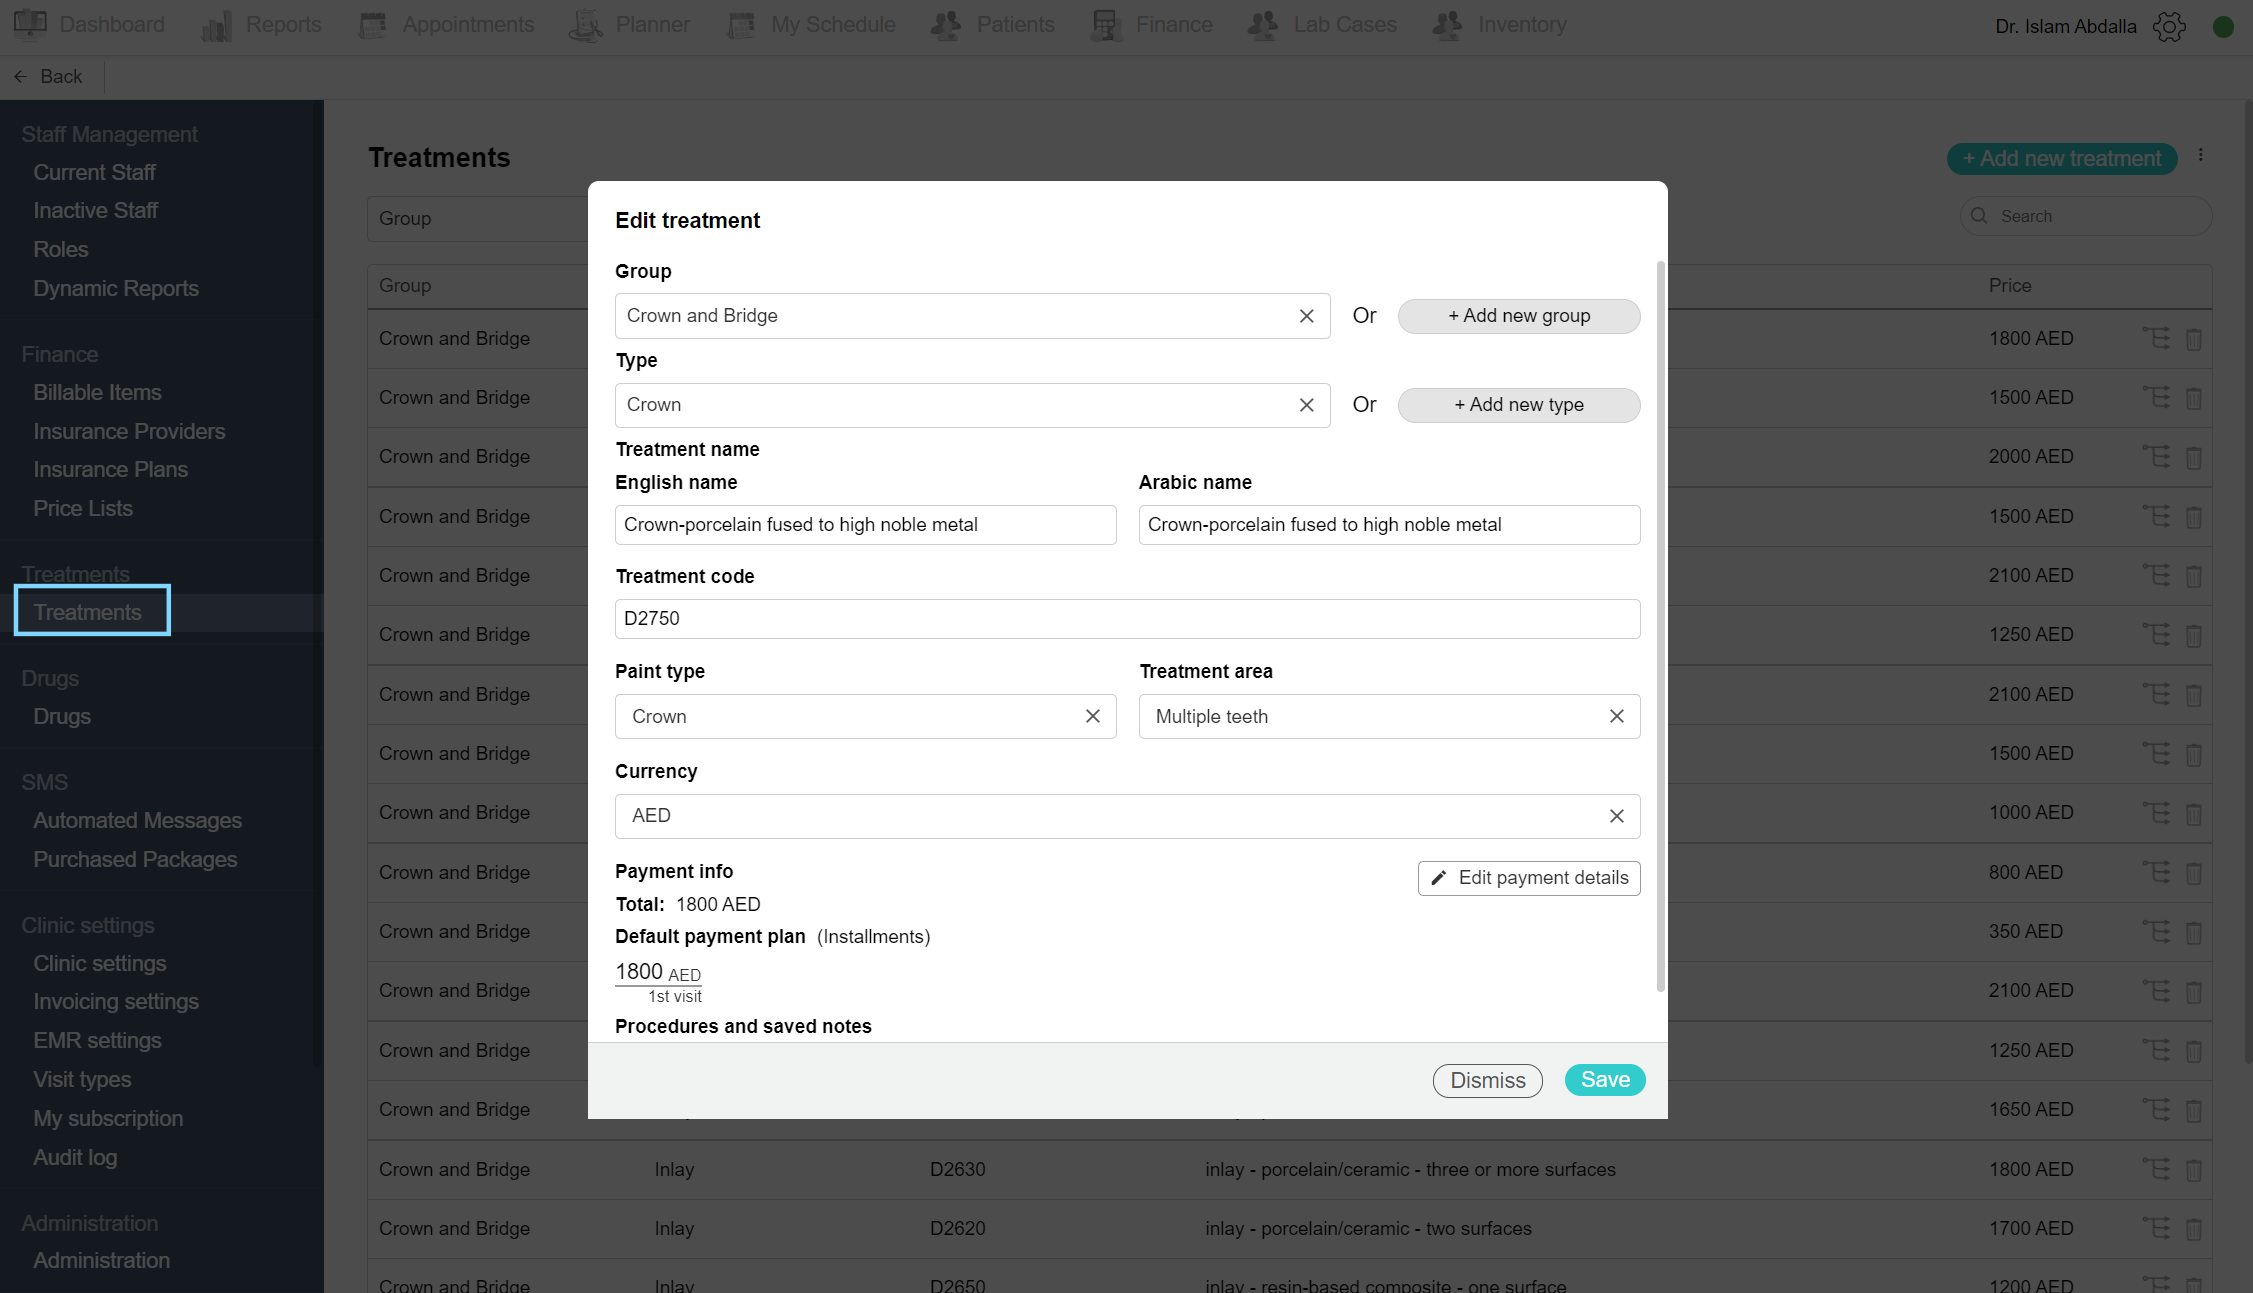
Add treatment
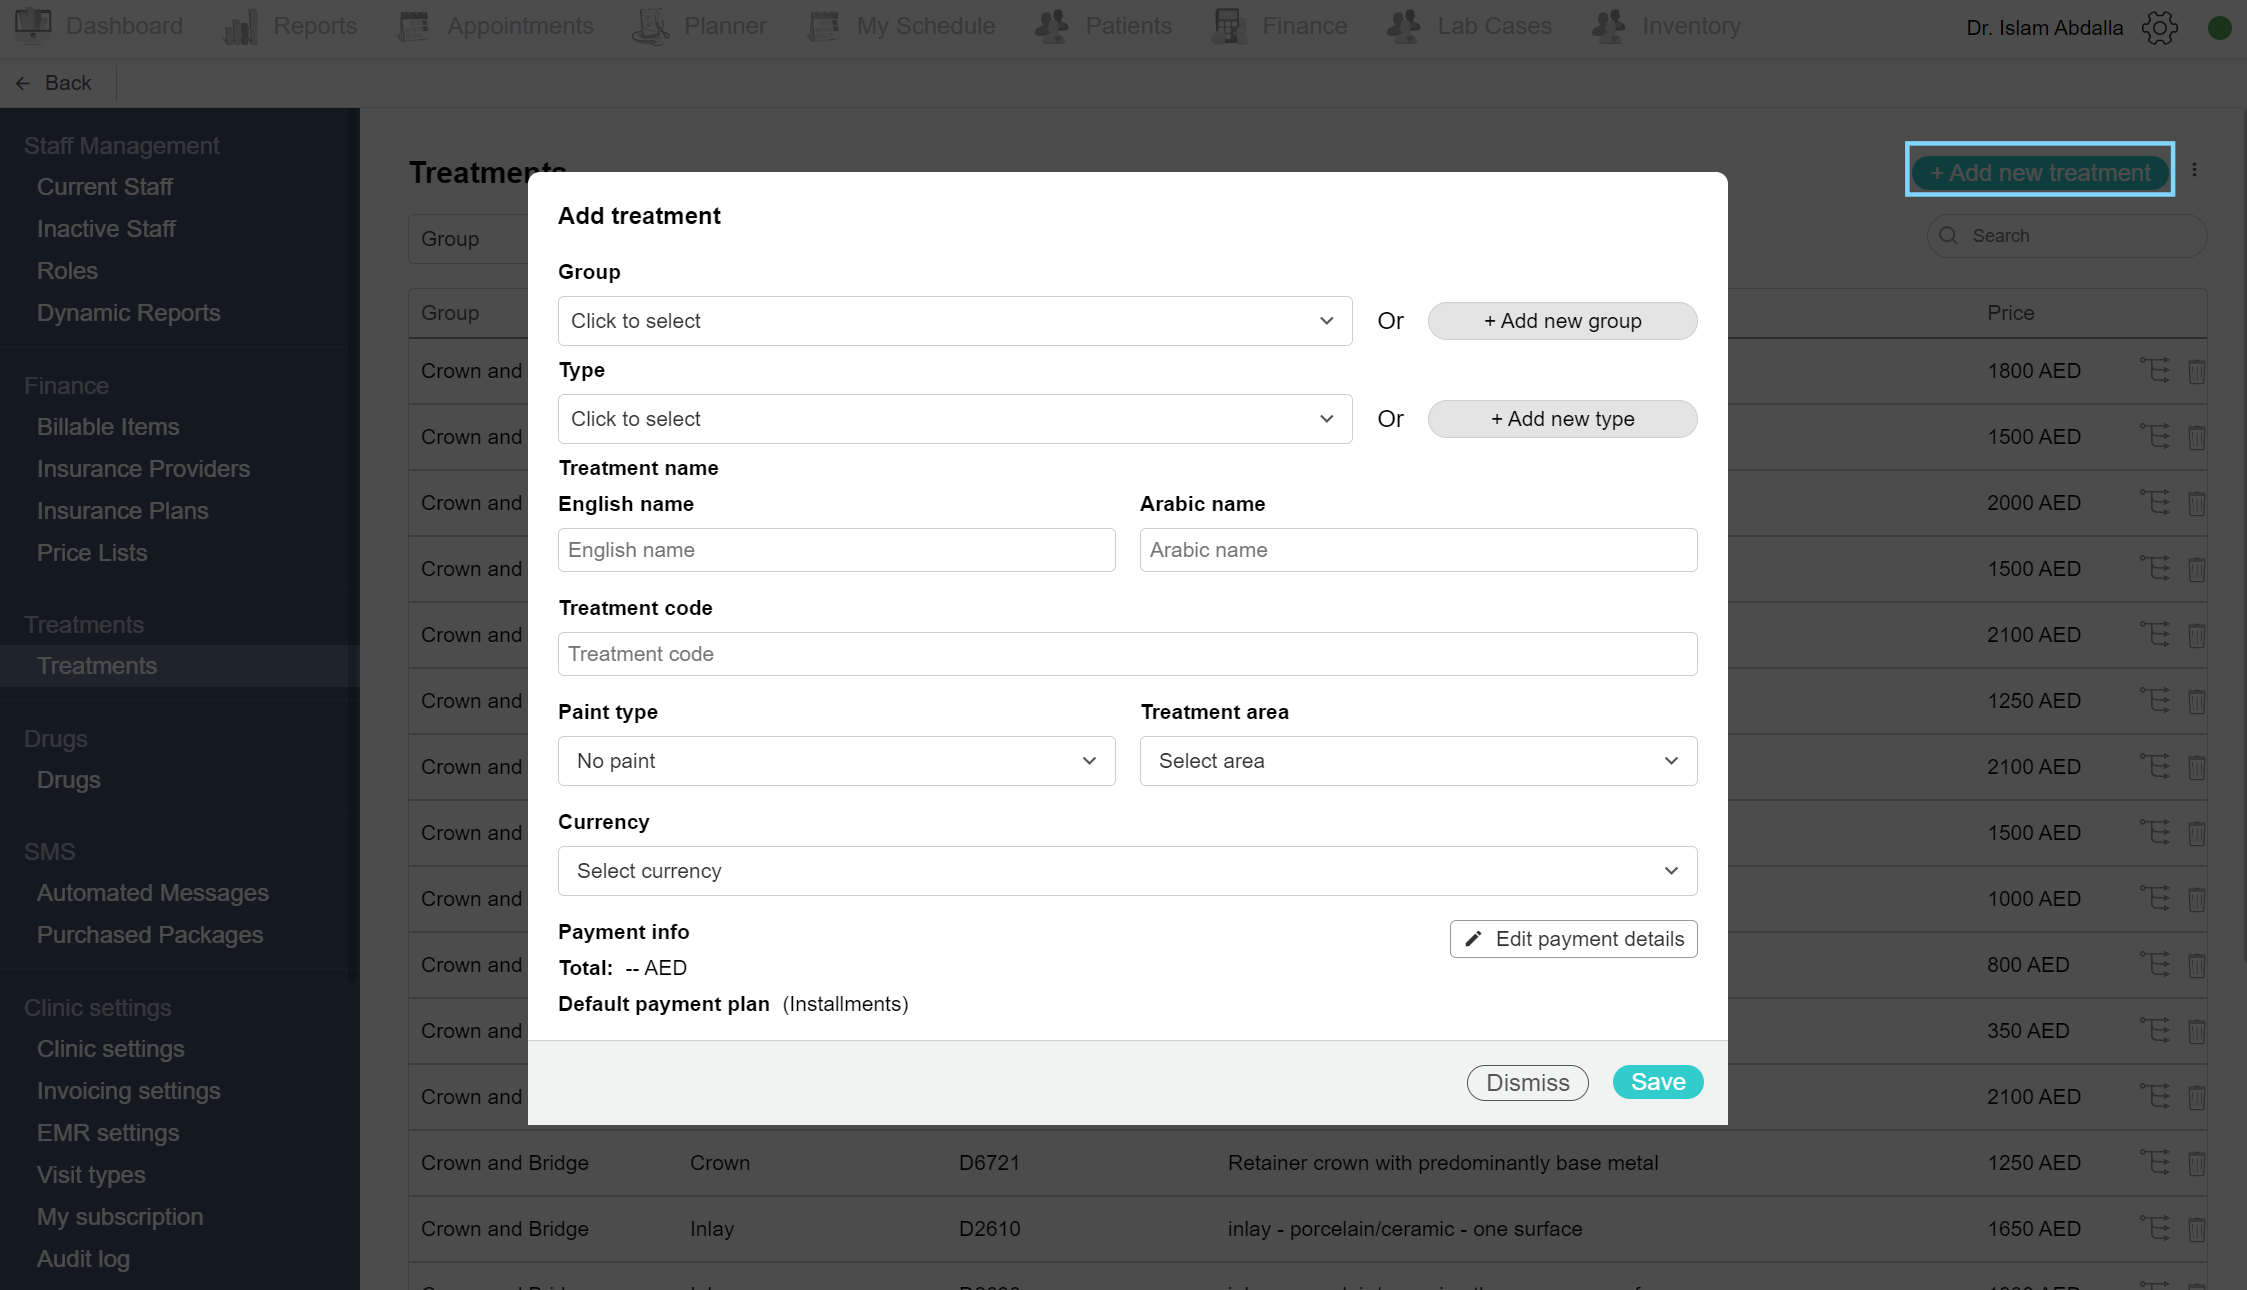
To add a new treatment, click on the settings icon and choose the Admin Area from the list. Under the Finance section, select Treatments. On the top of the page, click on ‘Add new treatment’. In the add treatment box, add the necessary data such as;
-Group: We have categorized the treatments in Medico into different groups to make it easier to search them.
-Type: Each group is further divided into types.
-Treatment name: Add the treatment name in English and Arabic.
-Treatment code: In Balsam Medico, we use the CPT/CDT codes for the treatments.
-Paint type: Choose from the drop-down list the paint that appears on the dental chart, if you choose extraction, an ‘X’ will appear in the dental chart when the treatment is added.
-Treatment area: This is the area of operation for the treatment, such as Single tooth, Multiple teeth, and Mouth.
-Payment details: Finally you can click on ‘Edit payment details’ to add the treatment cost.
The last thing is to click Save and the treatment is now added to Balsam Medico.
Bulk update templates
To add multiple treatments to Balsam Medico, you can use the ‘Bulk update template’ option. Navigate to the treatments page in the Admin Area. Click the three-dots option to click on Bulk update templates. Export the treatment templates into a spreadsheet, and update the data in the sheet. Finally, import the sheet by uploading it and click Bulk update treatments to complete the process.
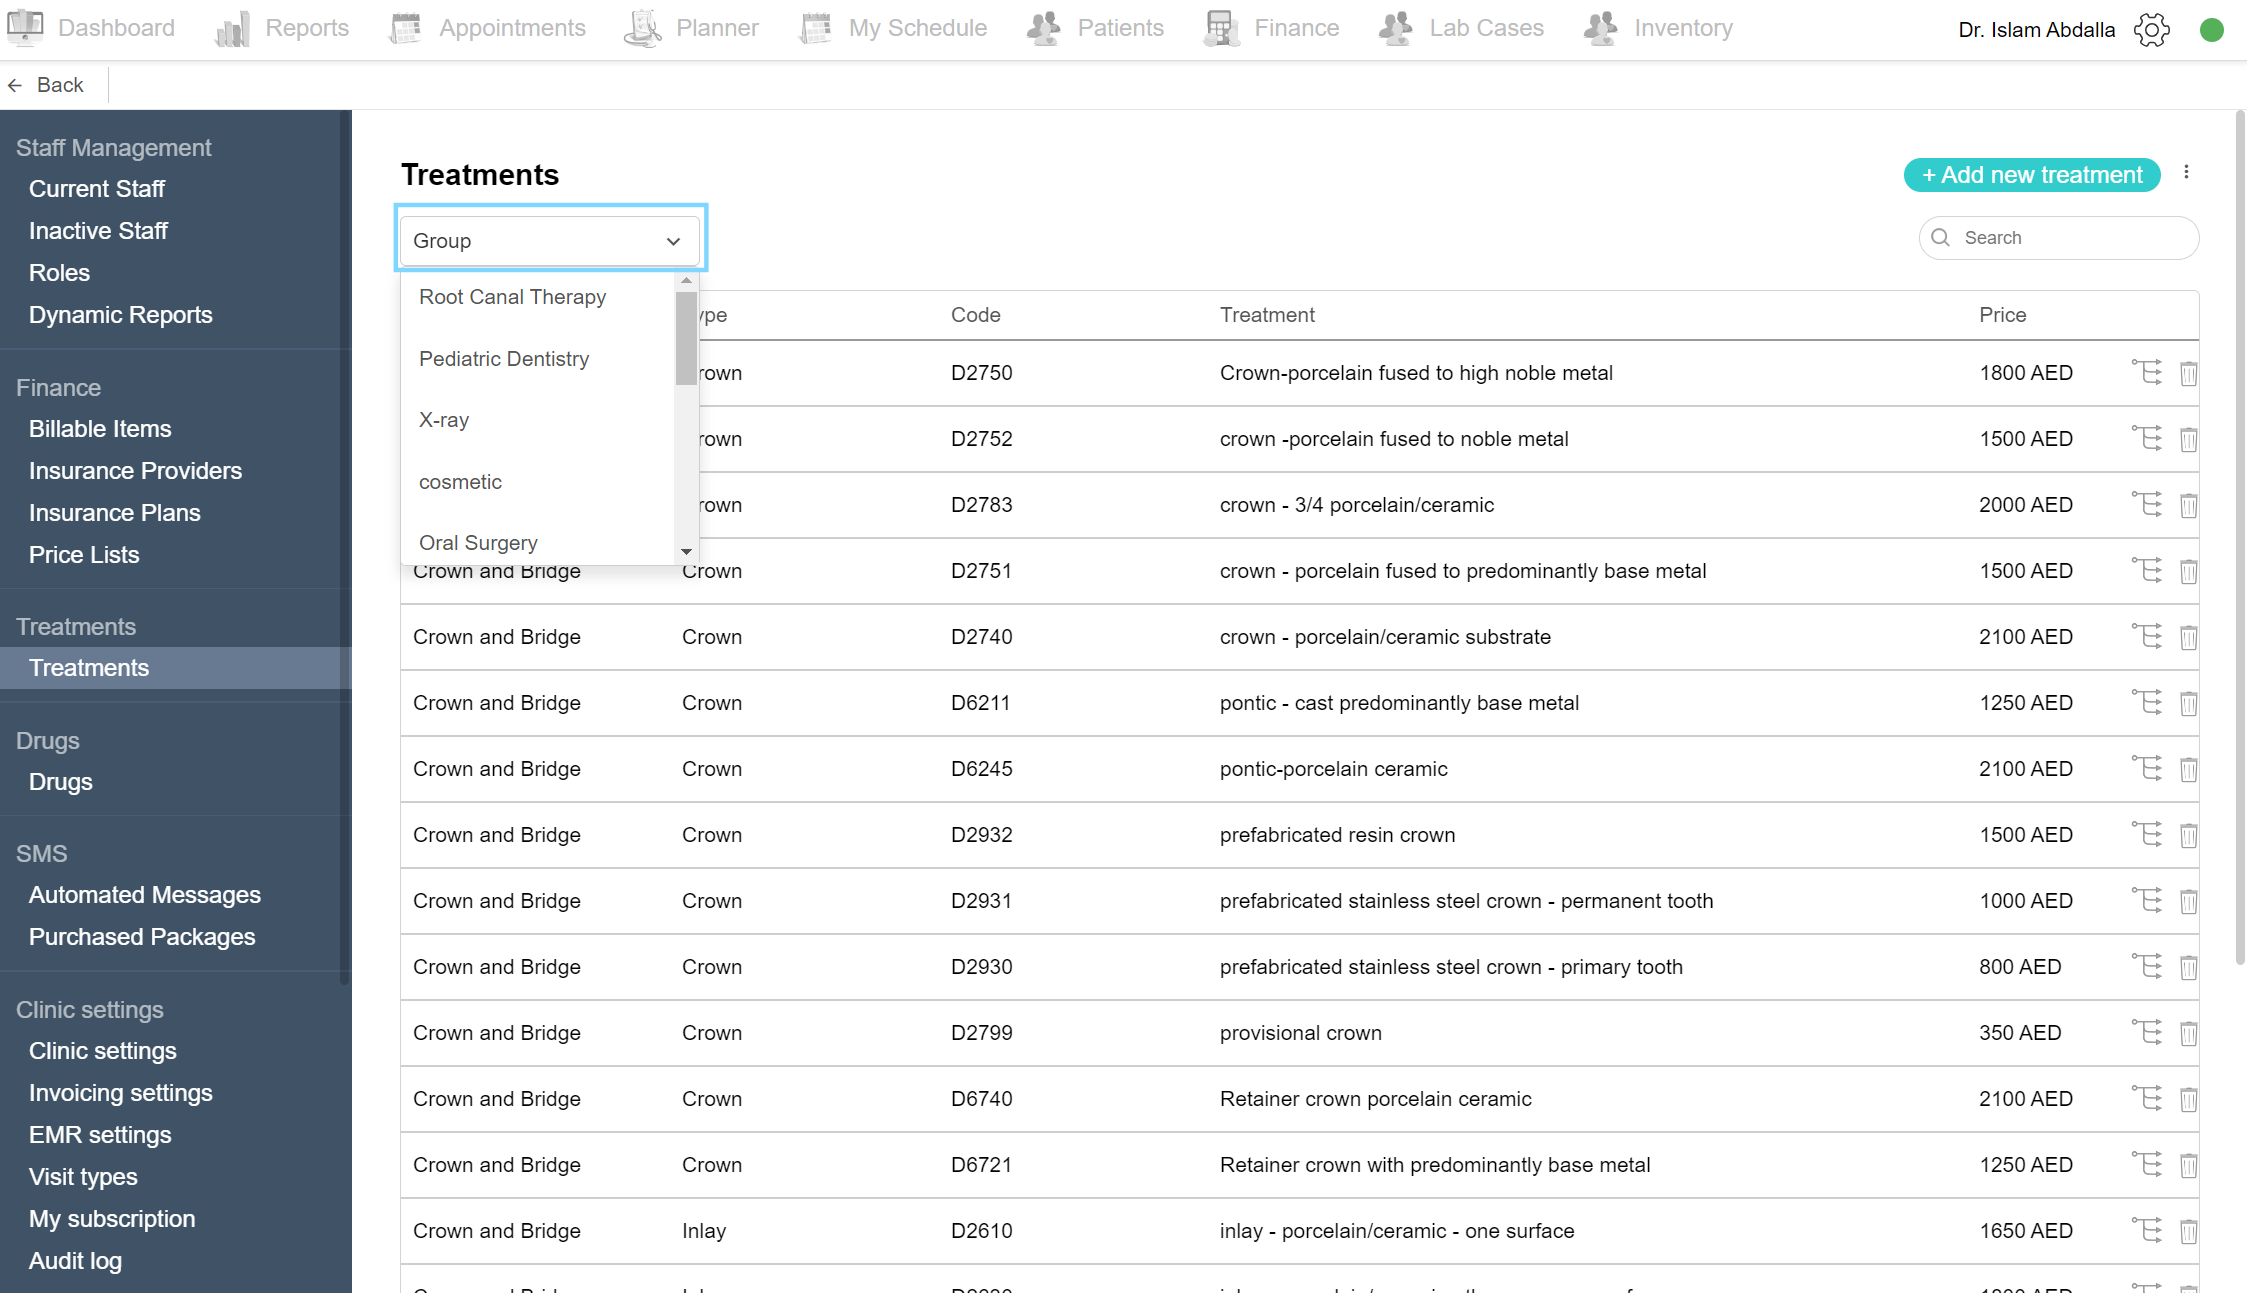
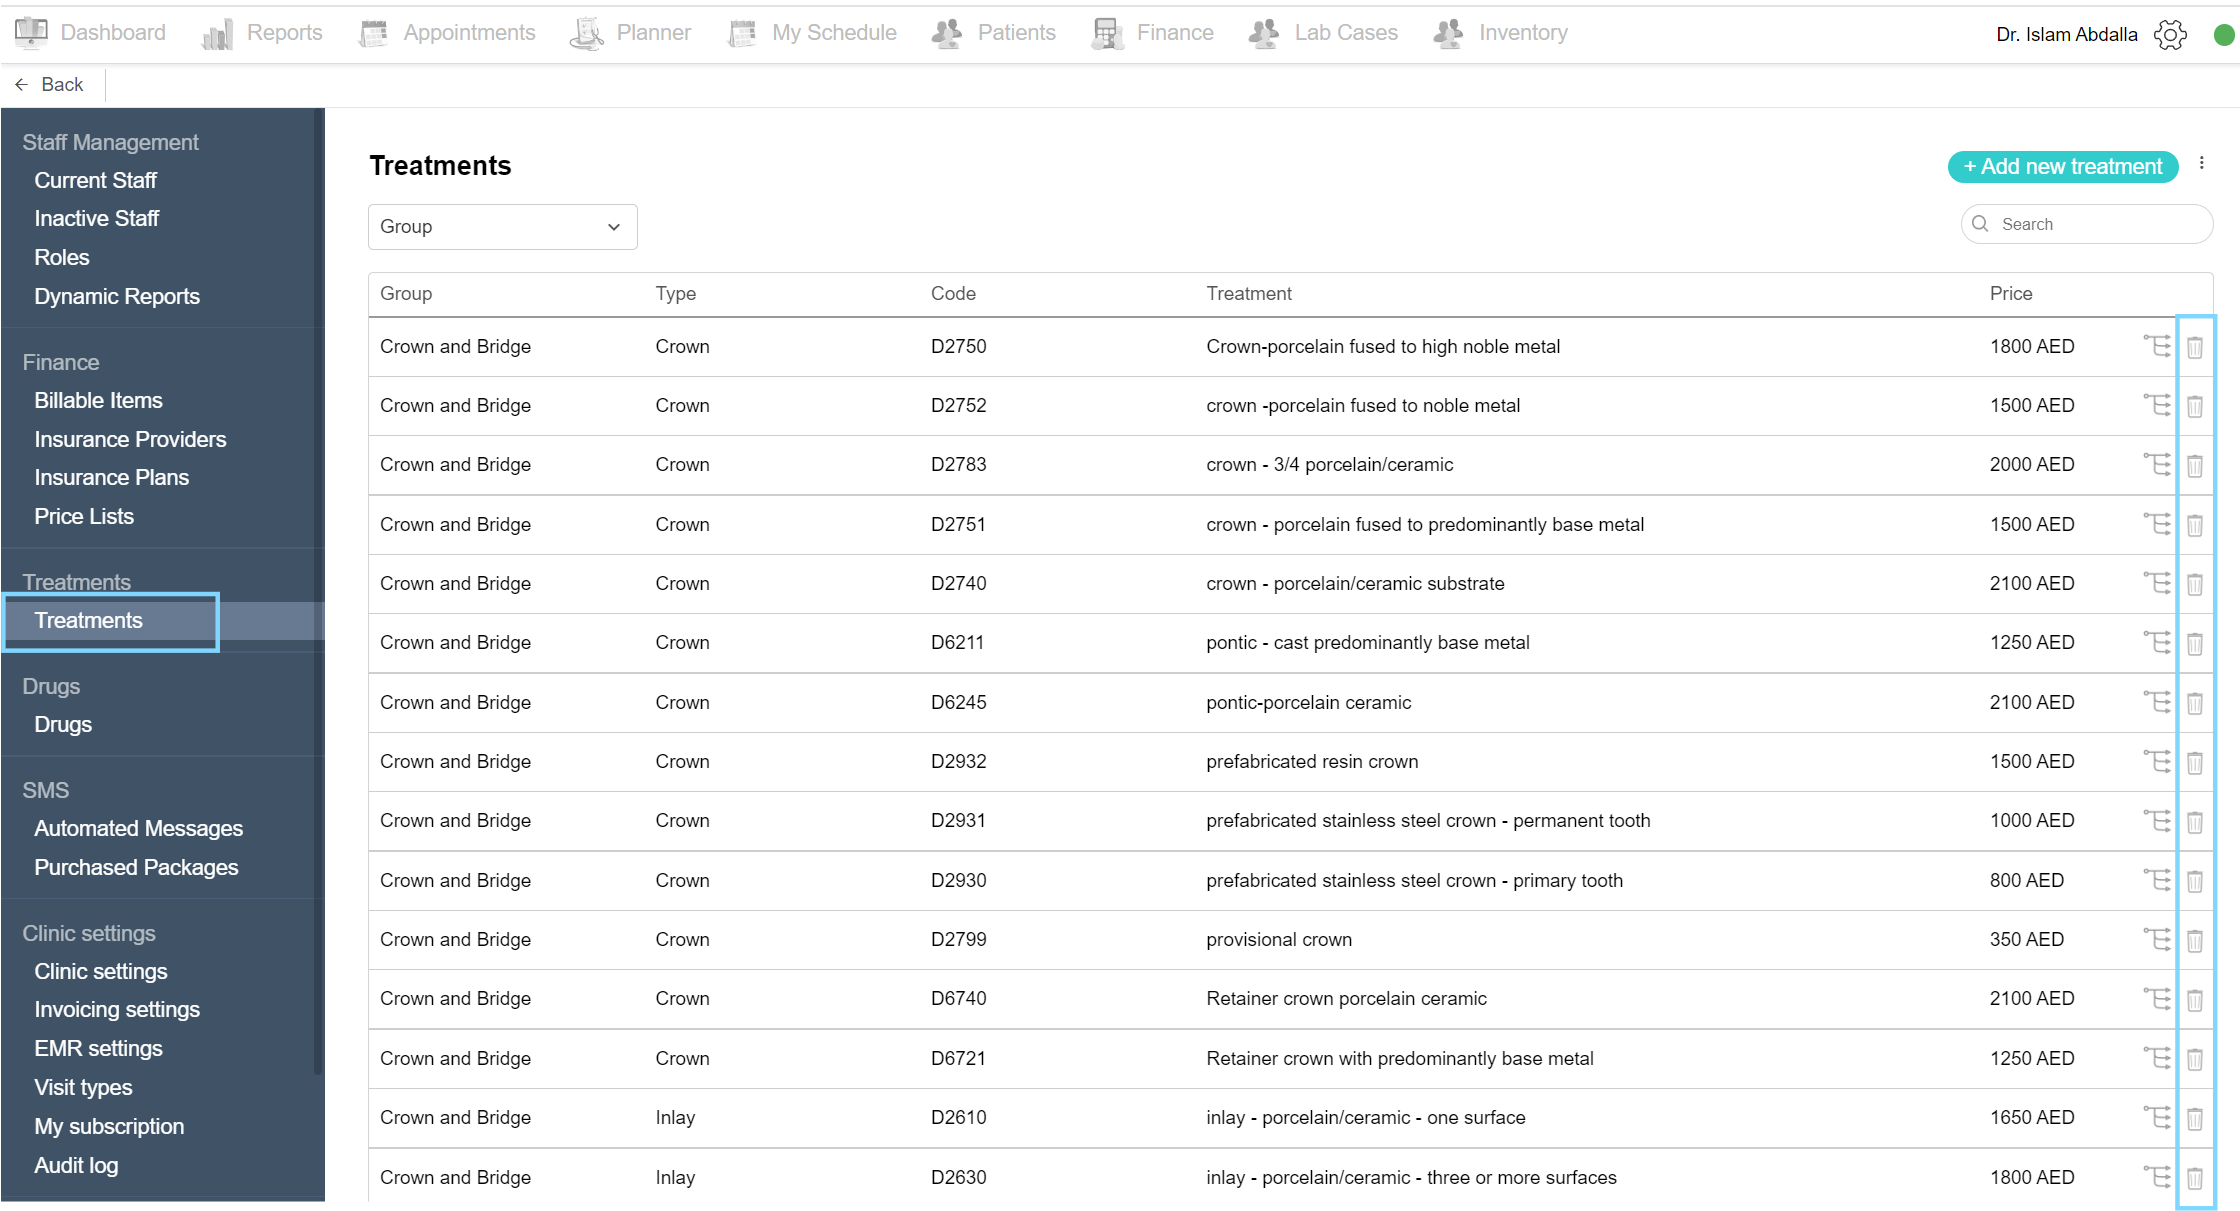
Filter treatments by group
Click on the settings icon and choose the Admin Area from the list. Under the Finance section, select Treatments. On the top of the page click on the Group drop-down list. Select the group name from the list and all the treatments categorized into that group appear.
Search treatment
To search for a certain treatment, navigate to the treatments page in the Admin Area. In the search field above the treatment list type the treatment name or code and the desired treatment will appear.

Delete treatment
If the treatment was mistakenly added or is no longer being performed in the clinic you can delete the treatment. Simply navigate to the treatments page in the Admin Area. In the treatment list, you will find the treatment name, code and price. At the end of the row is the delete icon. Click the icon and confirm the action in the confirmation box by clicking Delete.
Edit treatment information
To edit any treatment information such as the pricing, navigate to the treatments section in the Admin area and click the treatments page. You can search for the treatment in the search field or filter by group. Click the desired treatment and the edit treatment page appears, edit as needed and finally click Save.
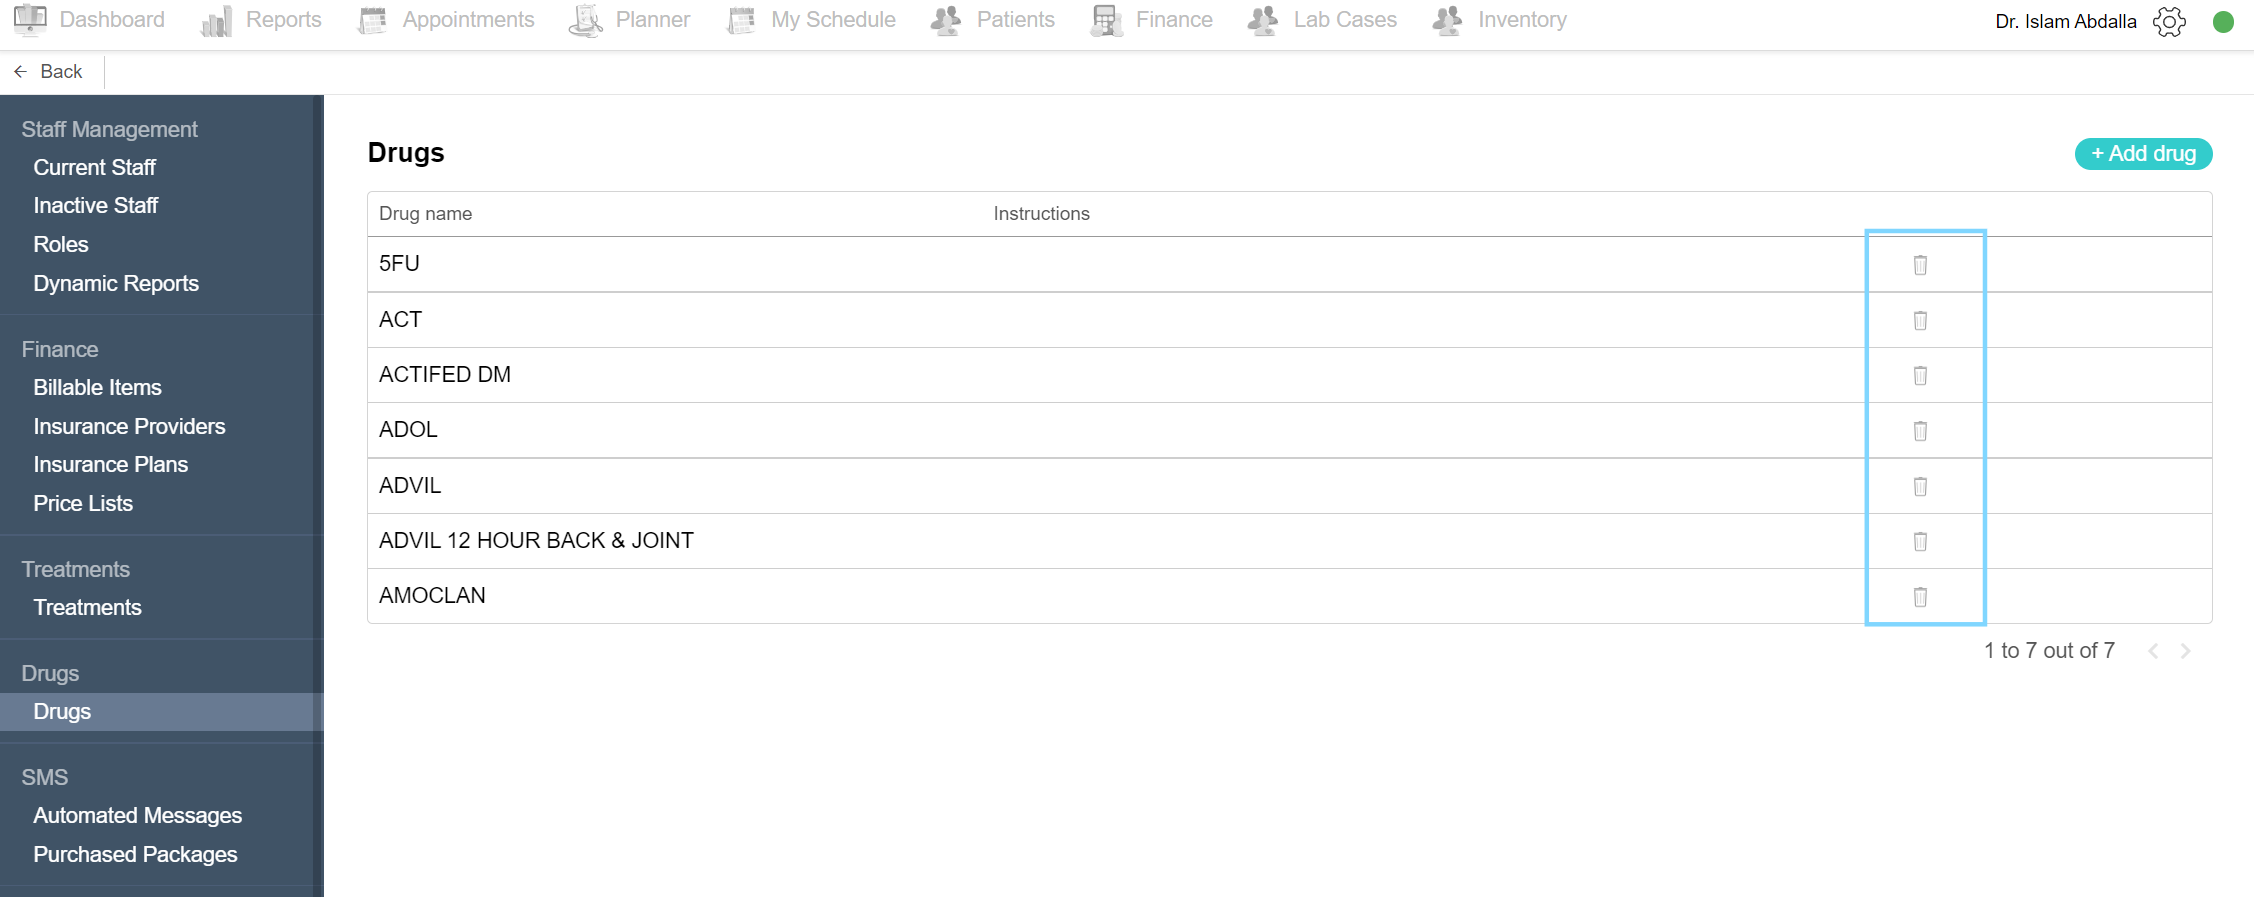
Add drug
Click on the Admin Area in the settings list, and under the Drugs section click the Drugs page. A drug list is shown. For clinics in the UAE integrated with Nabidh and Riayati, the drug list is added automatically to the system. The list includes the drug name, instruction, and delete icon. When clicked on a certain drug, an edit drug popup page appears. You can view the drug’s details.
To add a new drug, click the ‘Add drug’ button found above the drug list. A drug list appears with many columns, including trade name, generic name, ingredient strength, dosage form package and Select drug button. You can search for the drug in the search field, and when you want to choose a drug make sure to select the correct drug. Read the entire row, ensure this is the needed drug and click Select drug. Add the drug details and click Save.
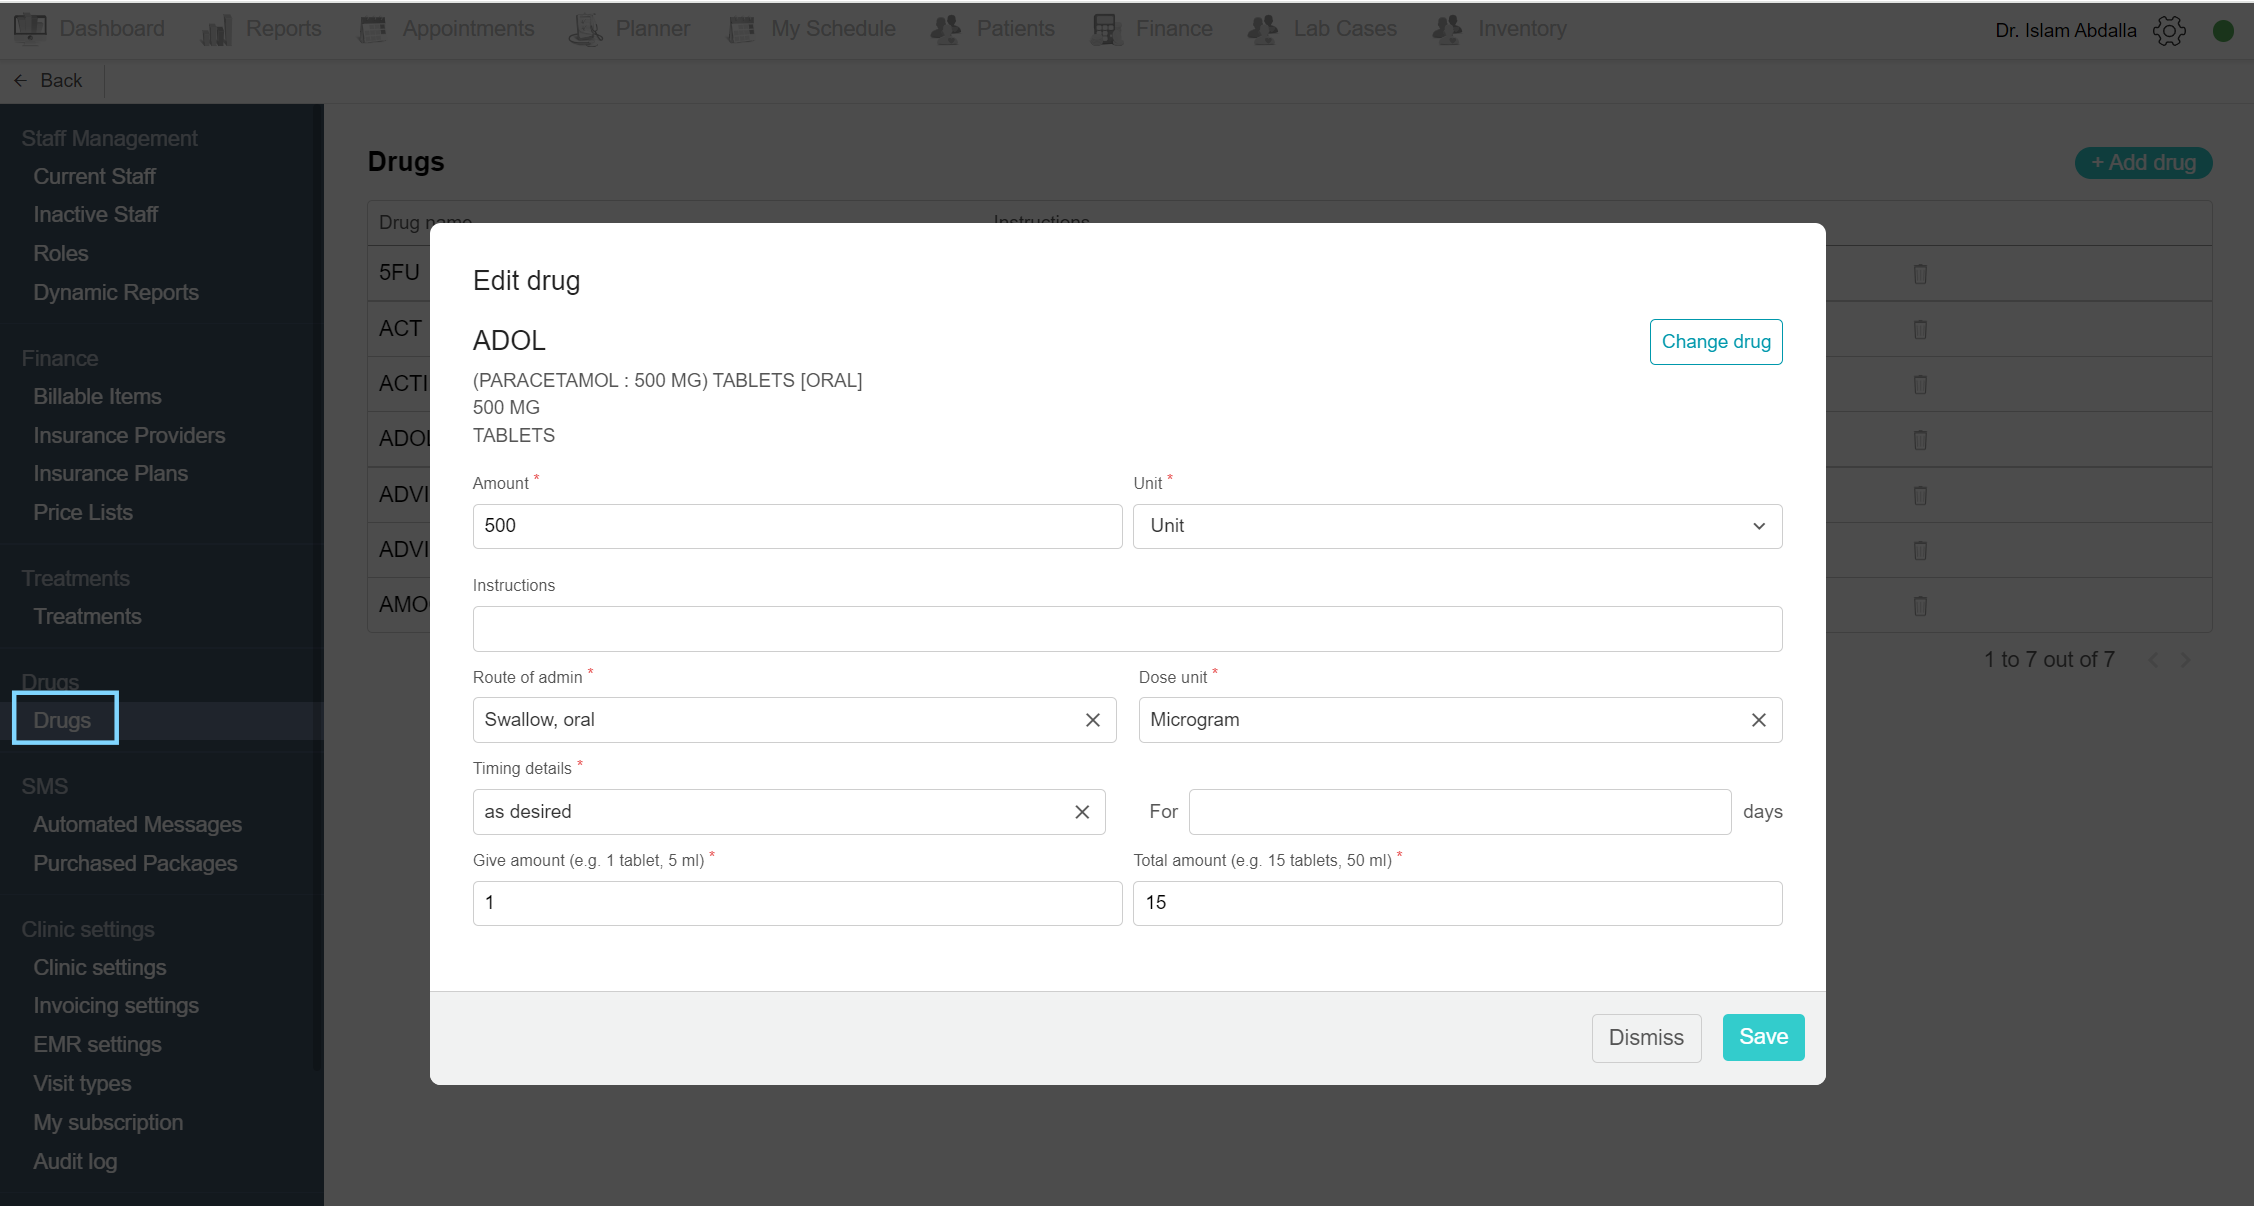
Edit drug details
To edit any drug information, click on the drug page in the Admin Area. In the drug list, click on the desired drug and the edit drug popup page appears. Edit the data or click Change drug if it was added mistakenly. After adding the necessary data click the Save page.
Delete drug
To delete a drug, navigate to the Drugs page in the Admin Area. in the drugs list, you can find the delete button next to the drug’s name. Click the button and a confirmation box appears, click the Delete button to confirm the action.
Clinic settings
In the clinic settings section, you can set the clinic’s operational parameters to your liking.
View clinic settings
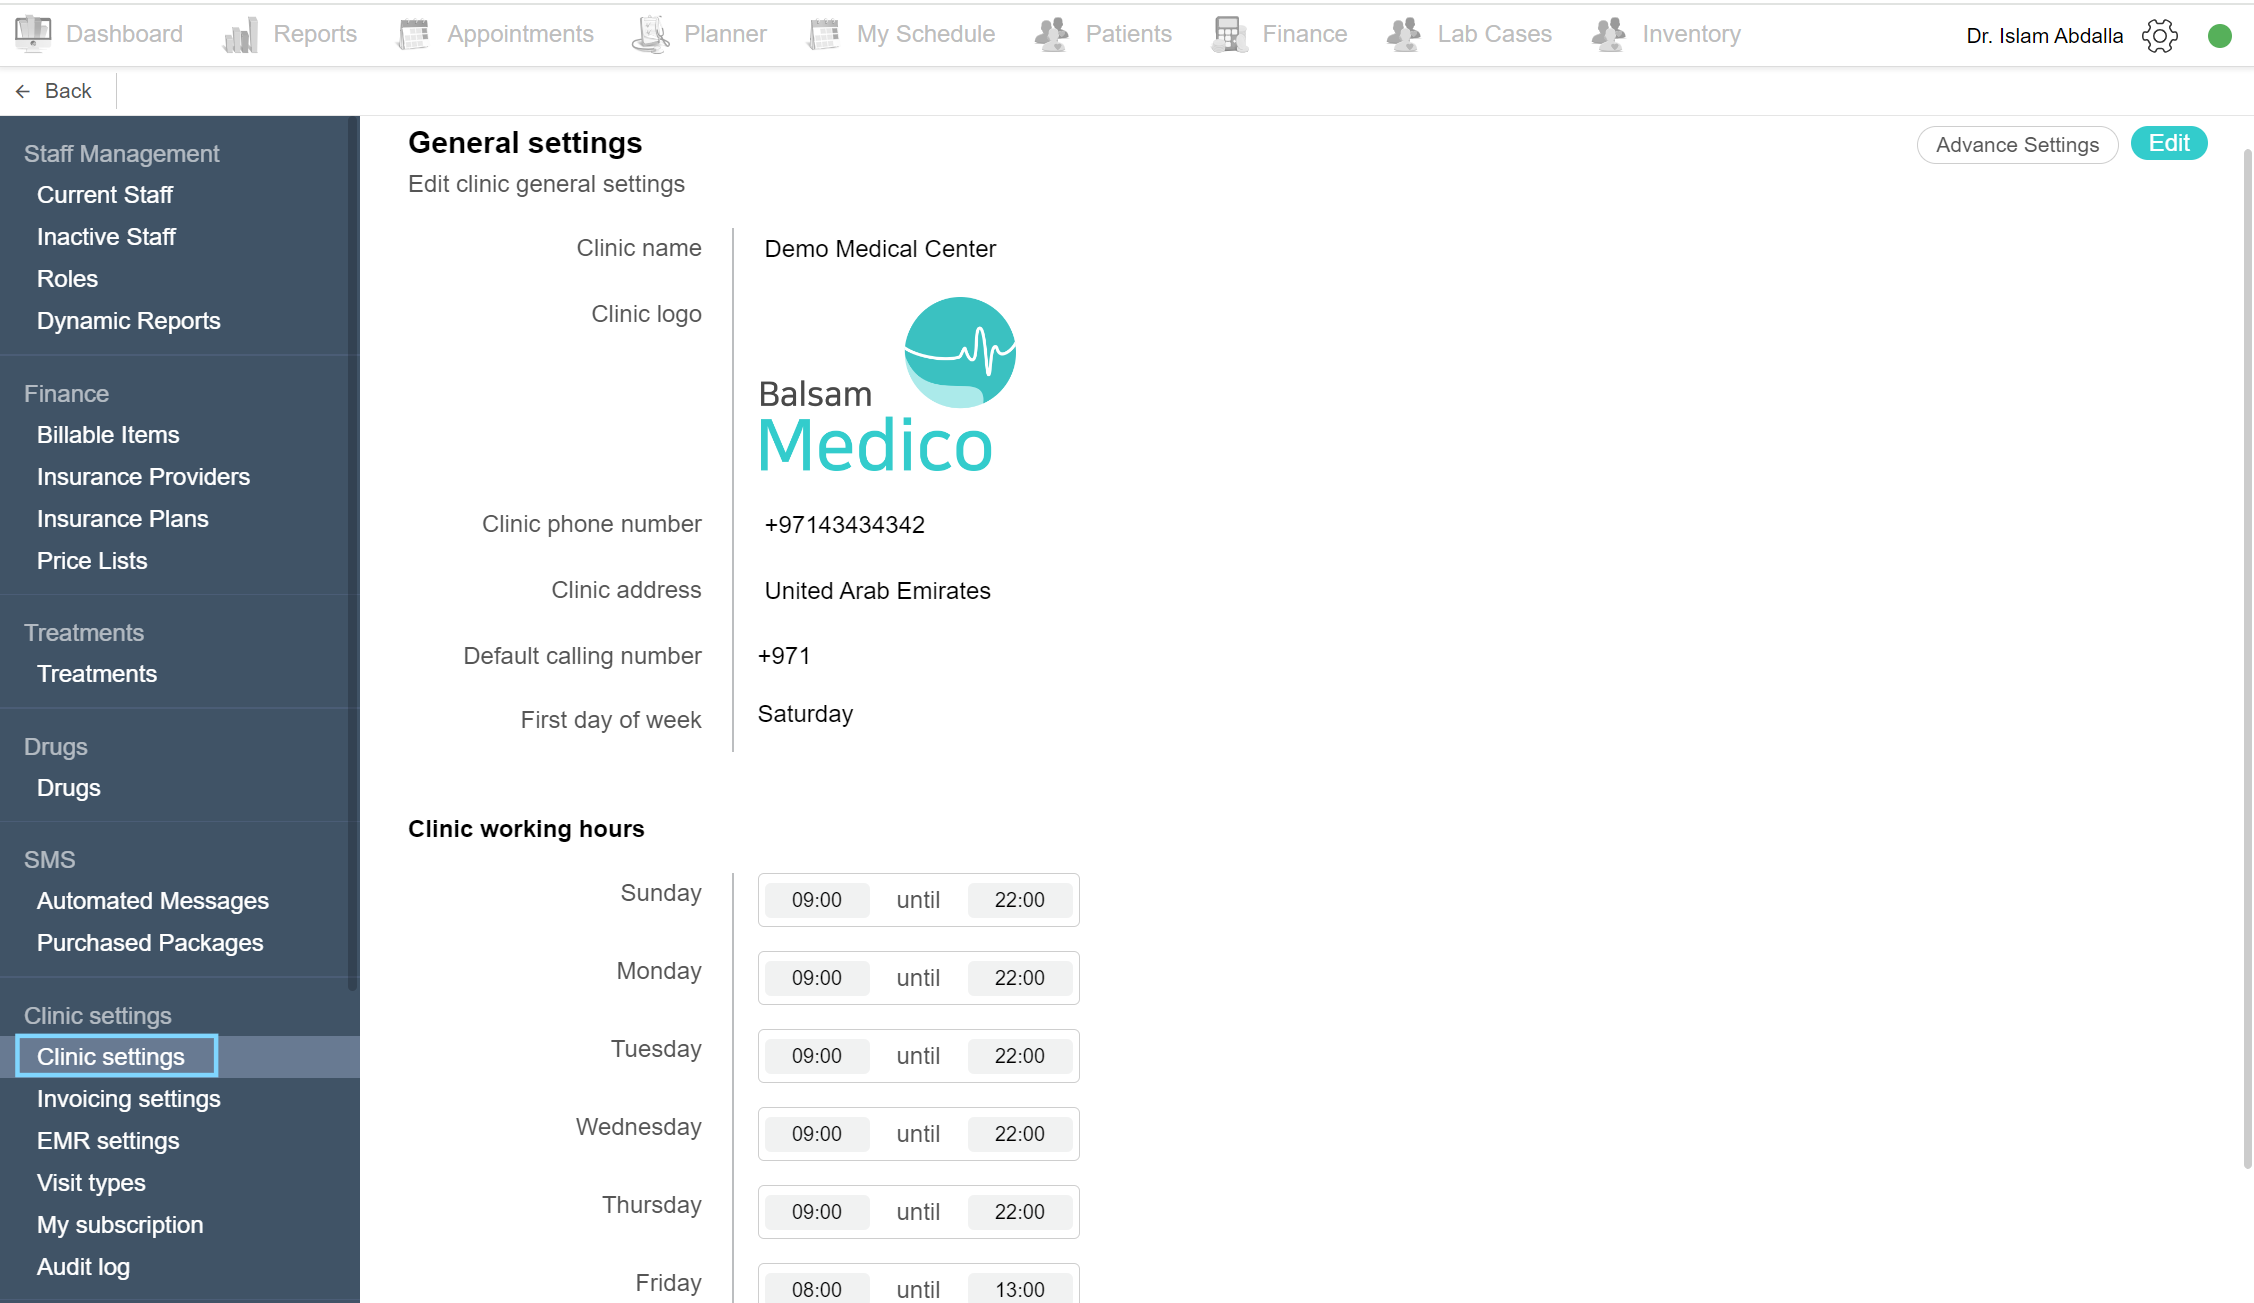
Edit clinic settings
[Advanced settings]
To edit the clinic settings, navigate to the clinic settings page in the Admin Area. At the top of the page, click the Edit button to start editing. Edit the settings as needed and click the Save button that is found at the bottom.
Next to the Edit button is the Advance Settings button. Click the button to view and edit. You can find more settings such as the doctor order for the appointment tab, the hour system and many more. Once it is edited, click the Update settings button at the button.
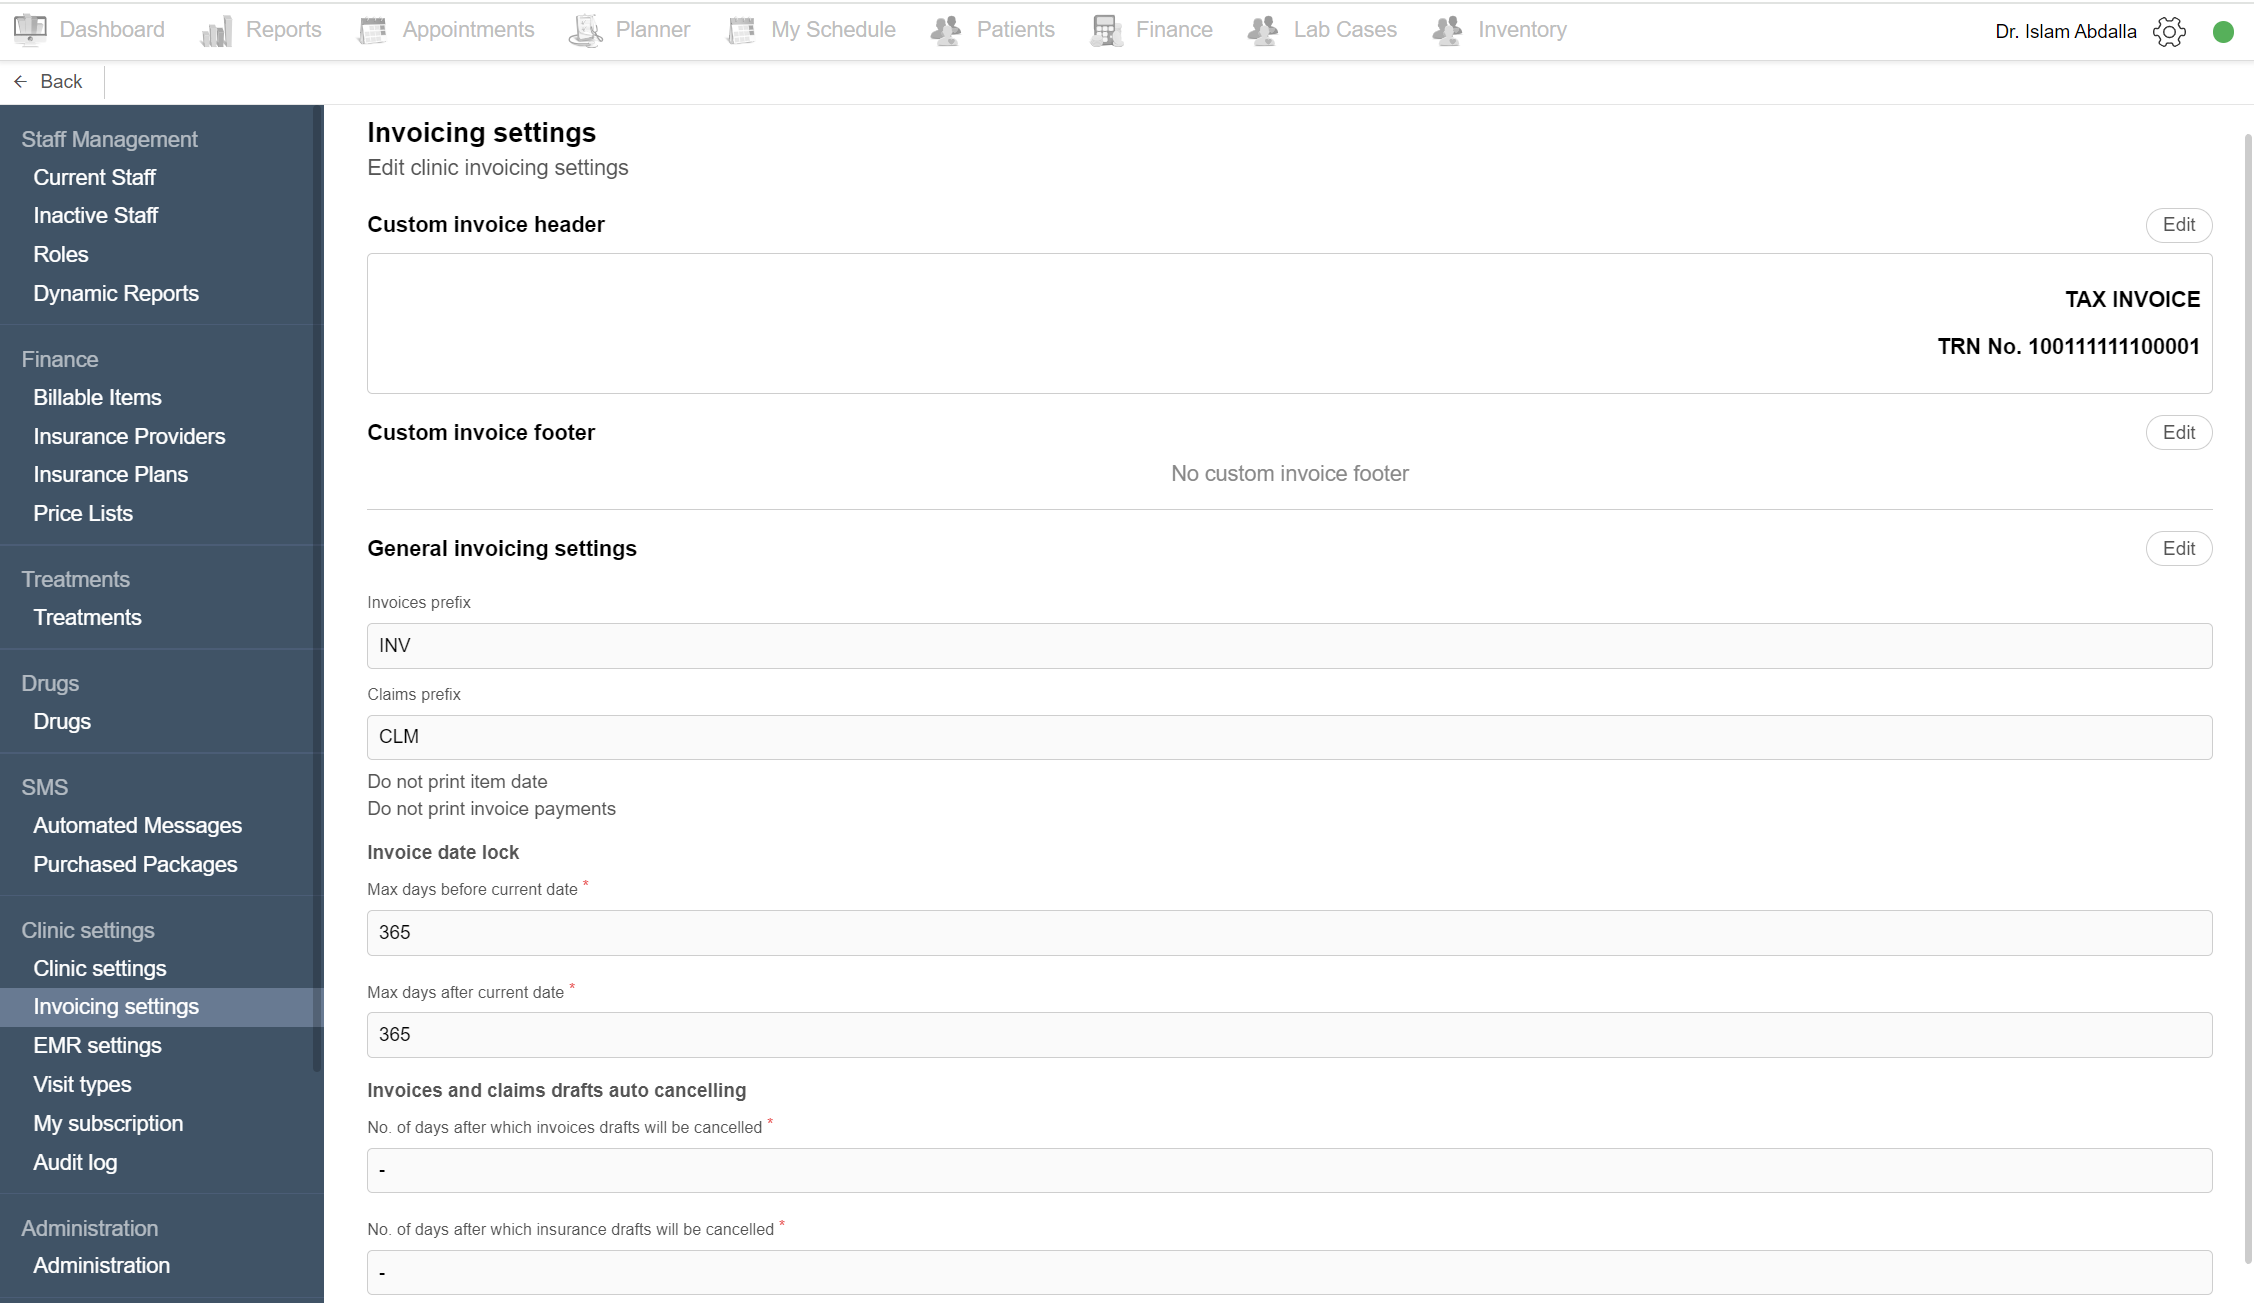
Invoicing settings
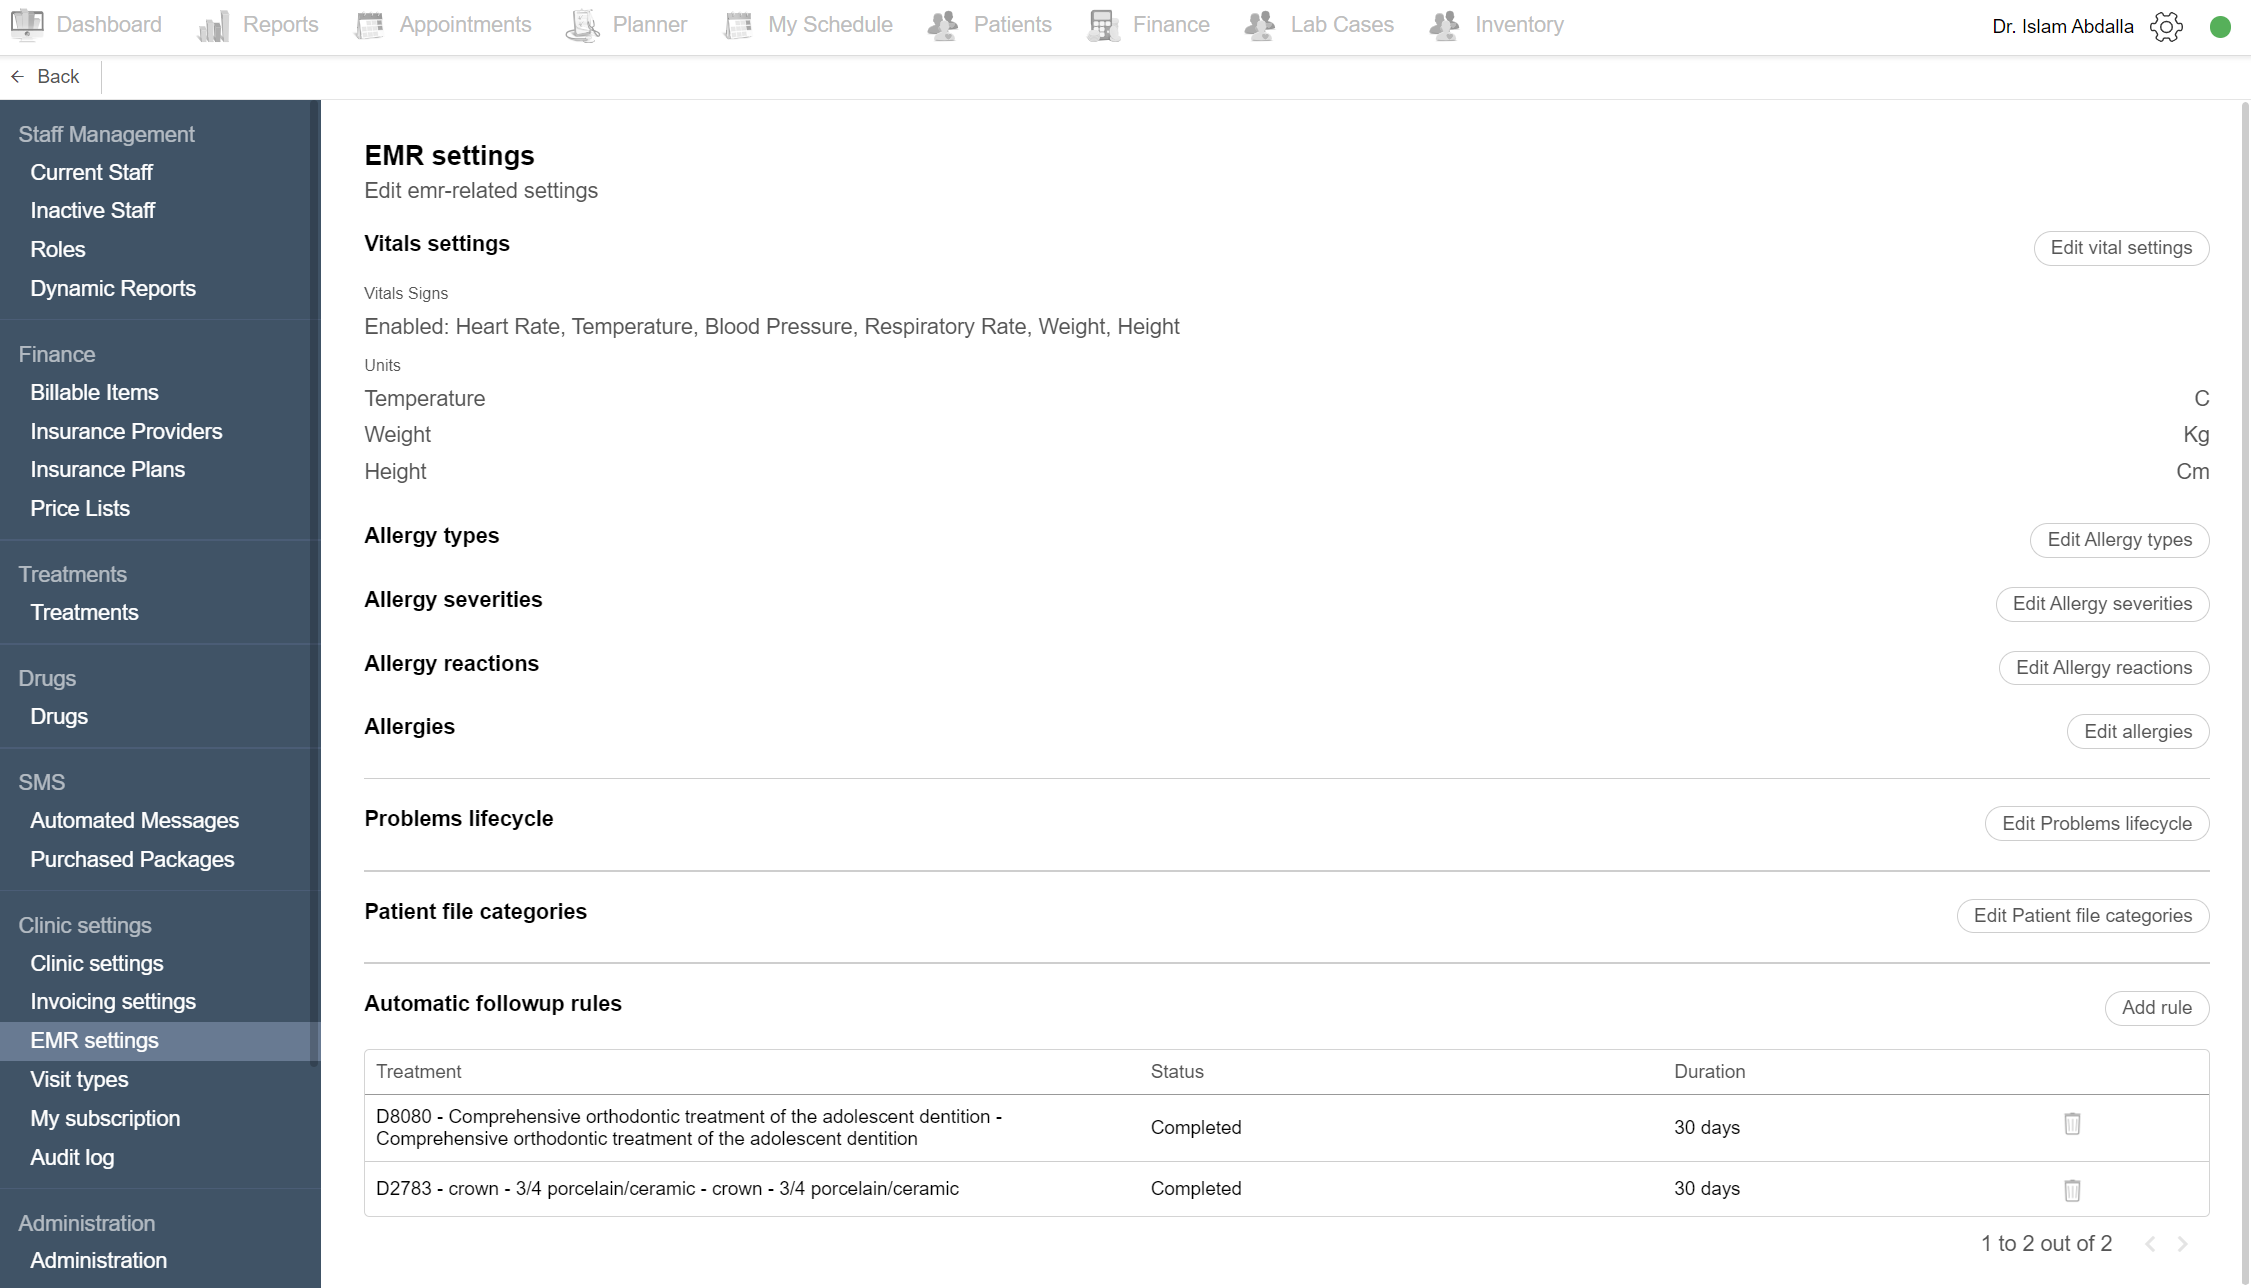
View EMR settings
To view and edit the EMR-related settings navigate to the EMR settings in the Admin Area. You can edit the vitals settings, allergy types, severities, reactions and allergies by clicking the corresponding edit button. You can edit the problems' lifecycle, and patient file categories by clicking their edit buttons. Finally, the automatic follow-up rules help create automatic follow-up appointments for the chosen treatment at the suggested period.
Visit Types
Visit types are the purposes of the appointment, such as Examination and Followups. You can customize the visit types from the Admin Area. Click Admin Area in the settings list and click Visit Types page. The list includes the name, price, duration, code (if any), colour and delete button.
Click the ‘Add visit type’ button to add a new one. In the popup page, add the new information and click Save.
To edit the visit, click on the desired visit type and the edit page appears. Edit the information as needed and click Save.
To delete a visit type, notice the delete icon on the visit type row. Click the delete icon, and a confirmation box appears, click the Delete button to complete the process.
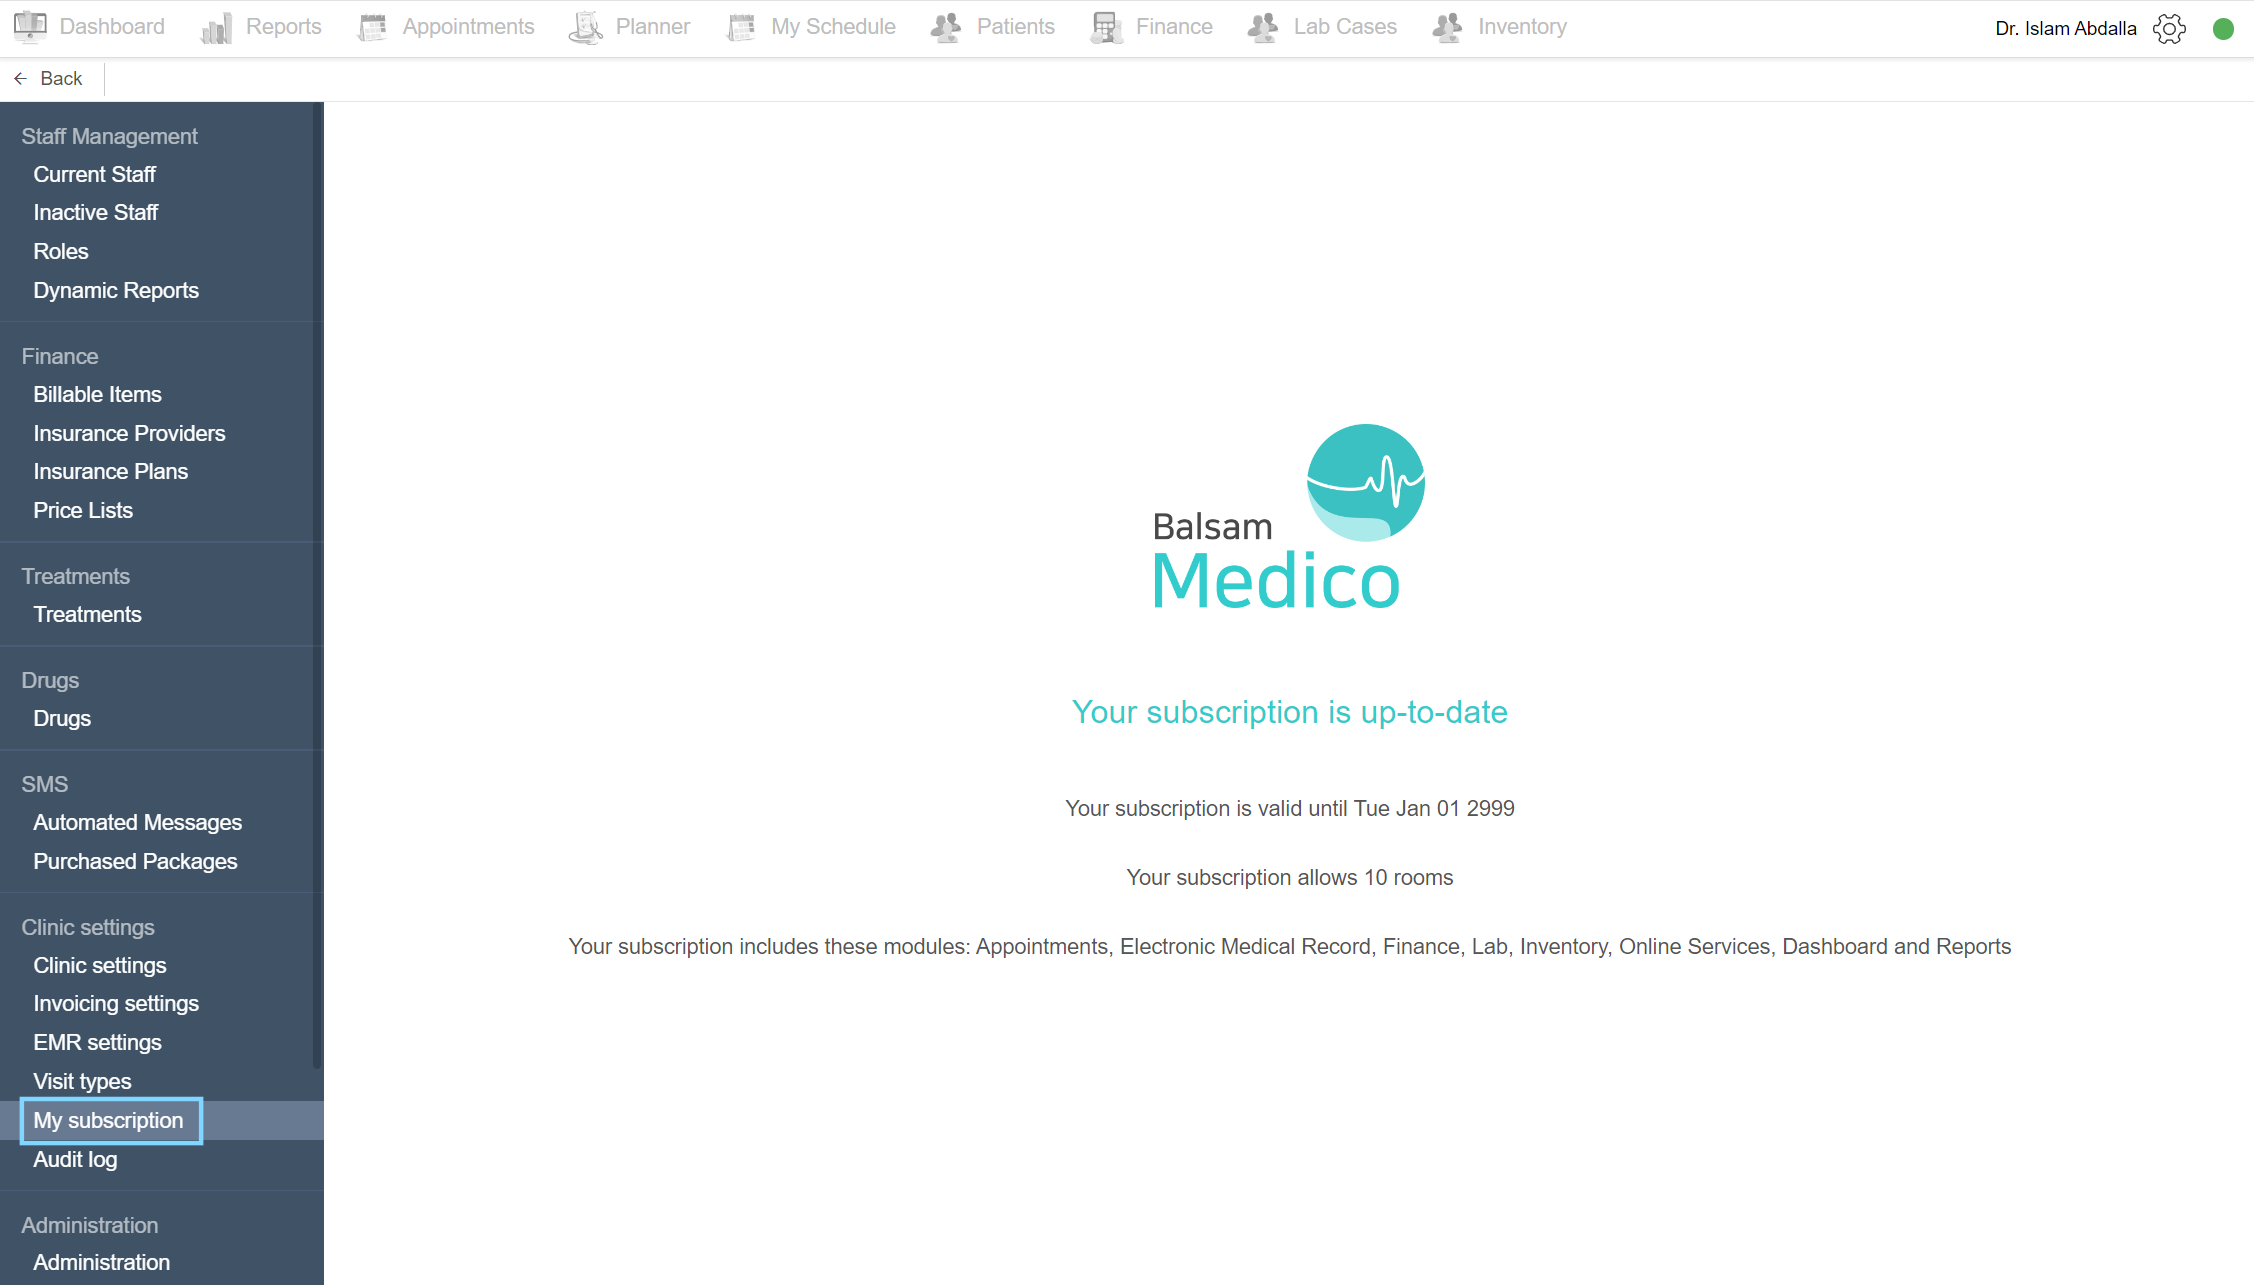
My subscription
Click on the settings icon and choose the Admin Area from the list. Under the Clinic settings section, select My Subscription. This page informs you of your subscription to Balsam Medico. It will show you the subscription end date and what is included in the subscription.
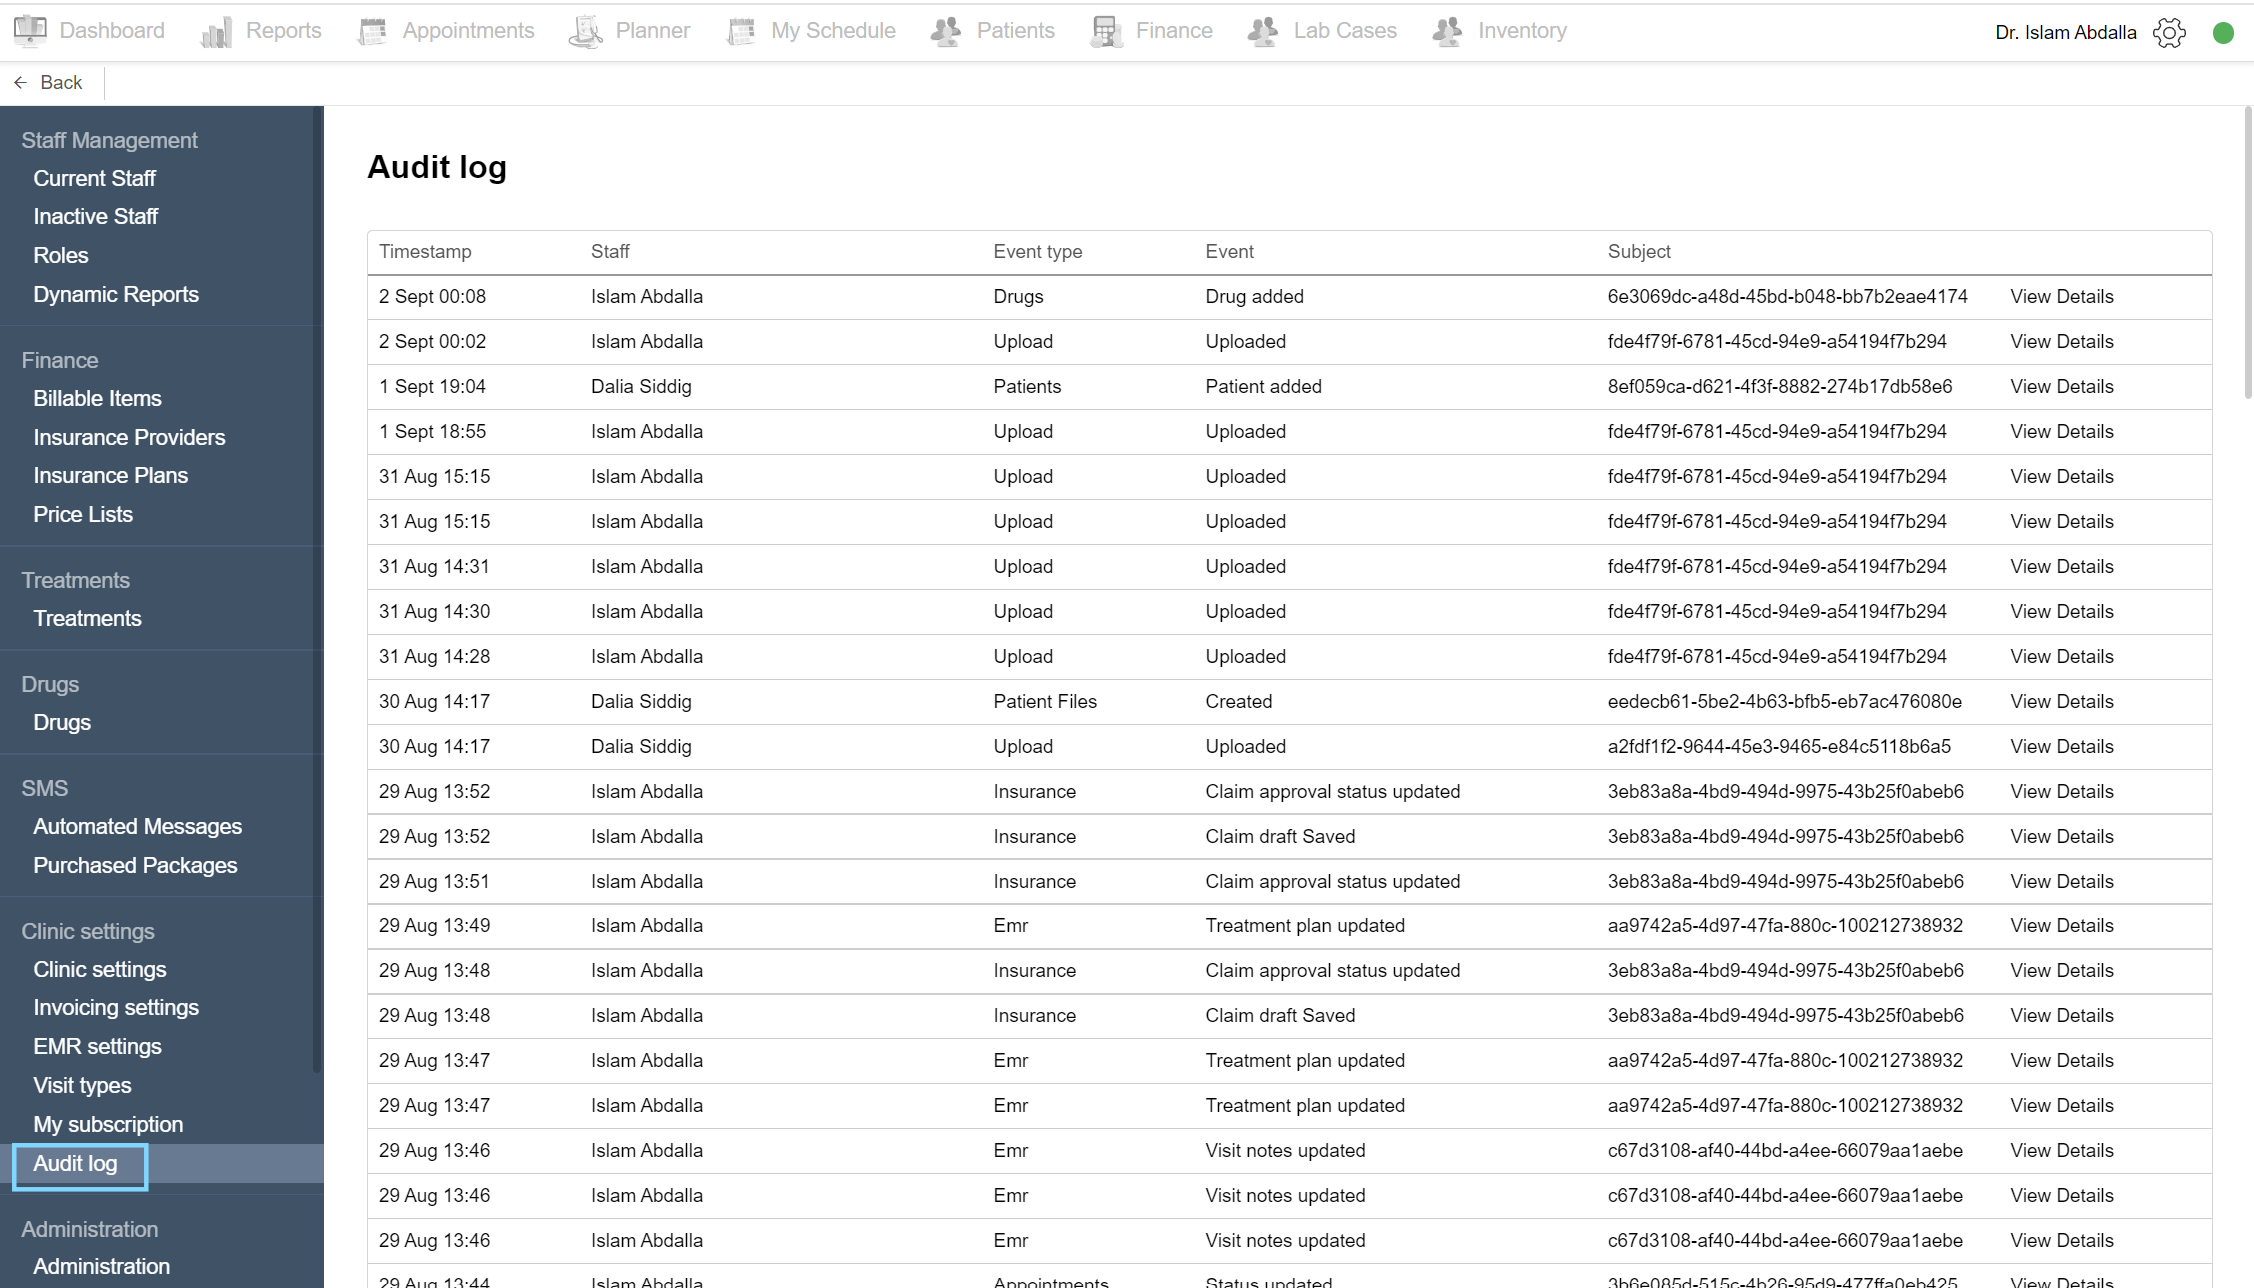
Audit log
Click on the settings icon and choose the Admin Area from the list. Under the Clinic settings section, select Audit log. This page shows every event made in the system. It will show the timestamp, the staff that created the event, the event type, the event created, the subject and the view details to view the event’s details.
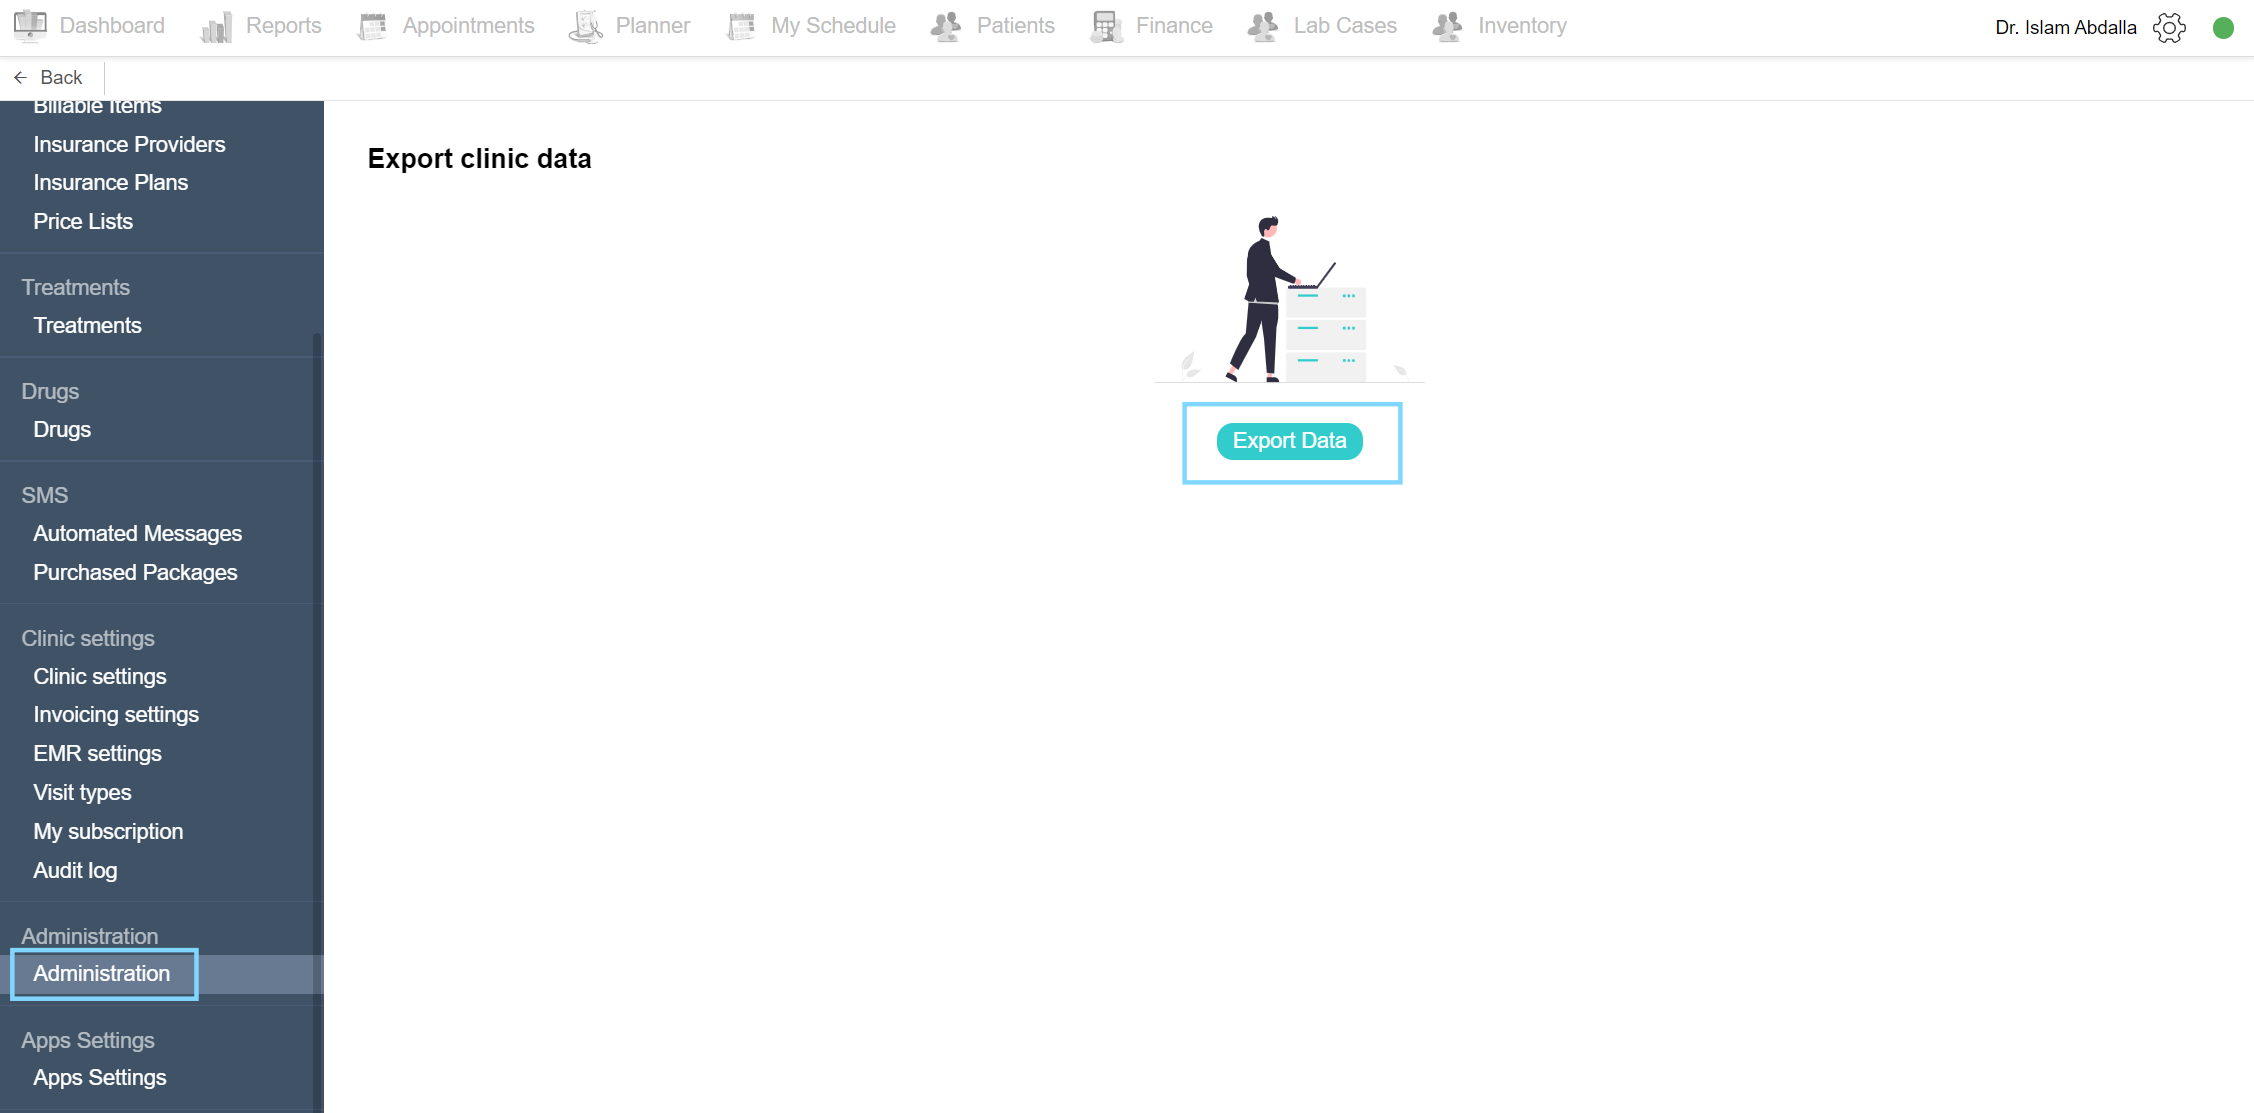
Administration
Administration
Click on the settings icon and choose the Admin Area from the list. Under the Administration section, select Administration. Here you can export the entire clinic’s data. Click the ‘Export Data’ button to download the spreadsheet including all of the clinic’s data.
Apps and settings
Apps Settings
Balsam Medico uses many apps to create a smoother, seamless journey through the system. These include the WhatsApp integration, the webform integration for a paperless flow, and the eclaim integration to manage the claims procedures through Medico. The technical team of Balsam Medico manages these apps and their configuration.
Apps
After the technical team sets the apps, the customer success team will configure and customize the apps in the Admin Area. if you wish to configure the apps, please contact the customer success team to help you through it.