
Inventory items
Inventory items:
To manage the inventory items added by your clinic, navigate to the Inventory tab and open the Inventory items page.
View list
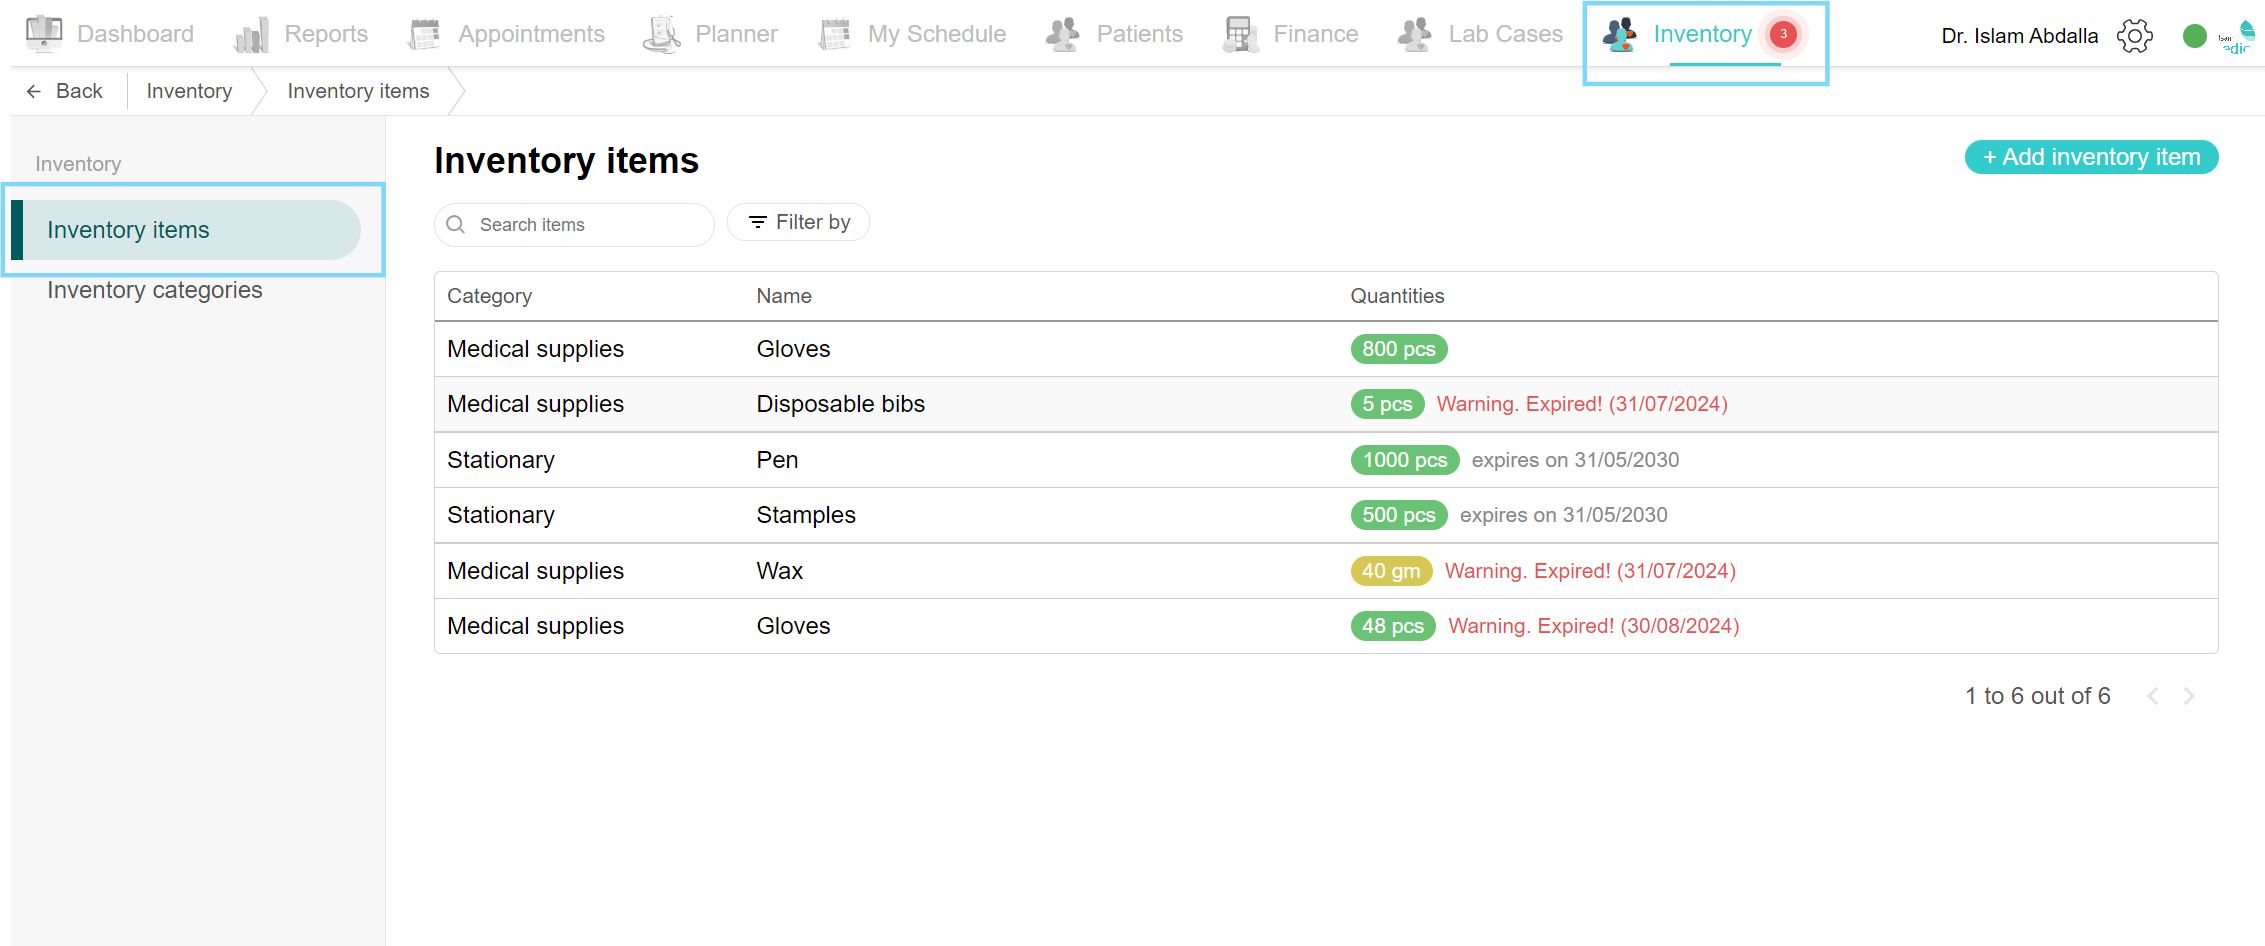
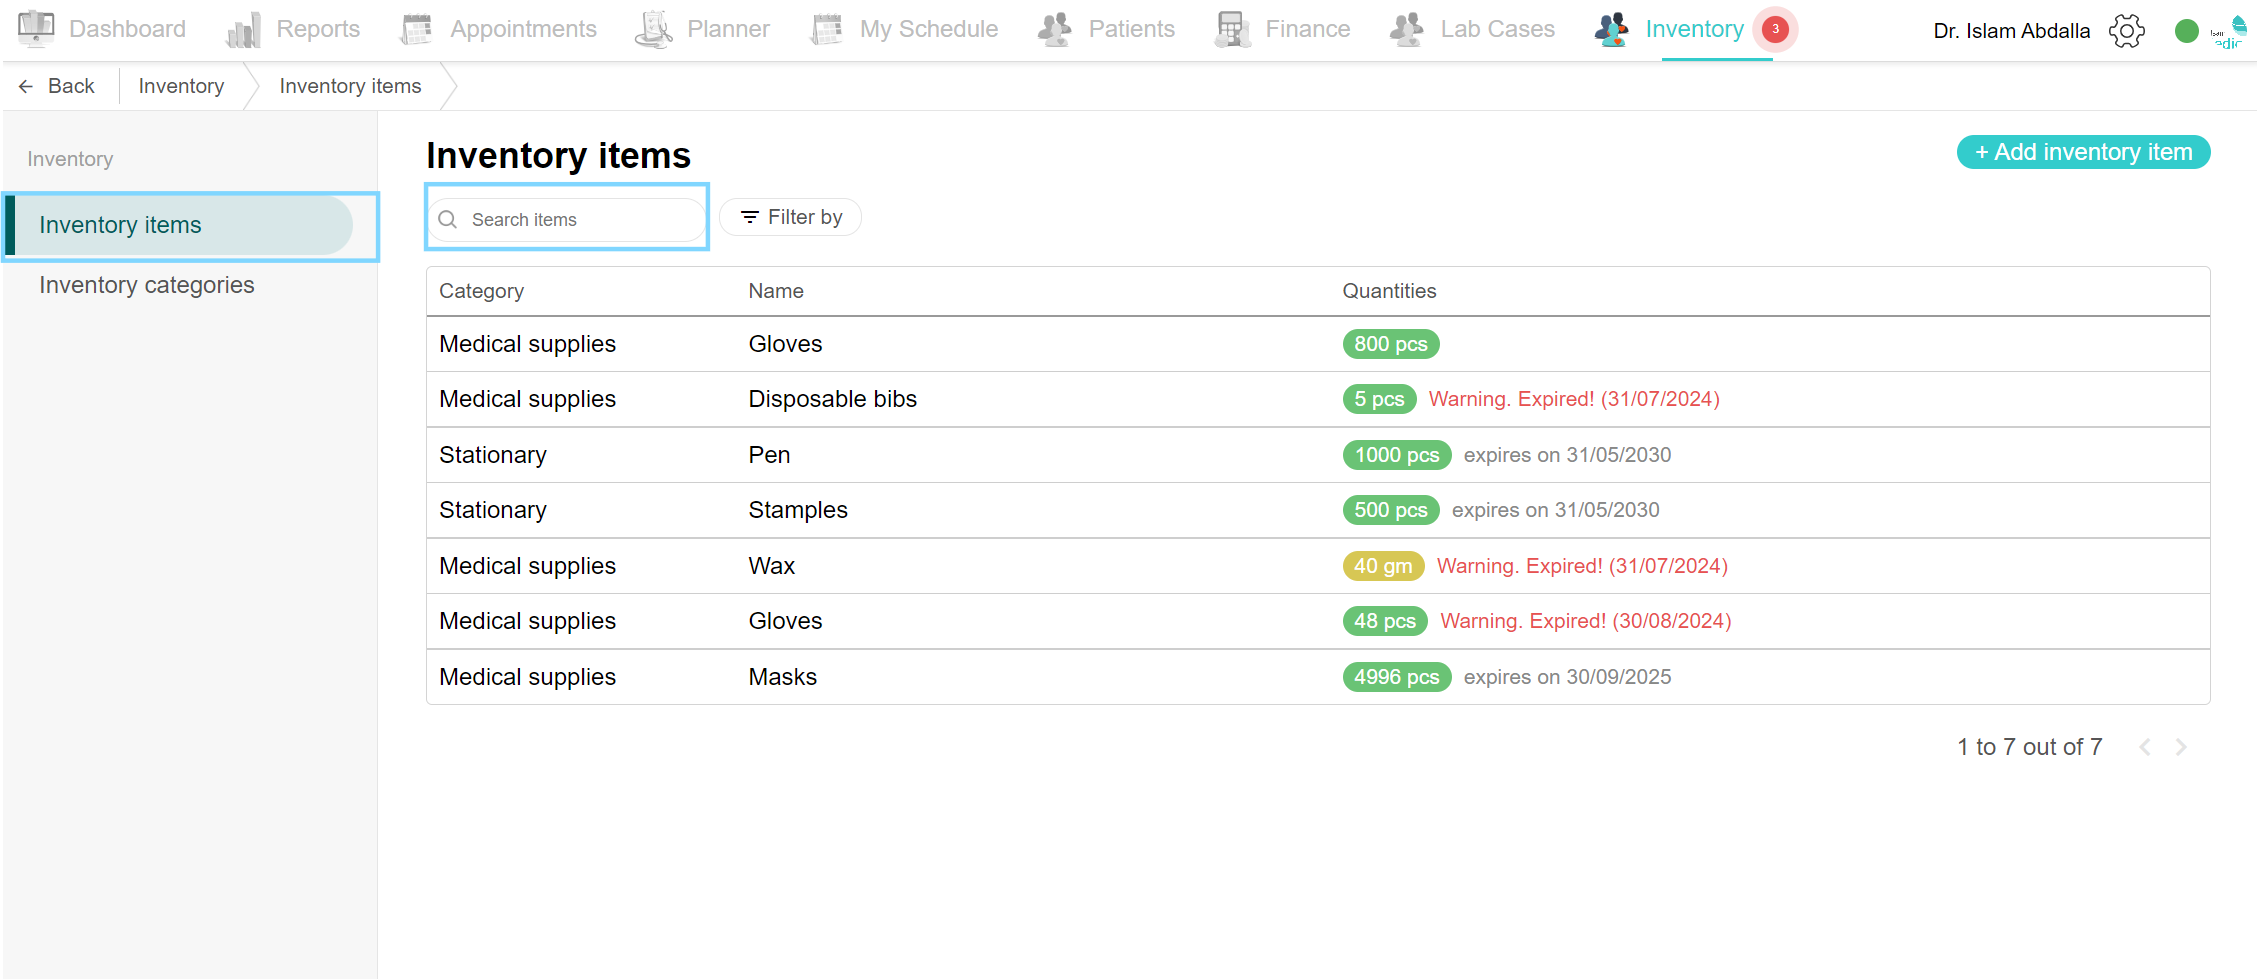
Click the inventory tab and select the inventory items page. You can view a full list of all the items added to the system. It shows the category name, item name, quantities and date alert. Click each item to view its details.
View details
To view each item's details, click the Inventory tab and open the Inventory items page. Click the desired item and the details pop-up page opens. You can view the inventory name [Gloves], and the category name with the unit of measure. Next is the warning threshold, when the quantity is close to the threshold number, the system will alert you. After that is the Quantities, which shows the amount of the item in store. Click the ‘Reduce quantity’ button to reduce the amount. The ‘Add quantity’ button is used to add the new amount. On the right is the Inventory log, it will show a detailed list of all events done to this item. It shows the date, time, name of the person who created this event, and the event that happened.

Add item
To add a new item to the list, navigate to the Inventory items page. Click the ‘Add inventory items’ button, and a new item popup box appears. In the box, add the item name, choose the category from the drop-down list or click the ‘Add new category’ to add a new category if not found in the list. Select the unit of measure from the drop-down list, optionally you can type the warning threshold [once the item reaches this number, the system will alert you], in the billable item, you can select an item to connect the inventory item to it. Lastly, type a note if applicable and click Save. The new item is found in the list. Click the item, and the inventory details popup box appears. It will include the name, category name and threshold amount. In the Quantities section, you will find the ‘Add quantity’ button. Click, add the quantity amount, expiry date and notes if any. Click Save. Once completed, click Done and it’s now updated in the list.
Reduce the quantity of item
When an item’s amount is reduced in the clinic, you can reduce the quantity on the Inventory items page. Navigate to the Inventory items page and click on the desired item. In the inventory details box, you can find the Quantities section. Click the ‘Reduce quantity’ box, and the reduce quantity box appears. Type the quantity to reduce, for example, if you have used 4 pieces in the clinic, type 4 in the quantity to reduce field, write a note if needed and click Save. Notice how when you type the reduced amount, it shows the updated amount underneath.
Search item
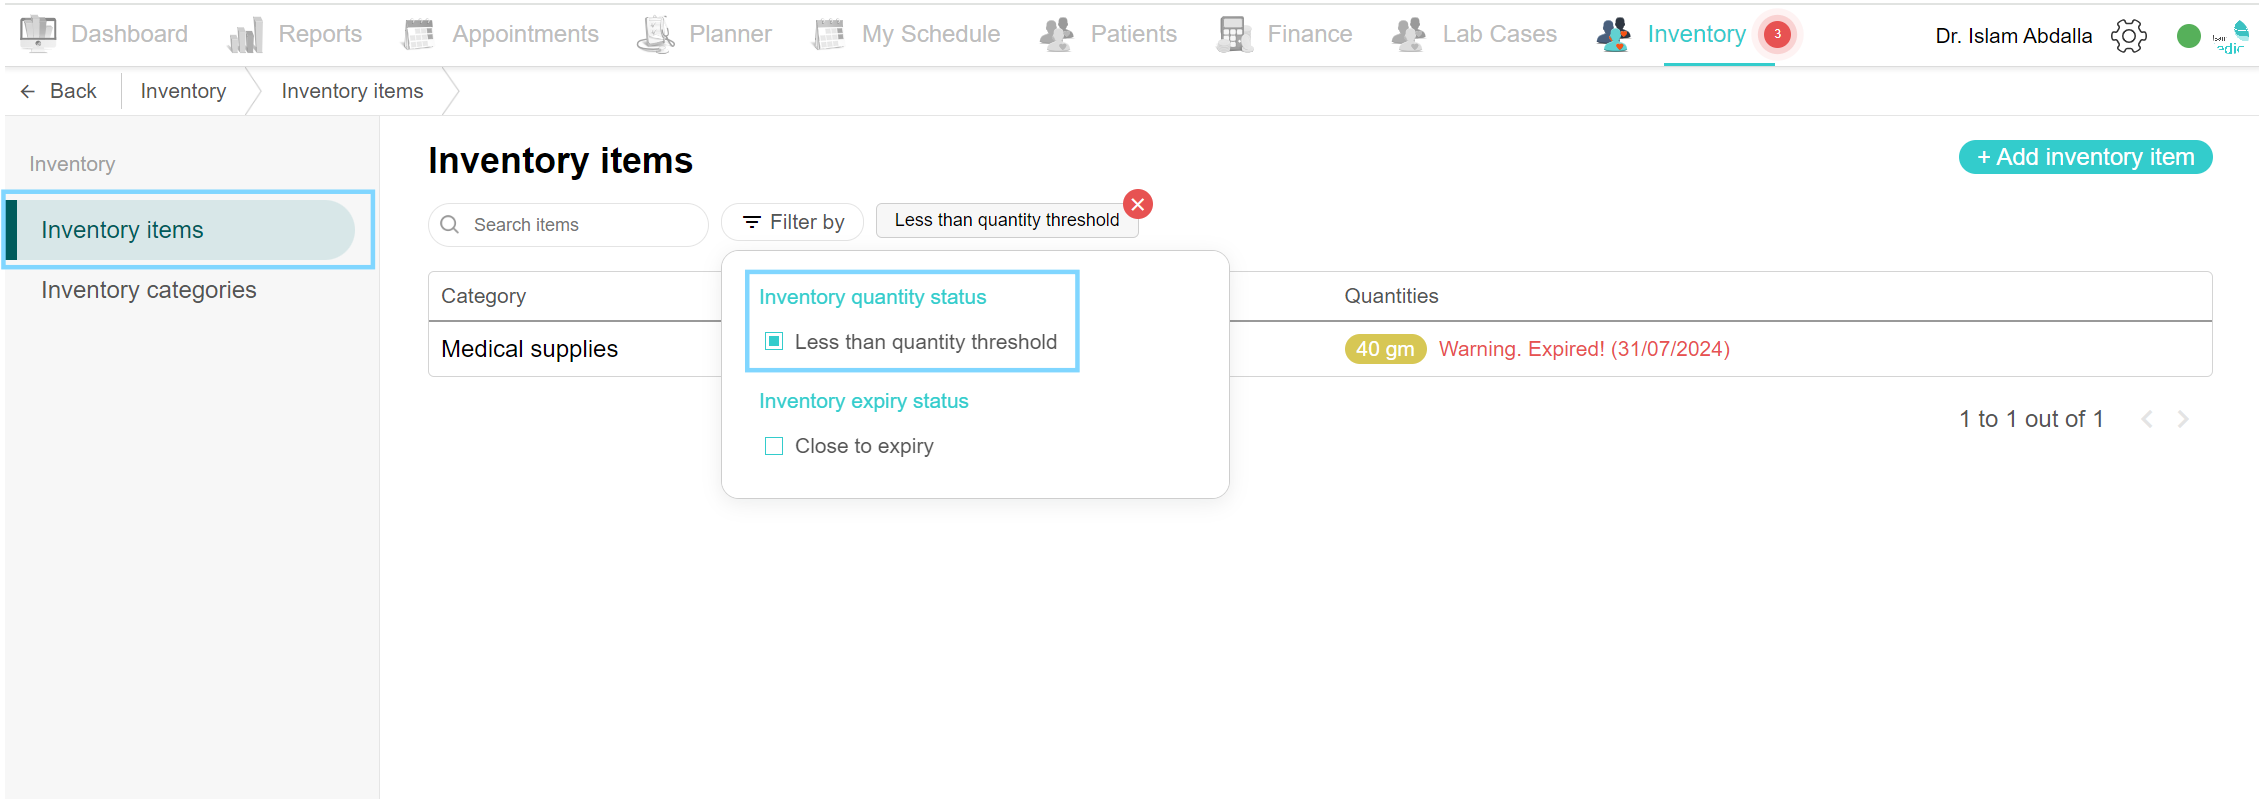
Filter by quantity status
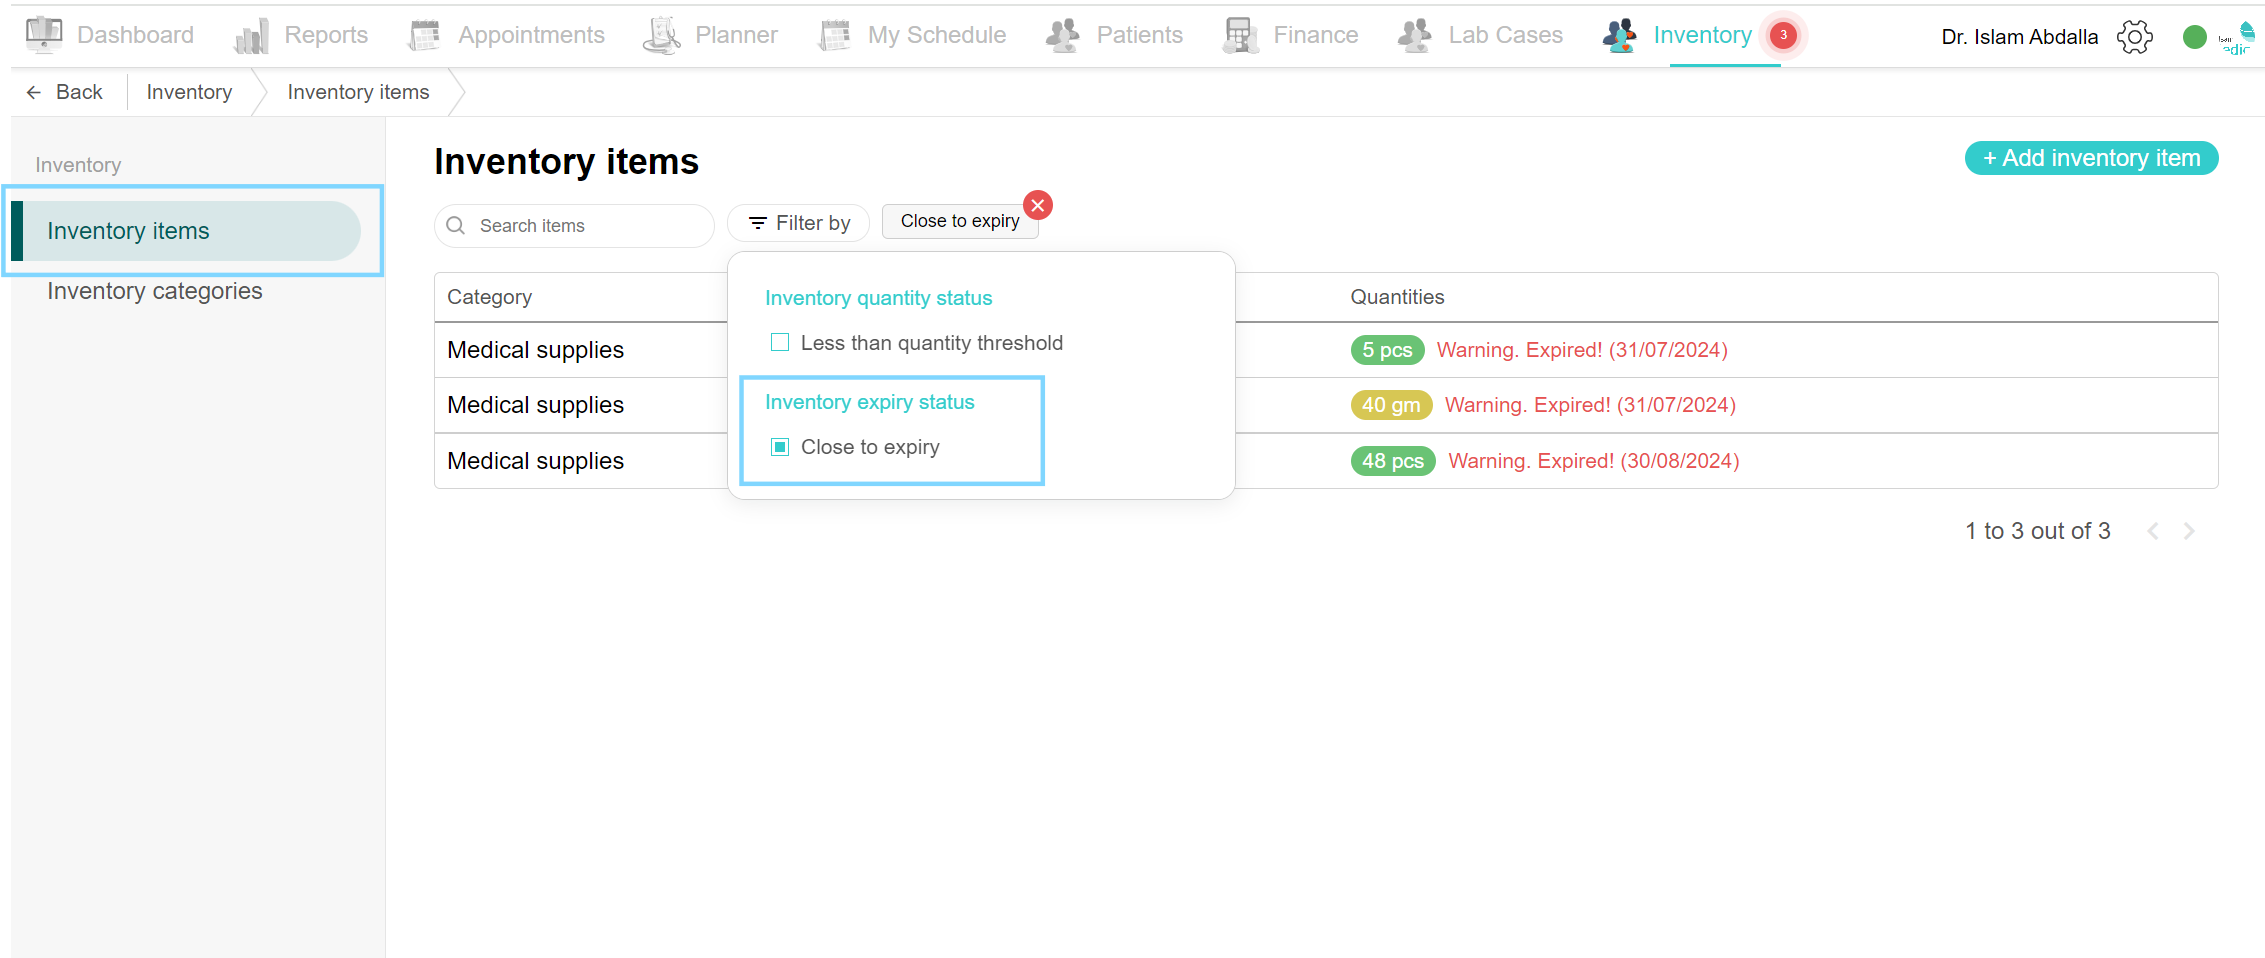
Filter by expiry status
Delete item
To delete an item, navigate to the inventory items page in the Inventory tab. Select the desired item, the inventory details popup page opens, and at the bottom is the Delete button. A confirmation box opens up, click Delete to confirm the action.