Invoices:
View invoice list
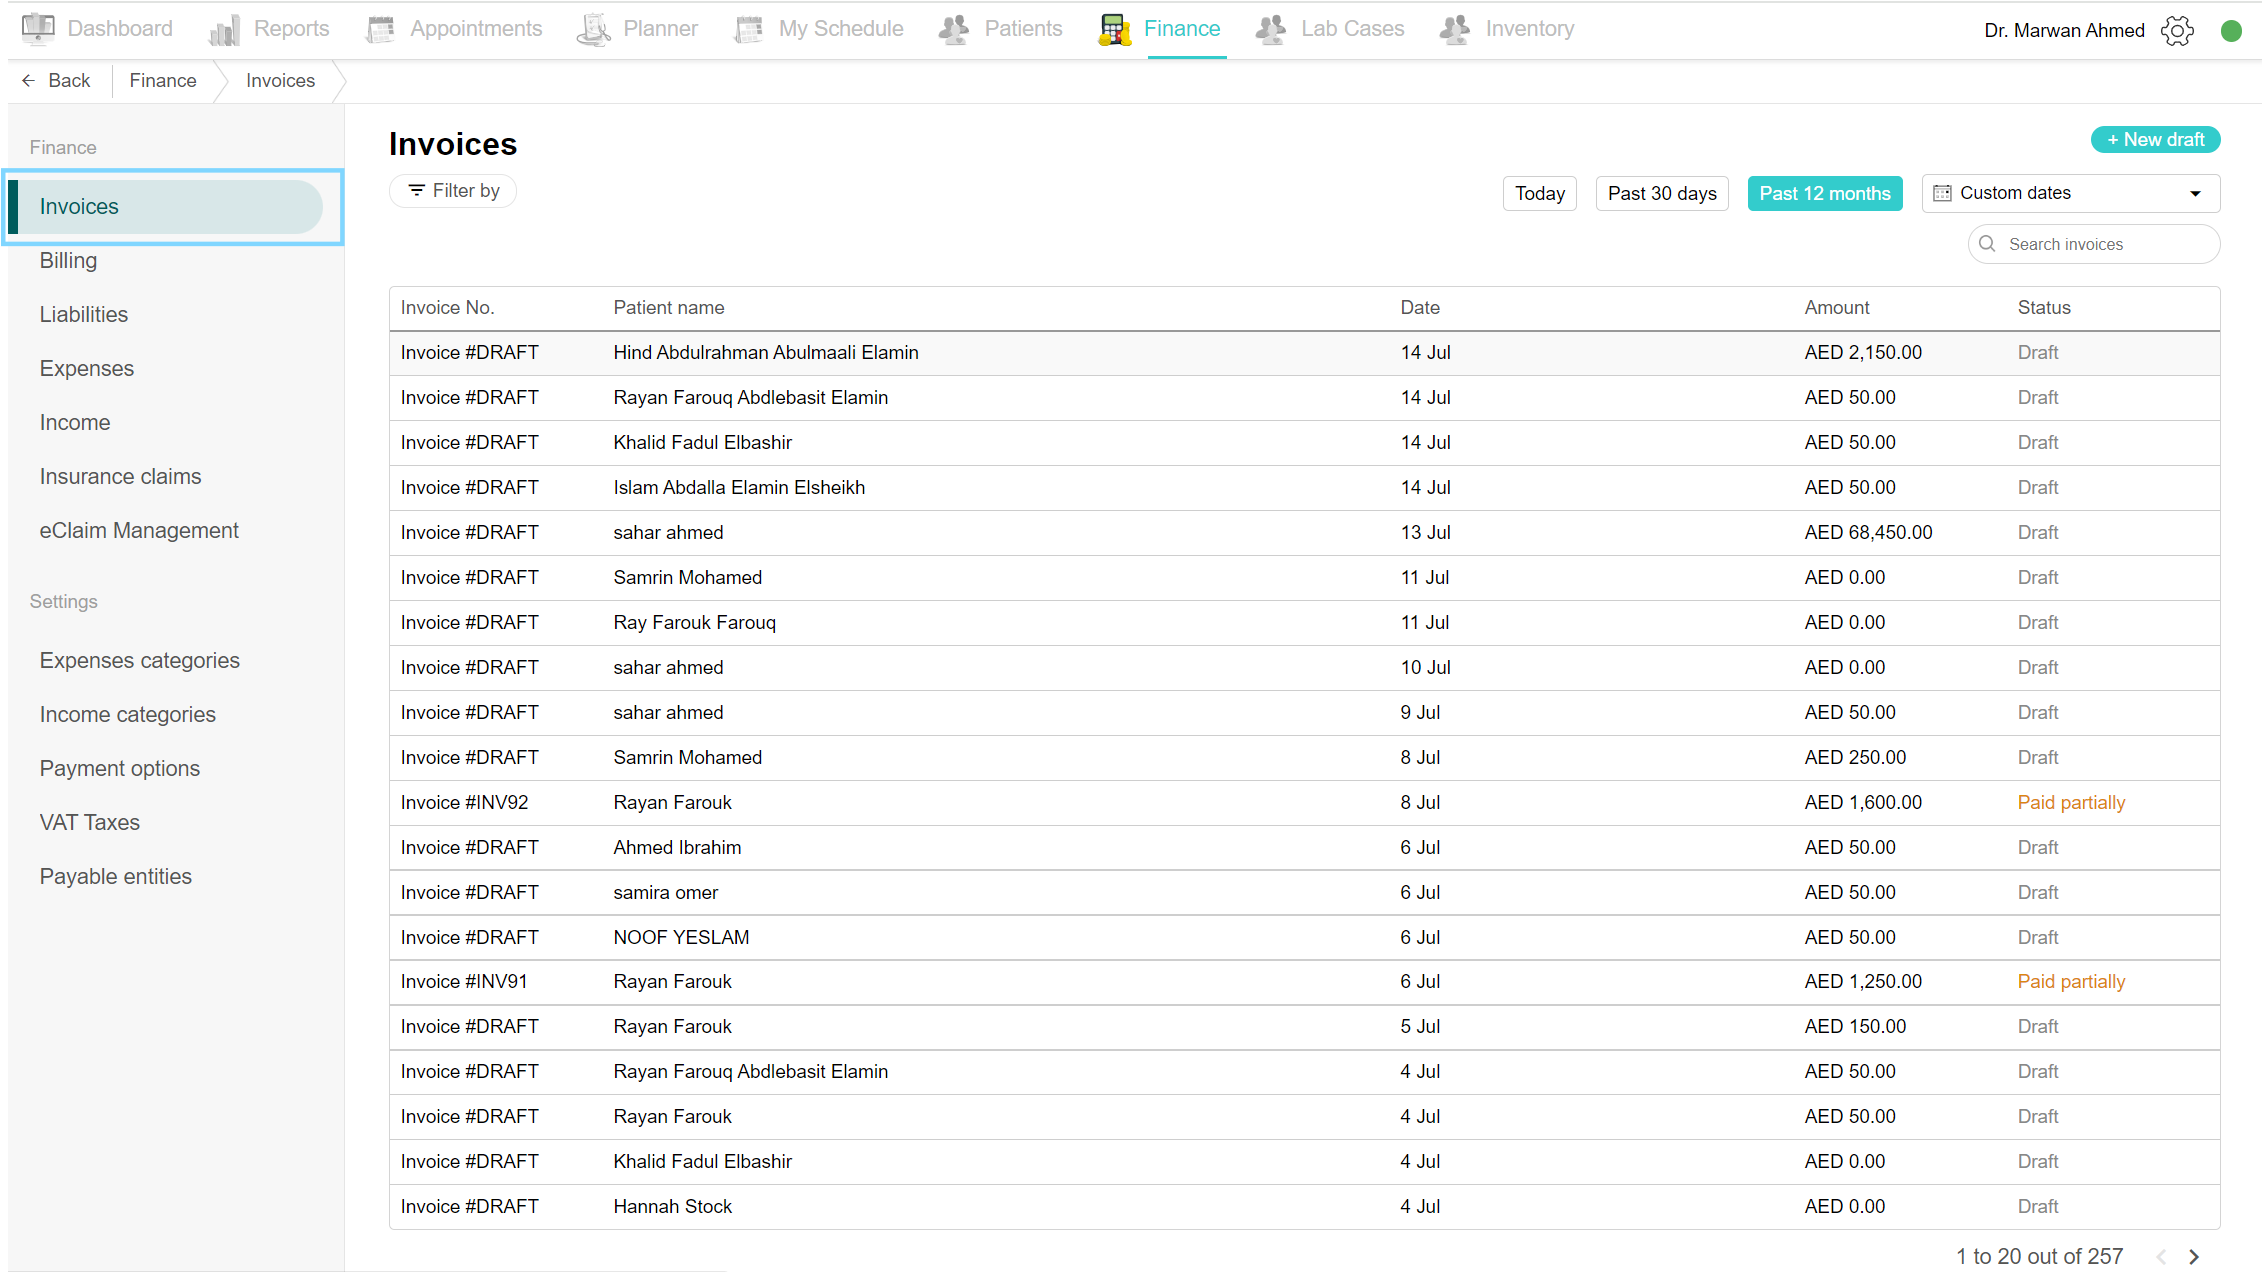
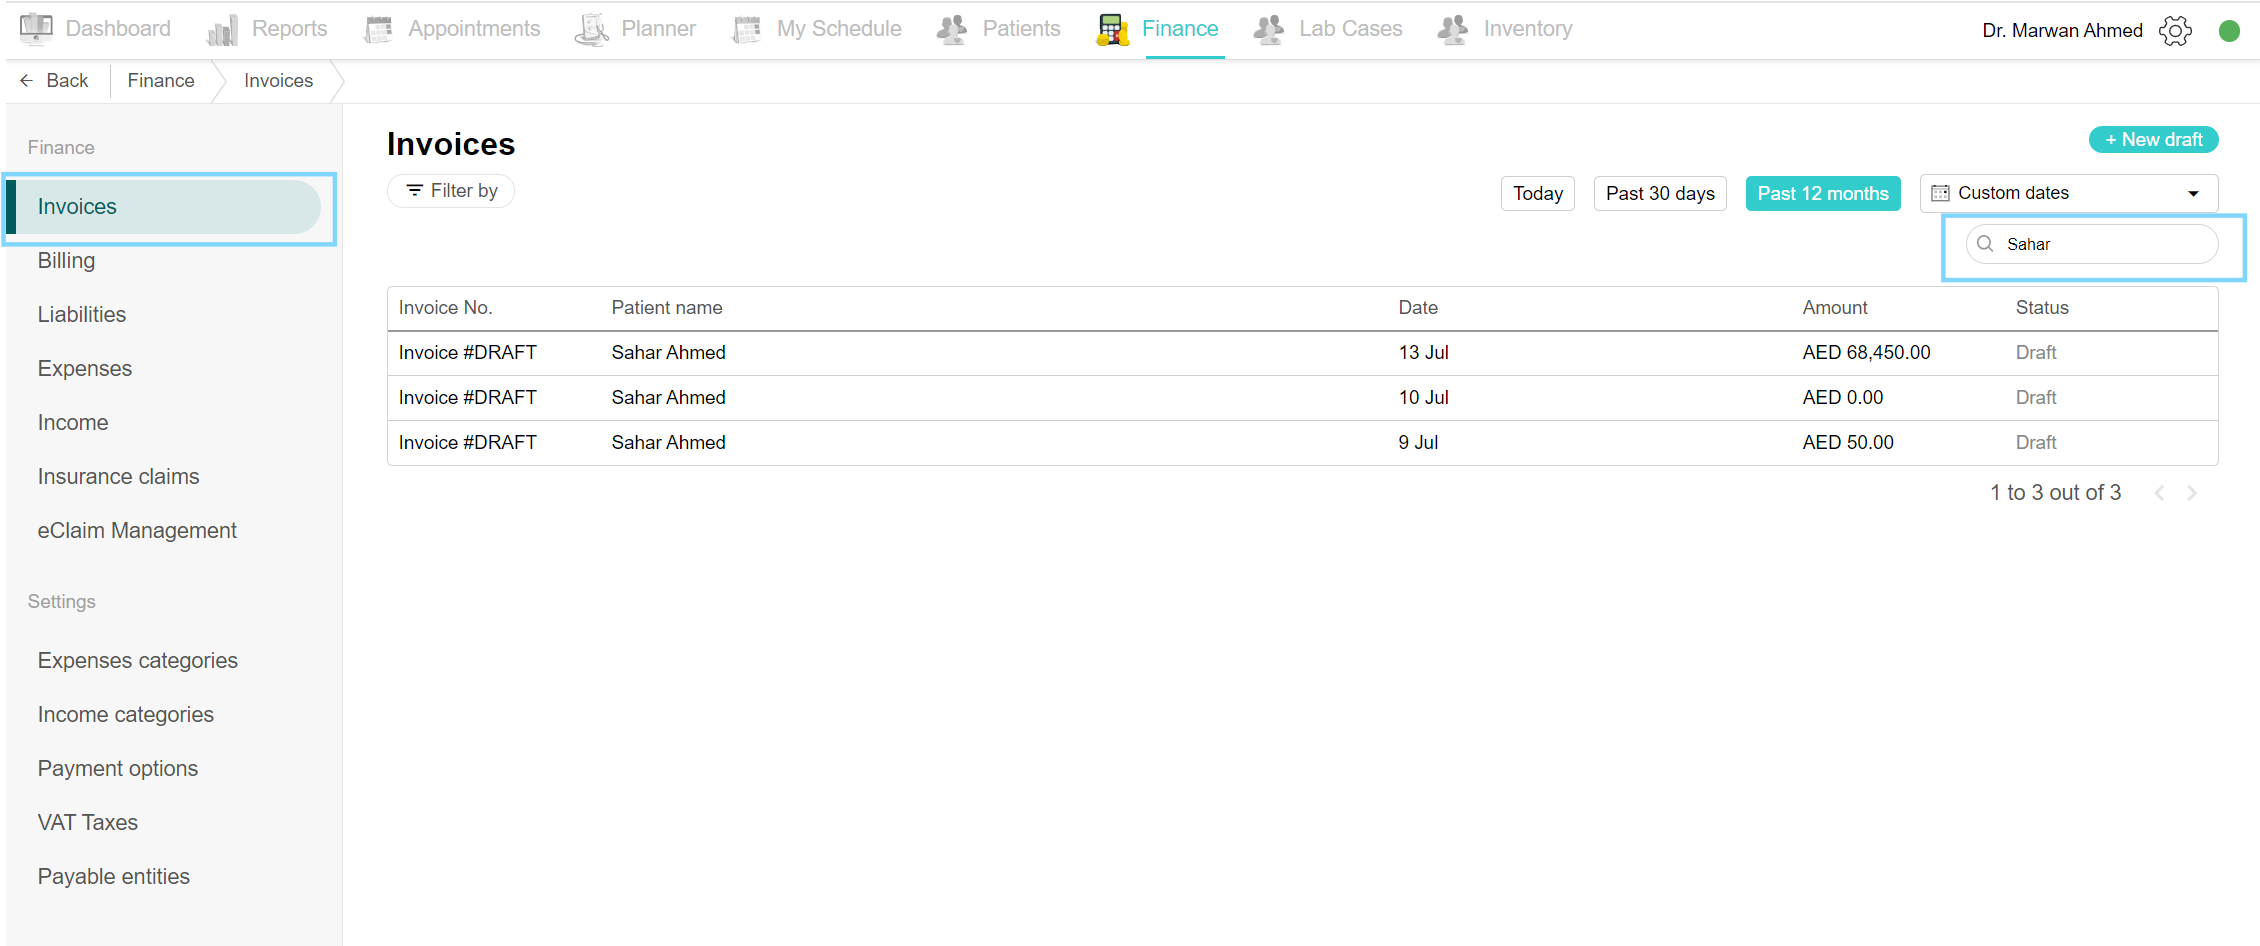
To view the full list of invoices and start creating, editing and cancelling invoices, go to the Finance tab and click on Invoices on the side. The invoices page includes all the invoices created in the system, you can filter the invoices by invoice status or by date, you can search for an invoice using the search field found above the list. The button “New draft” is to add a new invoice draft to the system. All these features will be explained below.
Create a new draft invoice
a. Invoice is created automatically with appointments
Creating a new invoice draft can be done in multiple ways. With every appointment made and treatment added, an invoice draft is automatically created. You can find the invoice by either opening the finance tab or going to the invoice page through the patient profile. Additionally, in the appointment details box, click on “Go to invoice” to view the invoice draft created with the appointment.
b. From the invoices page
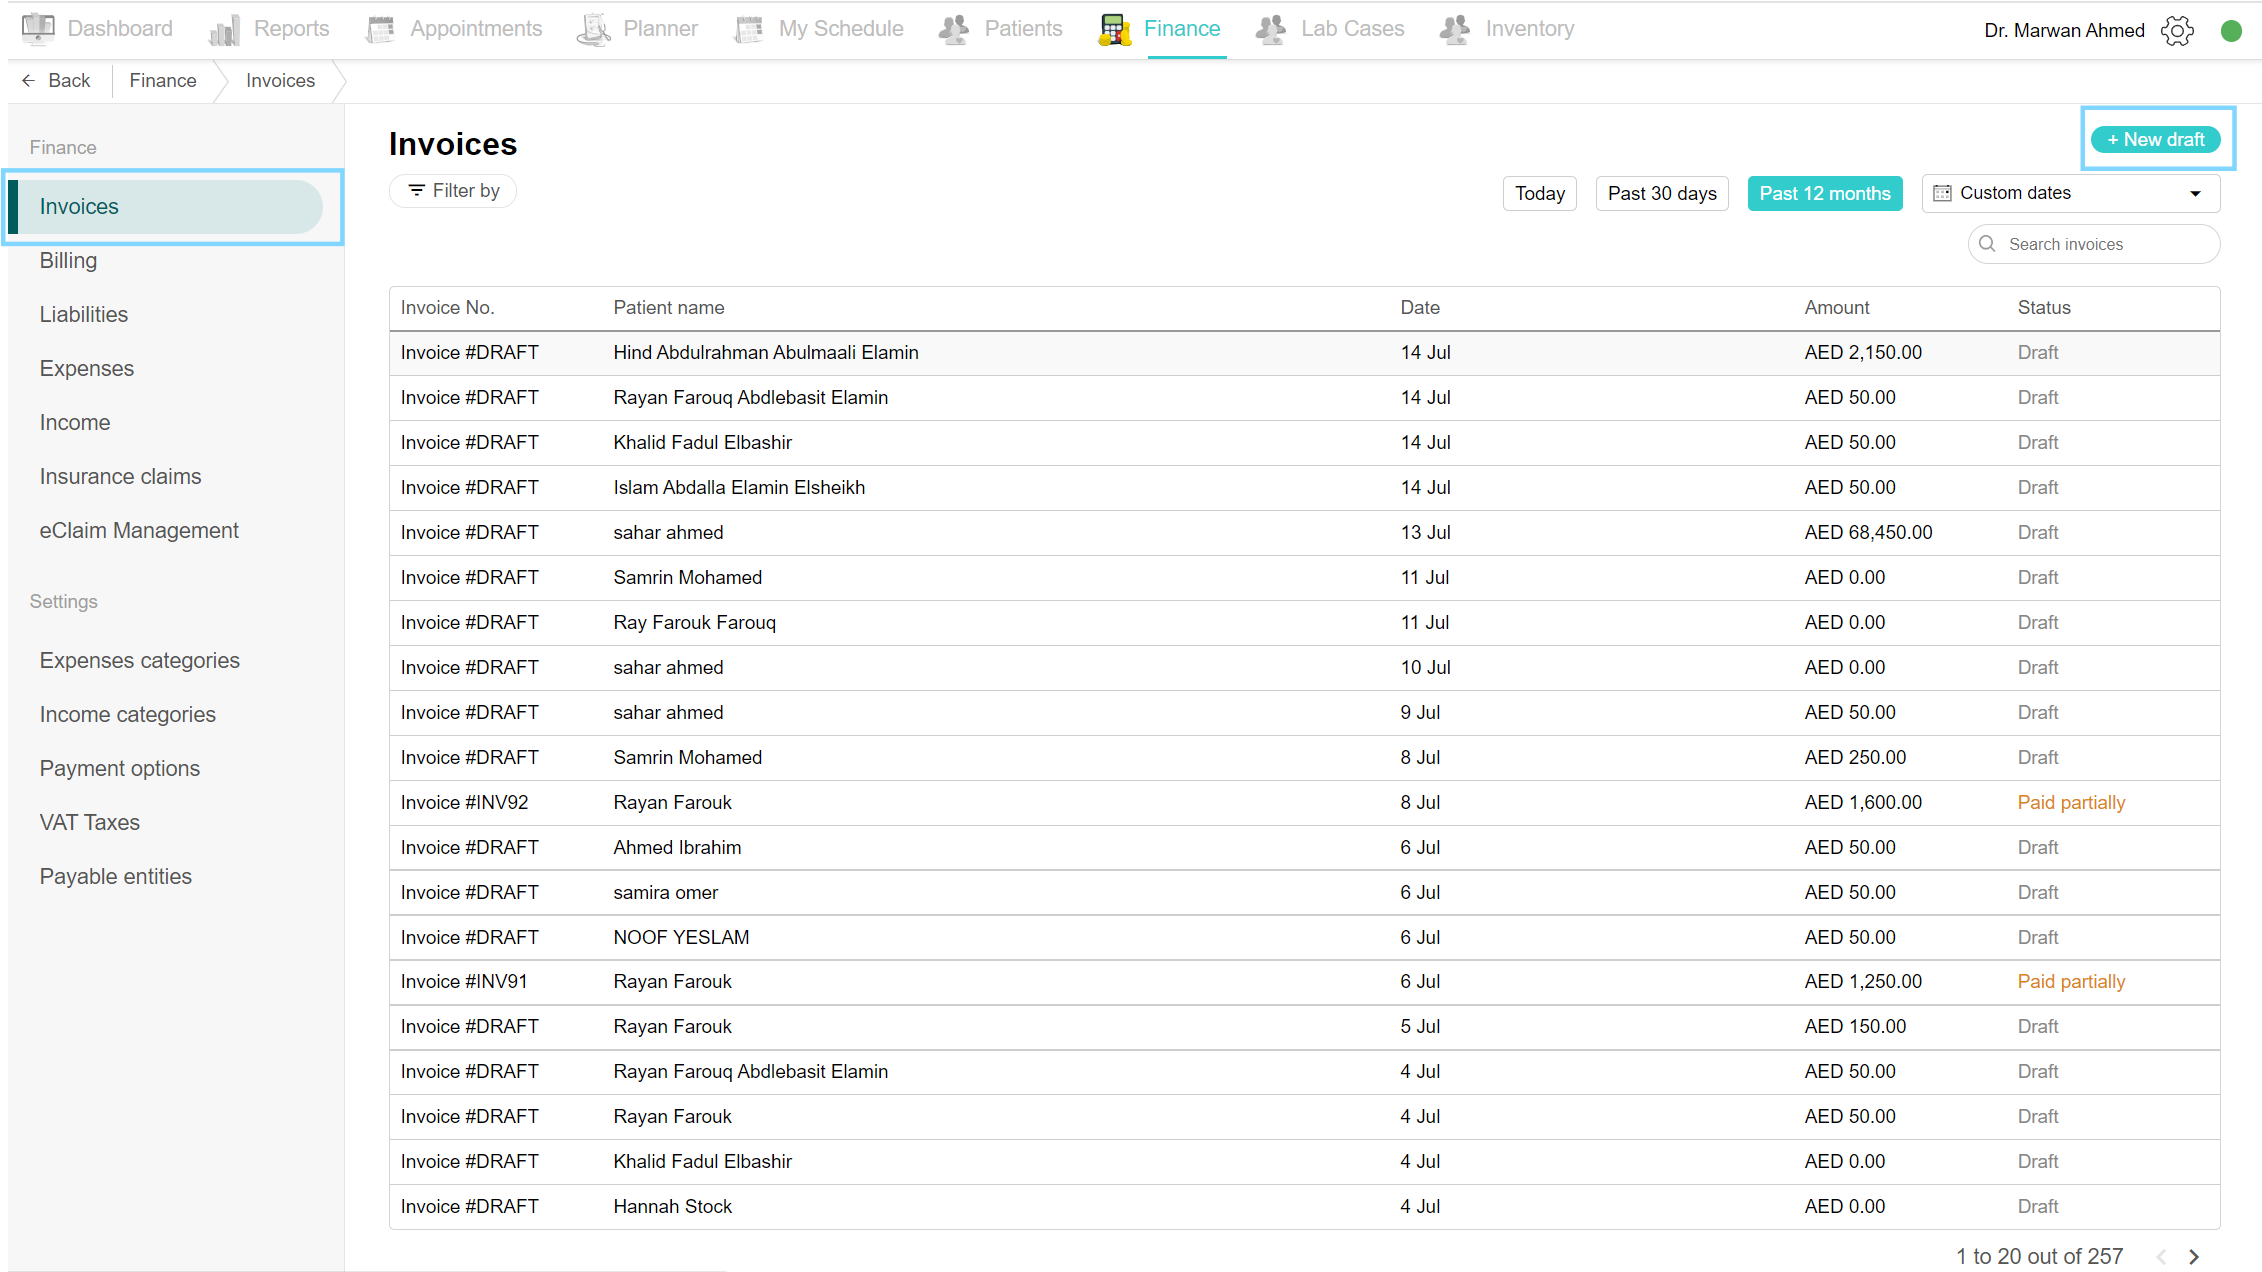
To create a new invoice from the invoice page, go to the invoice page and click on the “New draft” button found at the top of the page. Select the patient from the list, you can search for the patient's name or file number. A new draft opens and a list of all the previous invoices is found on the left.
c. From the patient invoices page
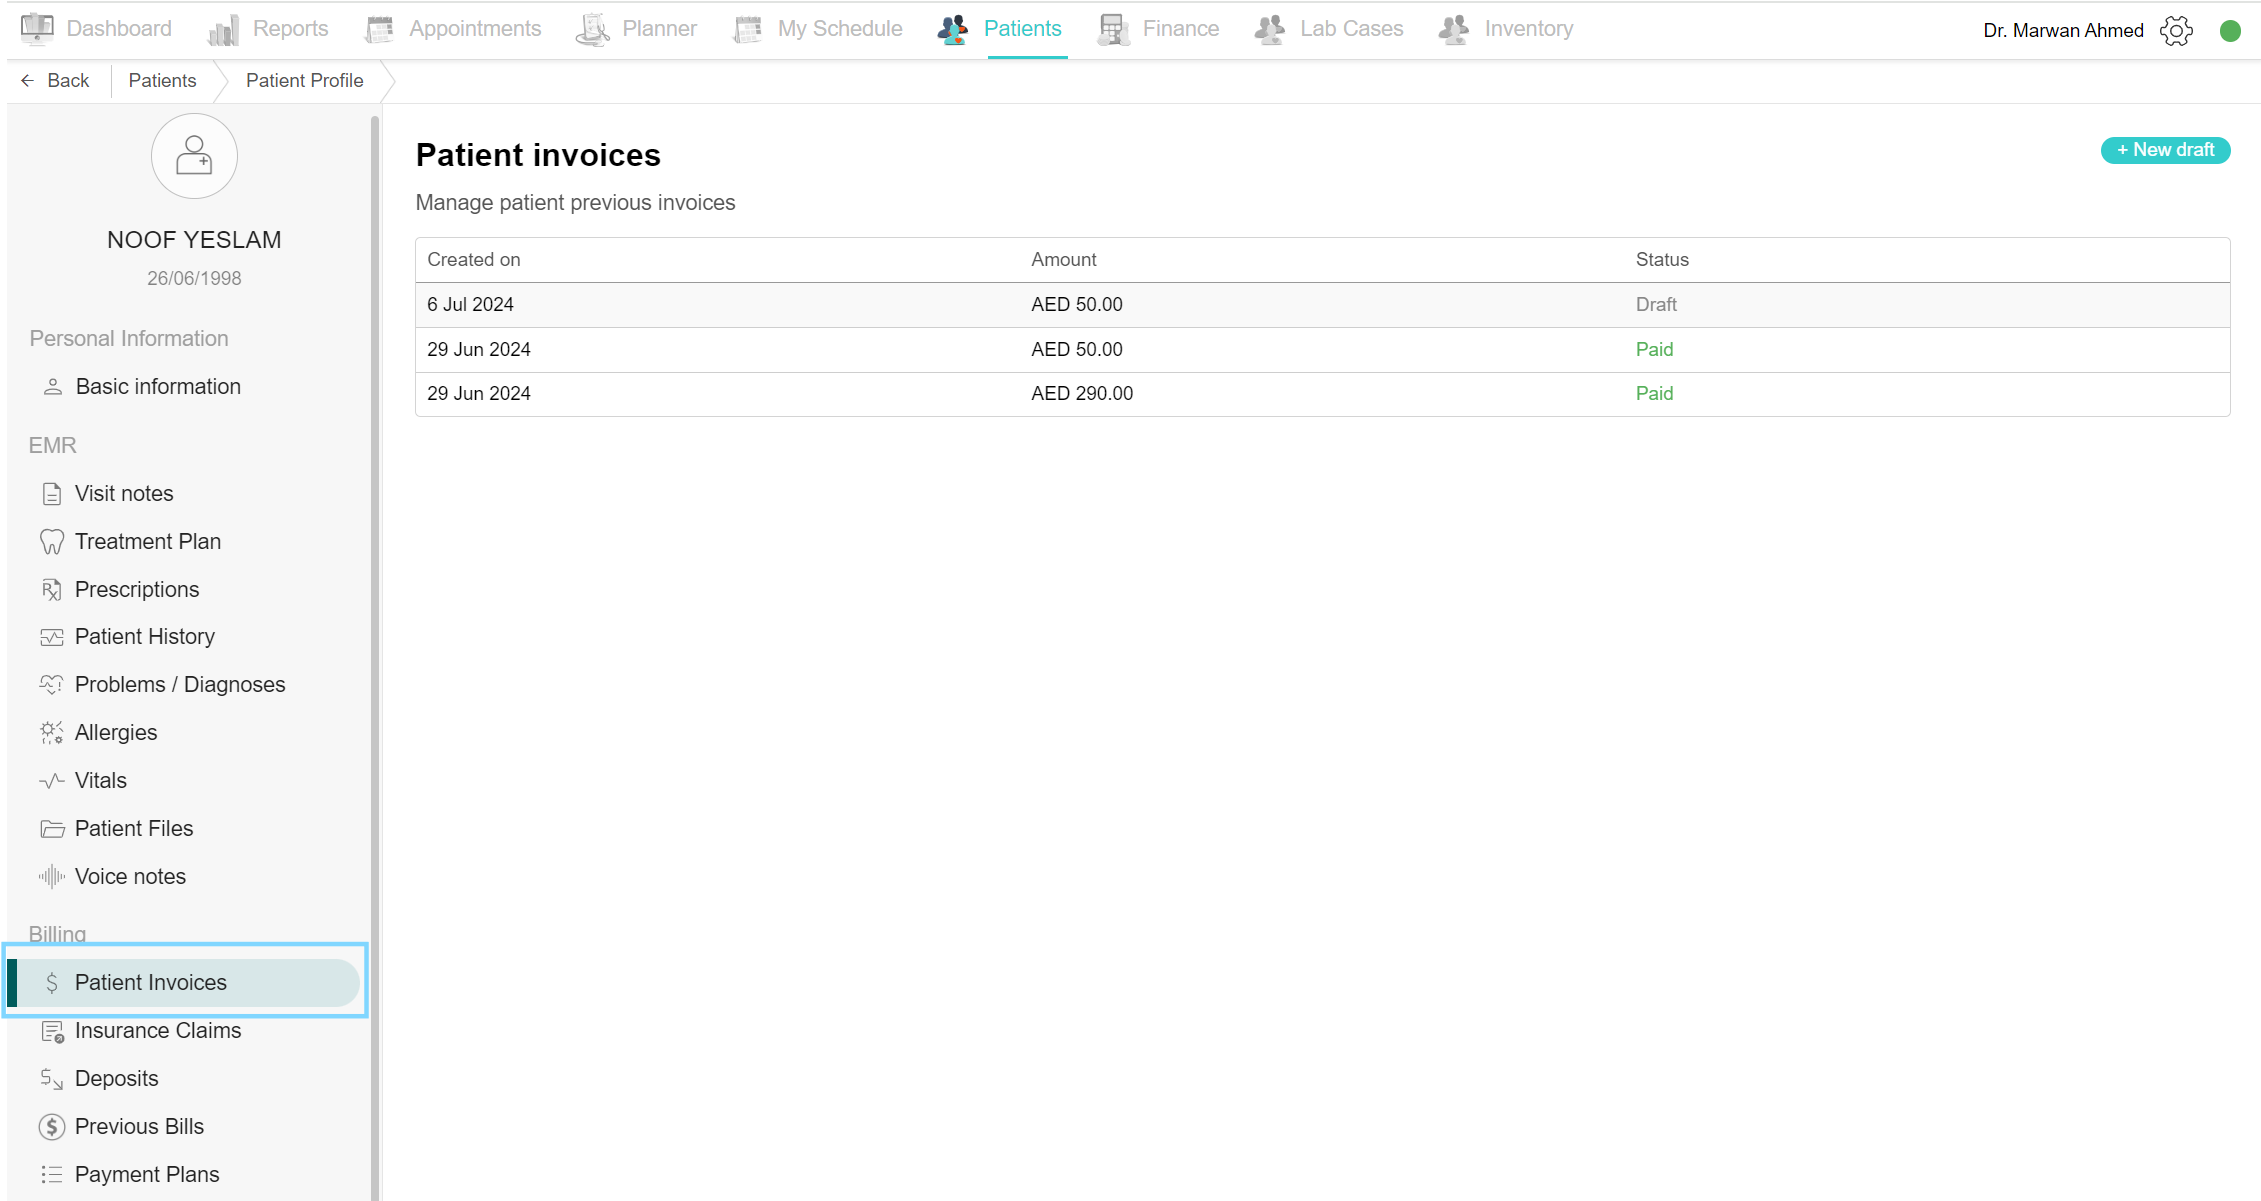
The final way to create an invoice is through the patient profile. Simply go to the patient desired and open their profile. Scroll to the Patient Invoices and click to open the page. At the top of the page is the “New draft” button, click the button and a new draft opens with a list of the previous invoices found on the left side
Search invoices
To search for a specific invoice, go to the Finance page and click on Invoices. In the search field found above the invoice list, start typing to find your desired invoice.
You can search by:
-
patient name,
-
phone number and,
-
Invoice number
Finally, choose the requested invoice from the search.
View filtered patient invoices by date
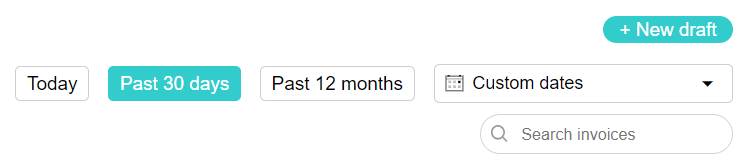
You can filter the patient invoices by several filters. The first is by date. Go to the Finance page and click on Invoices to open. On the top of the page is the date filter. You can filter the invoice list by Today, Past 30 days or Past 12 months. To filter for a specific date period, simply click on the “Custom dates” and choose the time period you wish. To choose one day, just tap on the date twice.
Now all your invoices are listed below.
View filtered patient invoices by invoice status
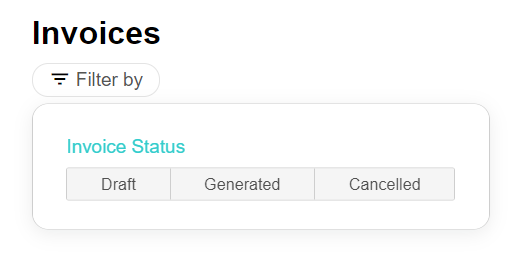
You can filter the patient invoices by several filters. The next is by invoice status. Go to the Finance page and click on Invoices. On the top of the page is a filter by button, when clicked you get to choose between the invoice statuses. Now all the invoices under that status are listed below.
View patient invoice
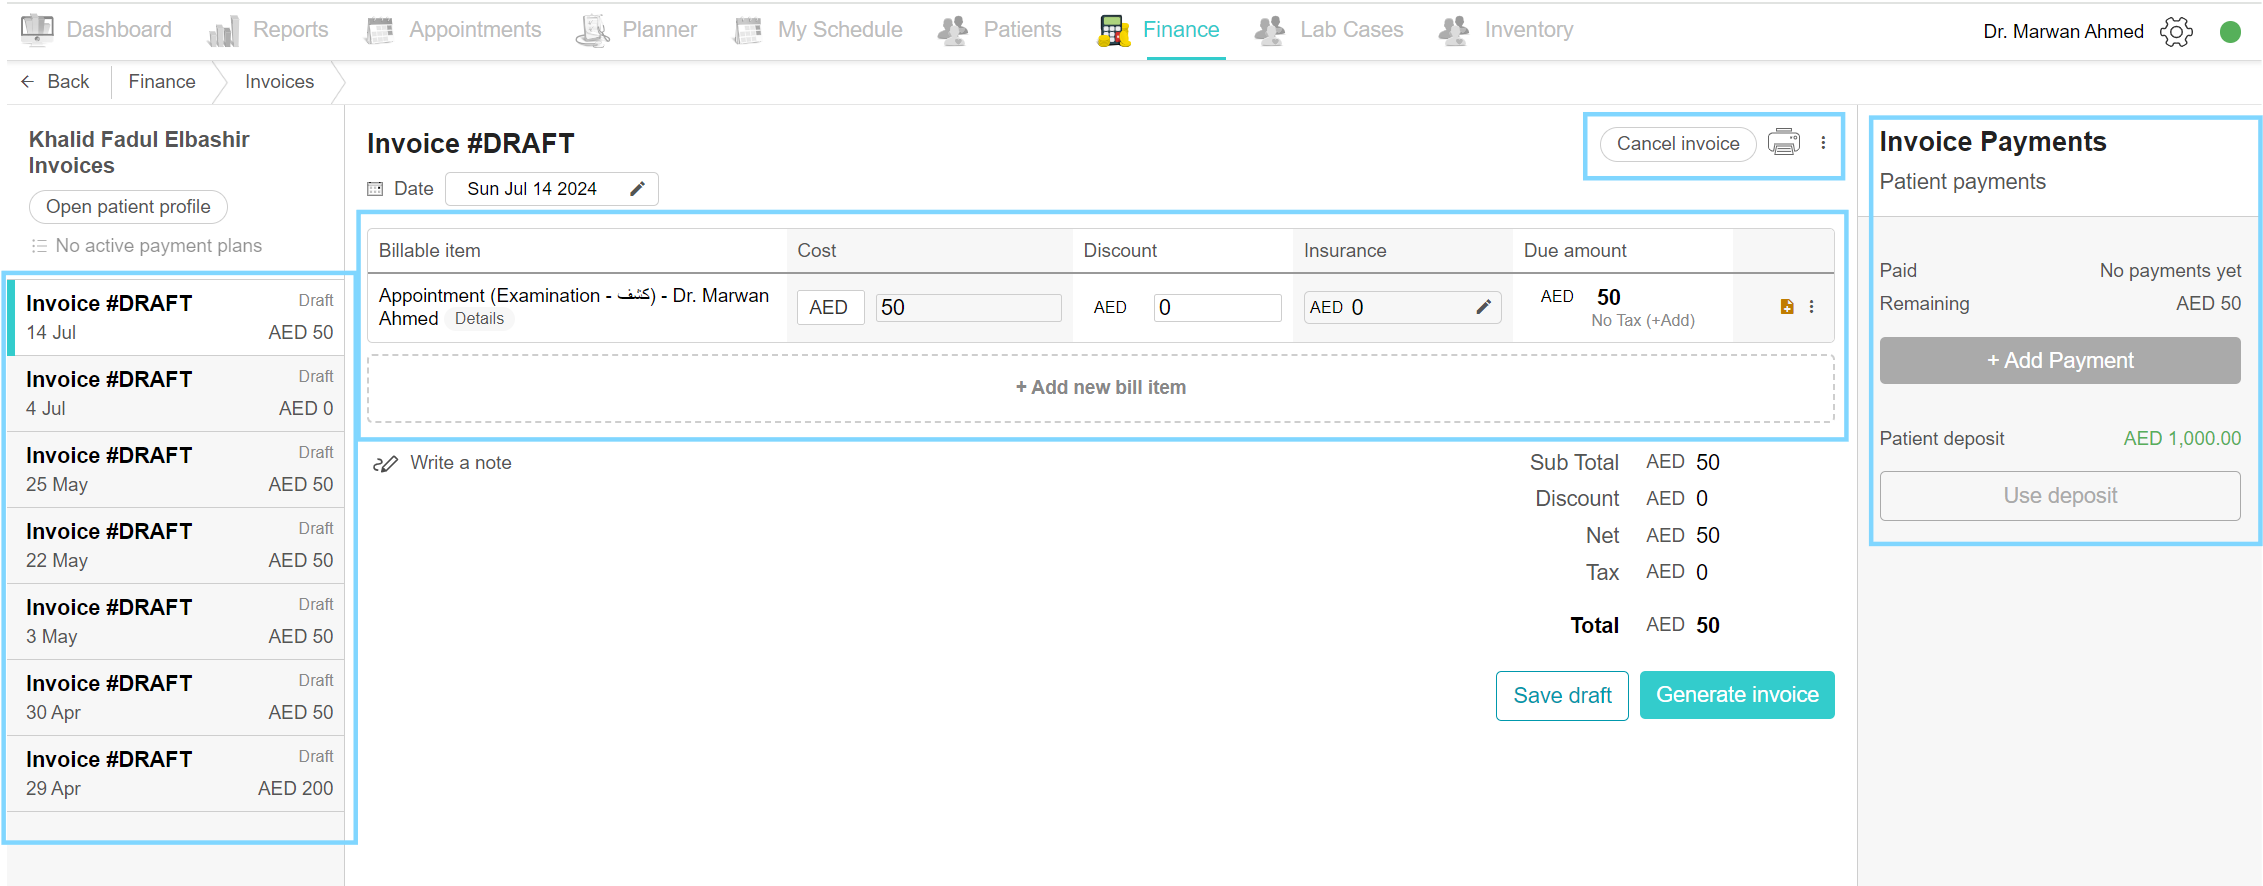
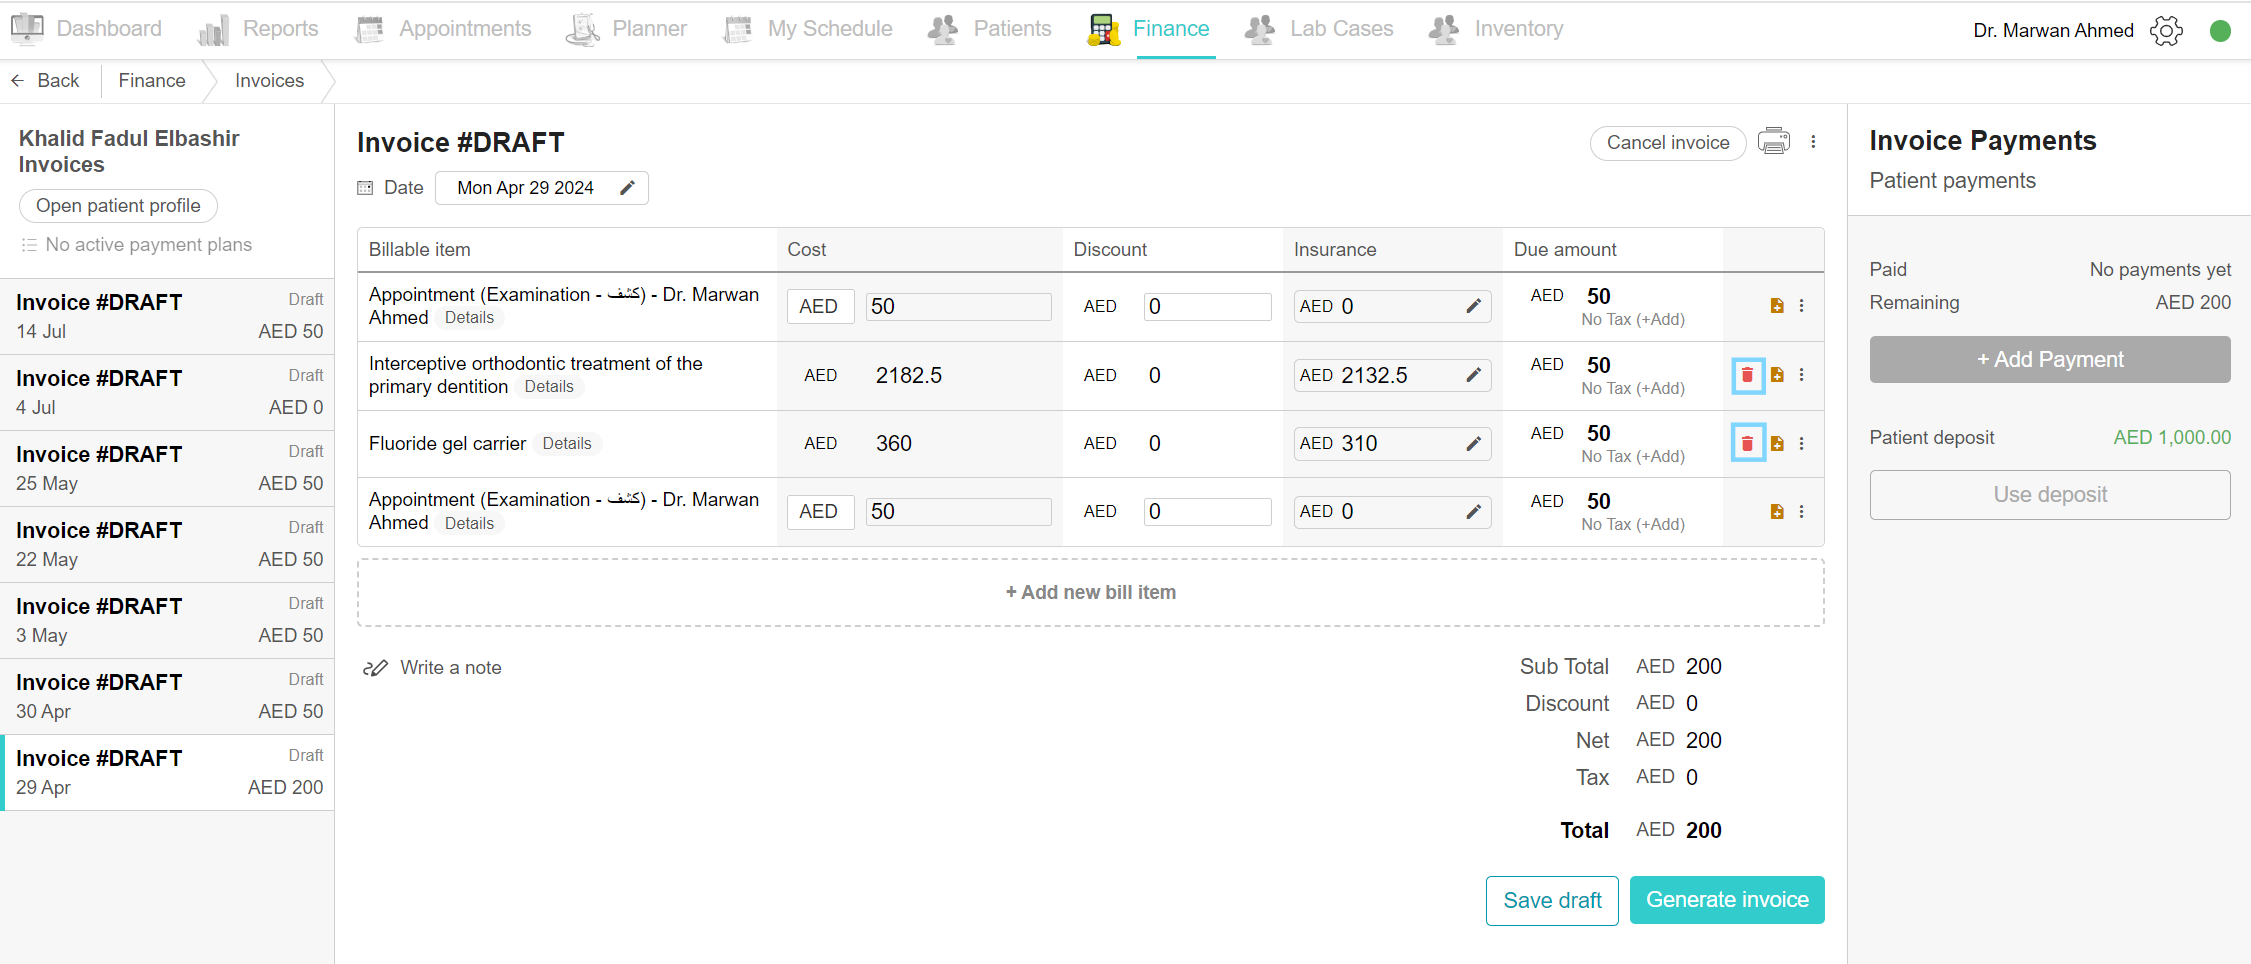
To view each invoice specific to a patient, go to the Finance tab and open Invoices. Either choose an invoice from the list or by searching it, and the patient invoice page is shown. On the left are all the previous invoices of the patient with their status and amount. The right side is the main invoice part, the billable items and the payments on its side. You can print the invoice by clicking the print button at the top.
Edit patient invoice
To edit the invoice, open the desired invoice. An invoice can not be edited if there is a payment added to the invoice. There are 2 scenarios for editing the invoice.
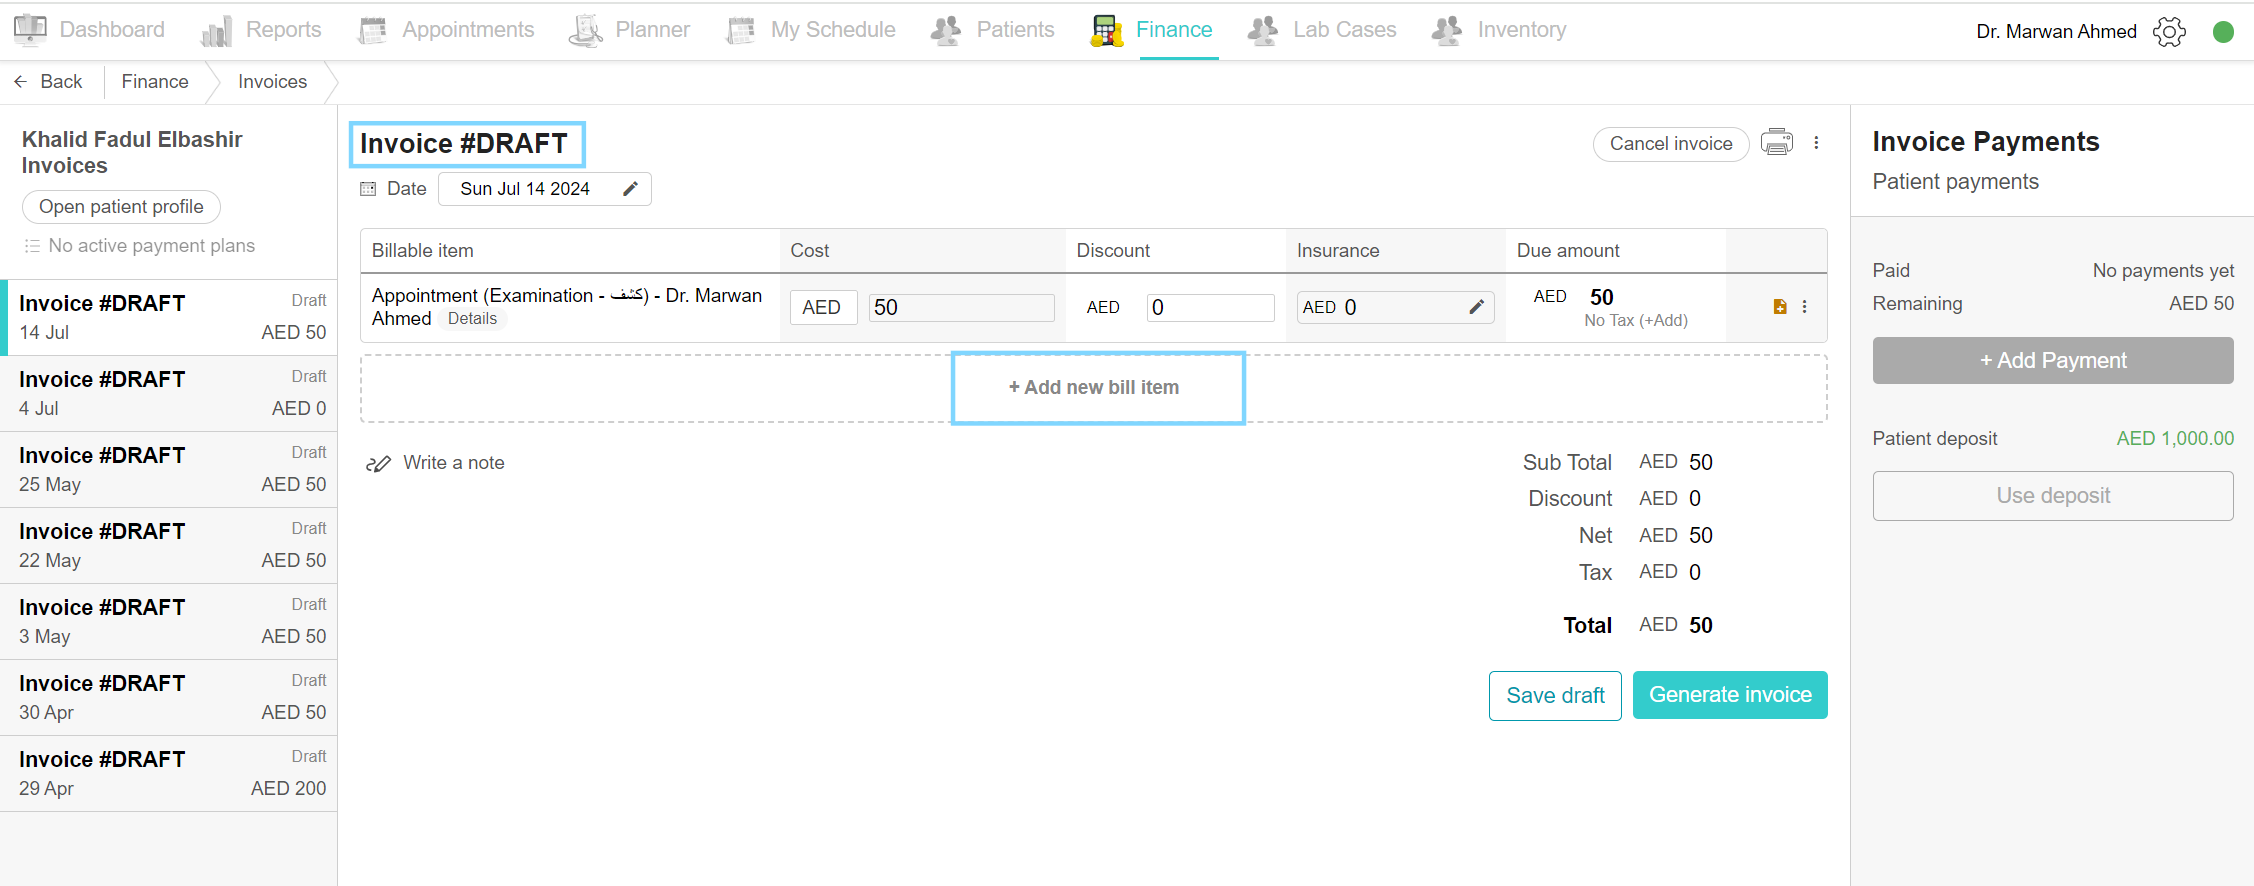
Scenario 1 Draft Invoice:
If the claim status is Draft, you can immediately start editing the invoice. Click on the date calendar to change the date. In the billable items table, you can change the cost and discount by clicking the column and changing the pricing. If the item is under the insurance price, you cannot change the cost, only the insurance price. Click on the delete icon on the item row to delete the item.
To add a new item, click on the “Add new bill item” button. A list of billable items appears, choose the items you wish to add by clicking on the “Add to invoice” button. Finally, click the save draft button.
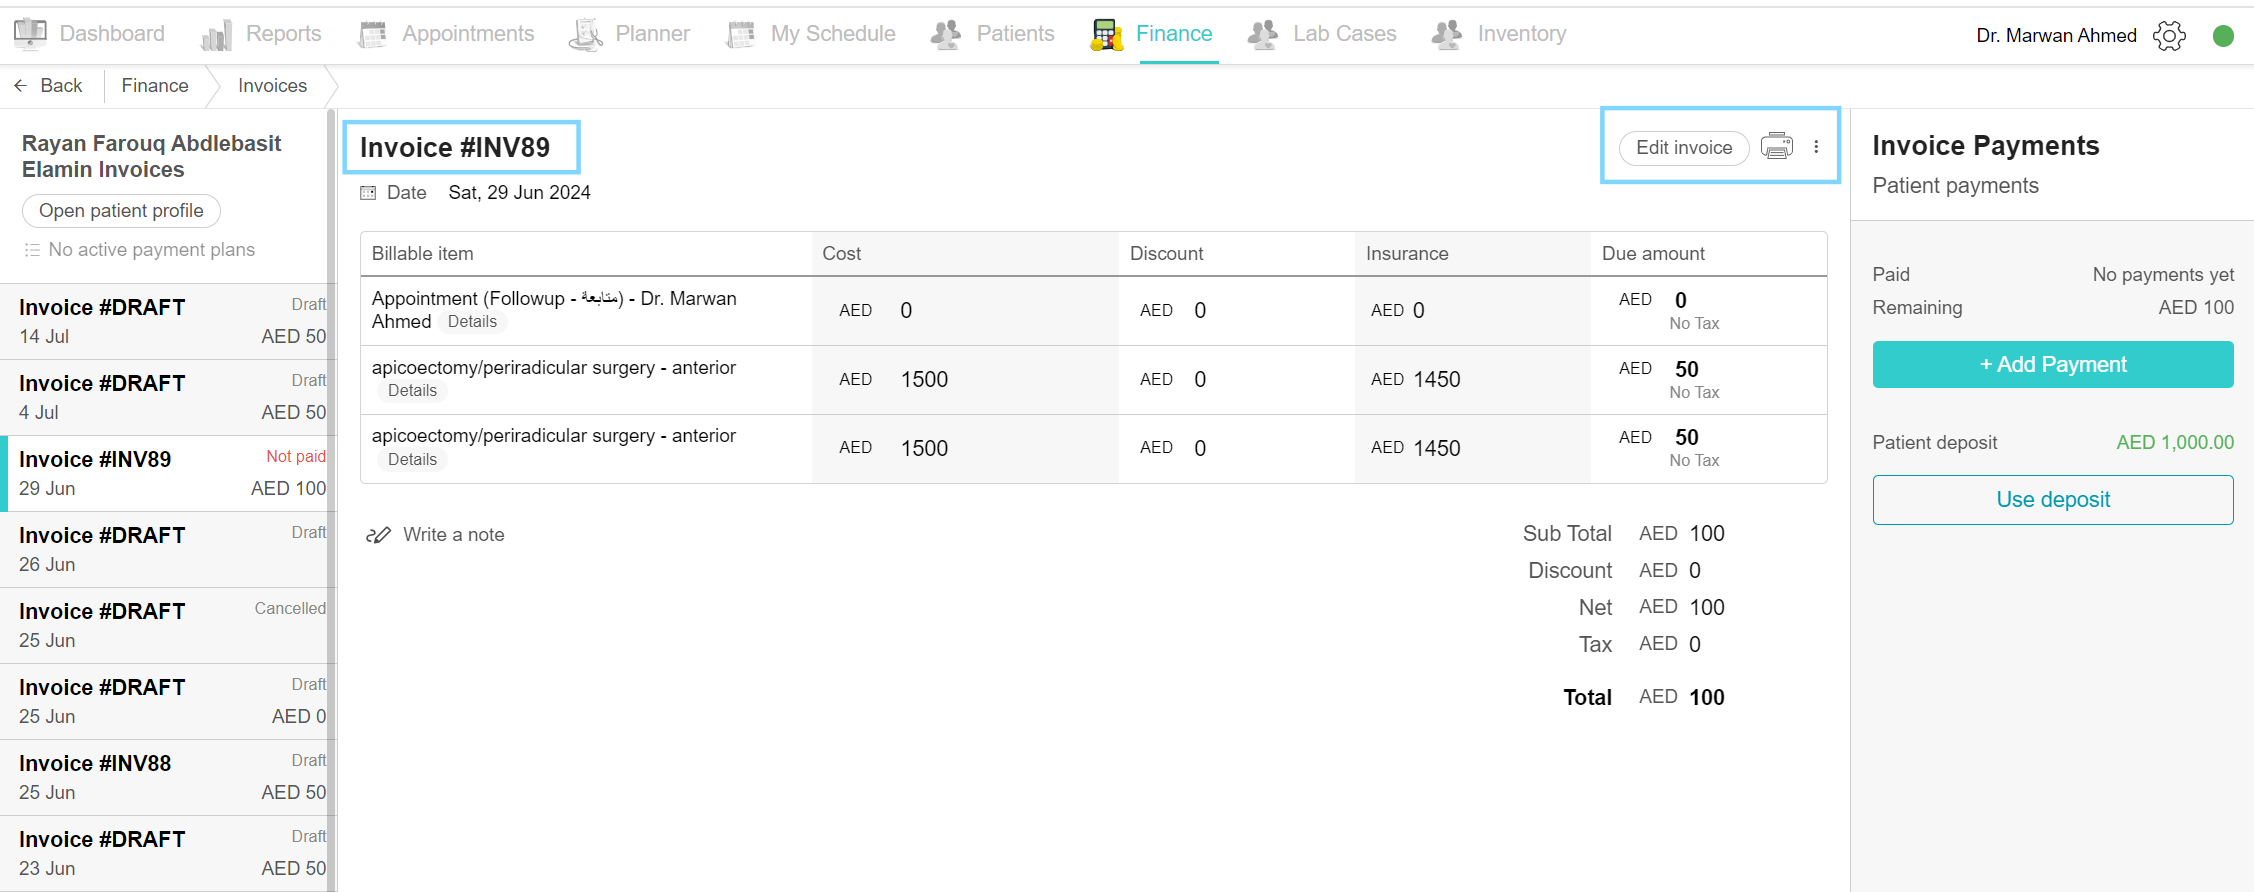
Scenario 2 Generated Invoice:
If the invoice is generated, make sure there isn’t any payment that has been added to the invoice.
If there is any payment, the invoice can’t be edited unless you provide a refund of the payment and click on the edit button. If there isn’t any payment, proceed with the editing. Click on the “Edit invoice” button found on the top of the invoice. Continue with the same steps mentioned above. Click on the date calendar to change the date. In the billable items table, you can change the cost and discount by clicking the column and changing the pricing. If the item is under the insurance price, you cannot change the cost, only the insurance price. Click on the delete icon on the item row to delete the item.
To add a new item, click on the “Add new bill item” button. A list of billable items appears, choose the items you wish to add by clicking on the “Add to invoice” button. Finally, click the save draft button and generate the invoice again.
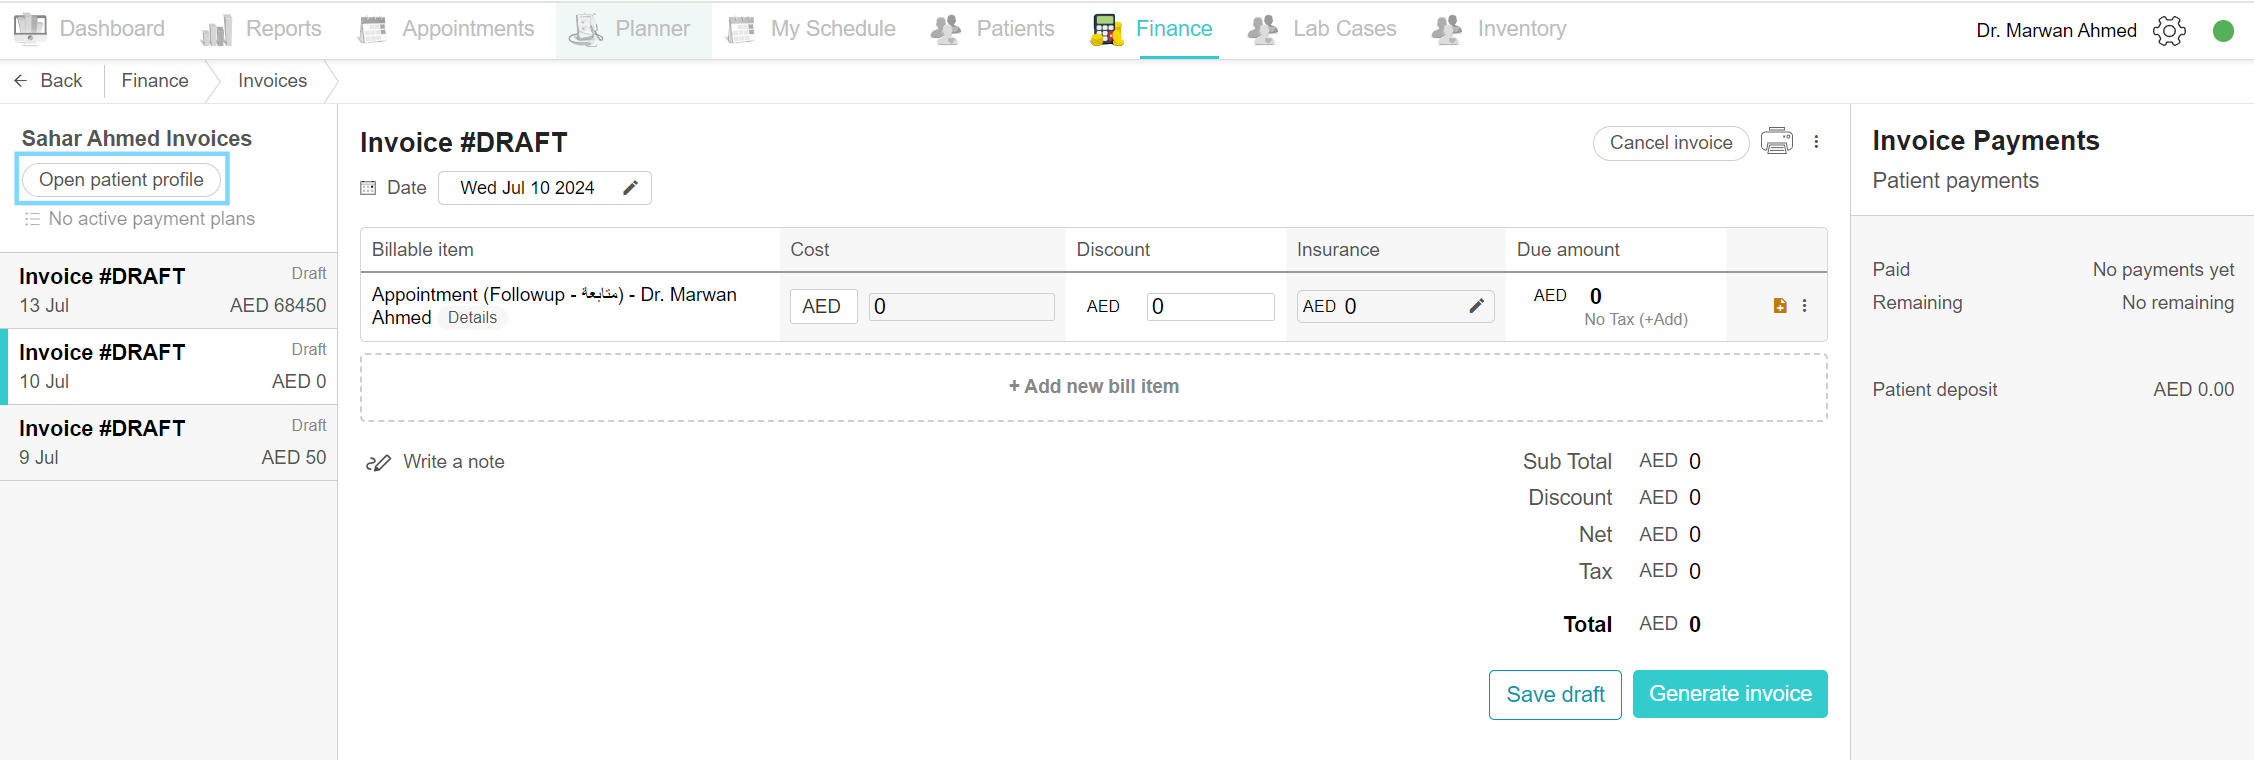
View patient profile from invoice
Click on Finance, and click on the Invoice page. From the list, choose the desired invoice and click it. On the left side of the invoice is the patient’s name for whom this invoice belongs. Underneath the name, you can find the “Open patient profile” button. Click the button and it will take you to the patient profile, from there you can view the patient information and view their invoices.
Select an invoice from the patient’s invoice list
After opening the patient profile, scroll down to the Billing section, and click on Patient Invoices. A list of invoices is shown, the list includes the invoice creation date, the amount and the status of the invoice. Select the desired invoice from the list and make the necessary changes.

Add new bill item to invoice
To add a new bill item, open the Finance tab and click on the Invoice page. Click on the desired invoice. Click on the “Add new bill item” button, and a list of billable items appear, choose the items you wish to add by clicking on the “Add to invoice” button. If there is a bill item such as toothpaste, gel or anything else, click on the bill item drop-down list and choose one. Once it is clicked, it gets added to the invoice, now you can edit the item as you wish.
Add a note to bill item
To add a note, you can add it to the bill item or the whole invoice.
To add a note to the bill item, open the Finance tab and open the desired invoice. Move to the bill item and click on the “Add note” button on the item row. Write the note and click on the “Save draft” button.
To add a note to the invoice, open the desired invoice. At the bottom of the billable items, click on Write a note, write your necessary information to the notebook and click Save. Now click on the “Save draft” button.

Delete bill item
To delete an item, open the Finance tab and open the desired invoice. On the billable item, find the delete icon. Visit types such as Examination, Followups and any other visit types can’t be deleted from invoices, only treatments and bill items can be deleted. In the item row, you can find the delete icon and click on it. A confirmation box appears and click the “Delete” button. After deleting it, you can find it in the “Add new bill item” underneath the bill items.
Cancel Invoice
To cancel any invoice, open the Finance tab, click the invoice page and open the desired invoice. Generated invoices can’t be cancelled. On invoices with the draft status, at the top of the invoice is a “Cancel invoice” button. A confirmation box appears and click on cancel invoice. The cancelled invoice is removed from the list but it can be found by filtering the invoice list by status. Click to filter by cancelled status, and you can find the recent cancelled invoice.

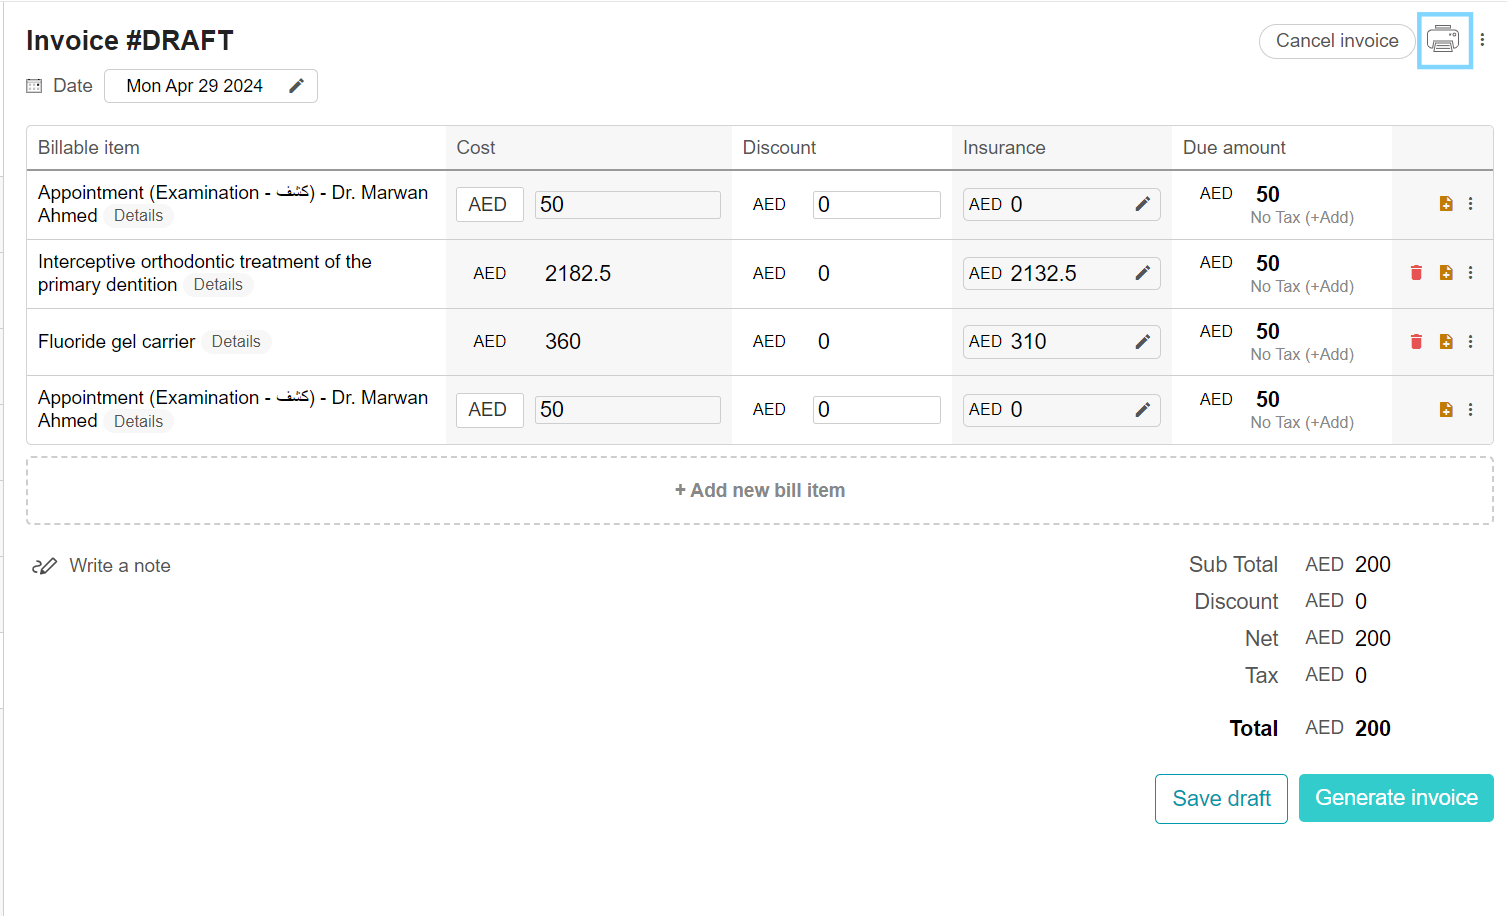
Print invoice
When a patient requests a copy of the invoice, click the desired invoice. You can either open the invoice from the appointment details box, the patient profile or from the invoice page. Open the invoice and at the top is the print icon. When you print the invoice, the template includes a header. The invoice header includes the clinic’s data, such as the clinic’s name, and logo and the patient’s data such as patient name and file number. The body of the invoice includes the Tax Registration Number – TRN- and the invoice details with the payment records. You can now print the invoice and hand it to the patient.
You can set the invoice layout to your liking. In the admin area, under invoice settings, you can set the invoice header, footer and even the prefix.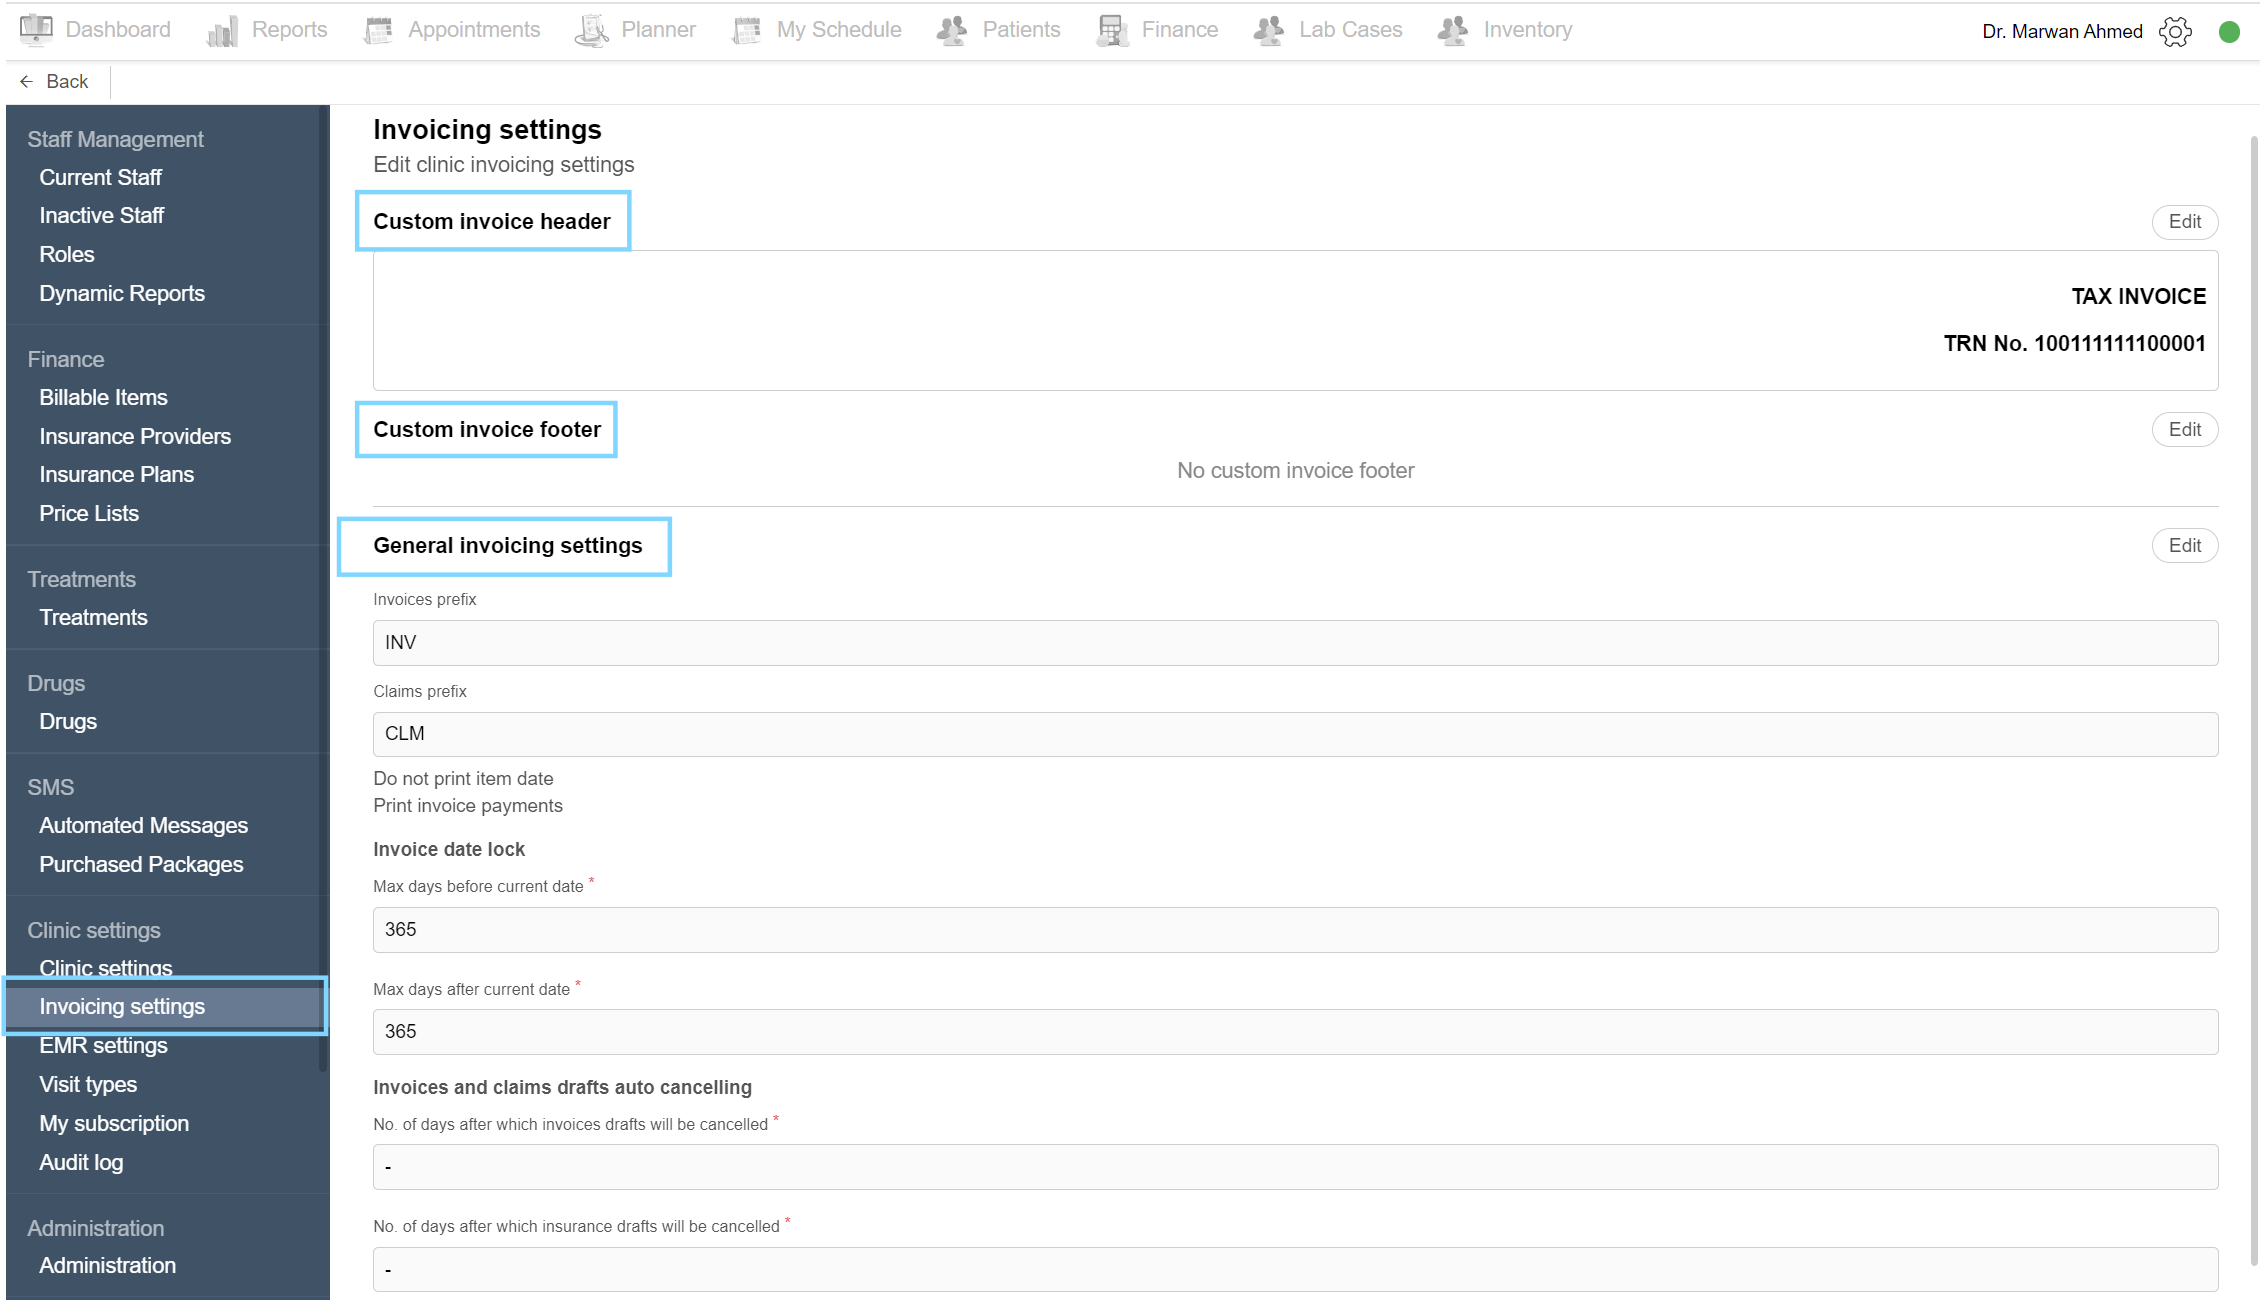
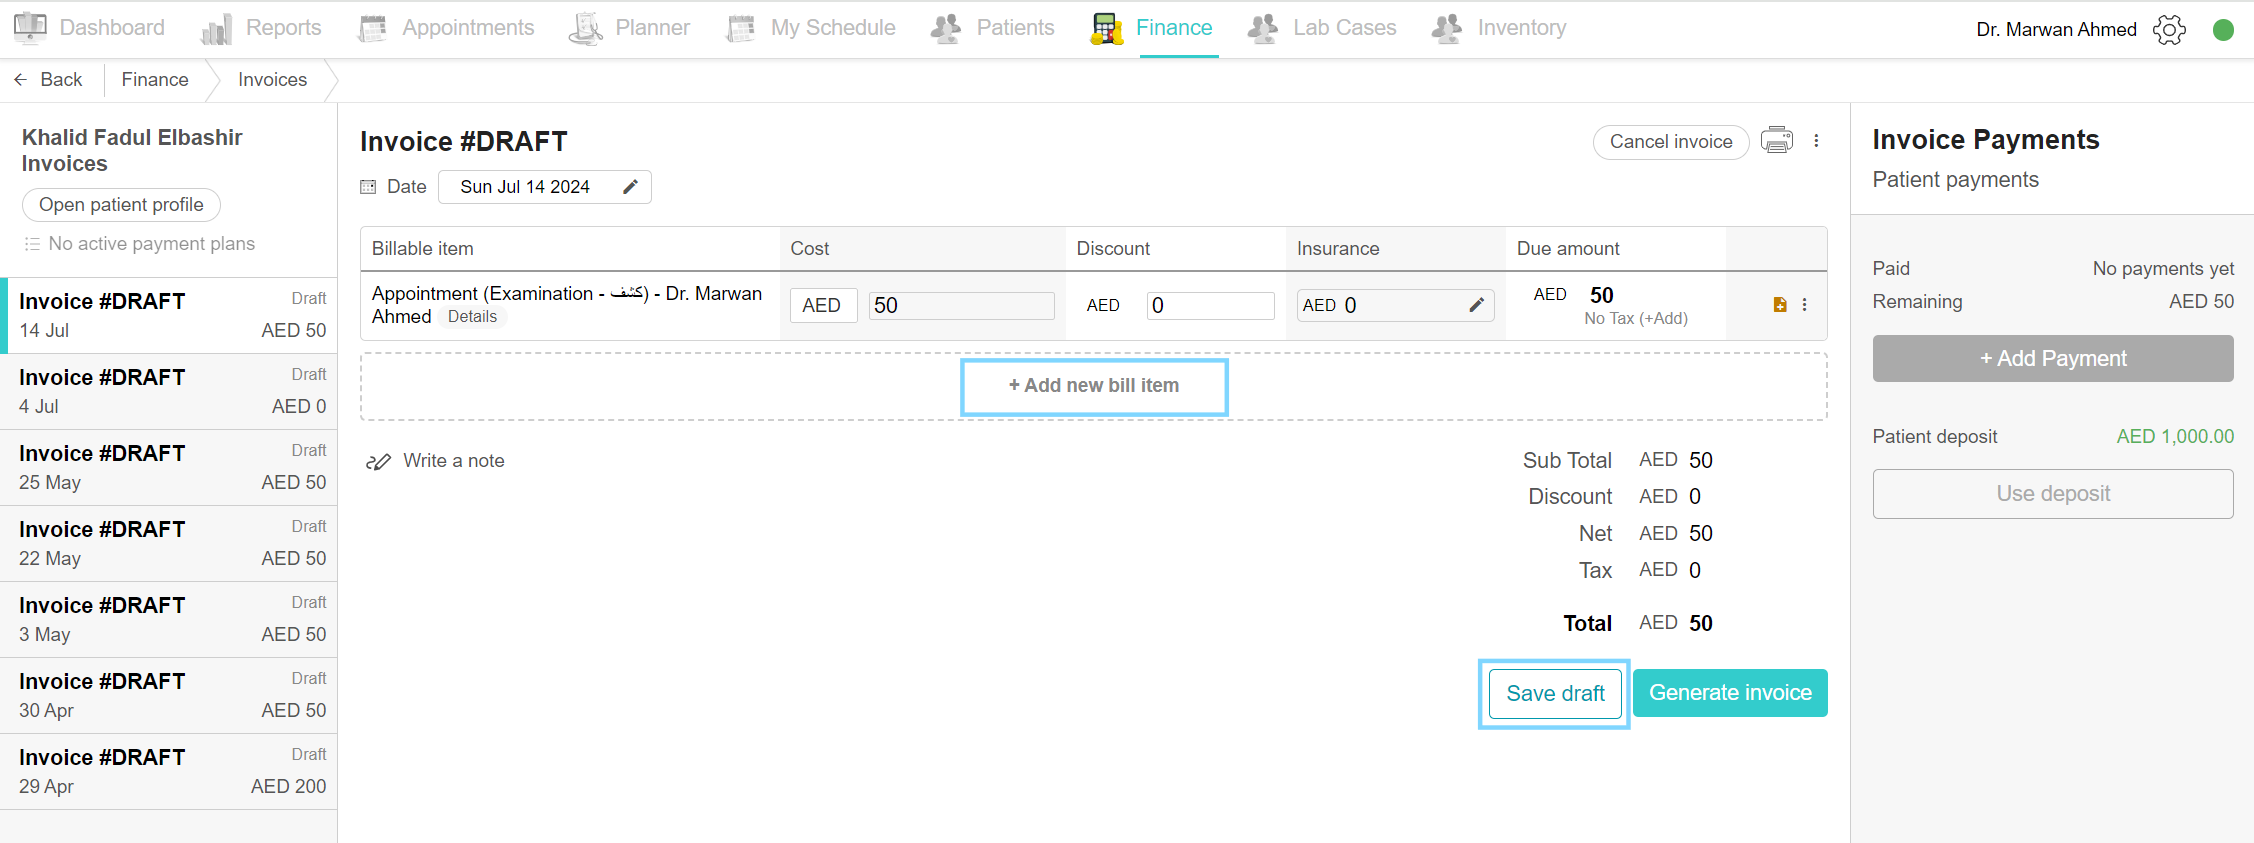
Generate invoice
Open the Finance tab and click on the Invoice page. Choose the desired draft invoice from the list. You can also open the invoice from the appointment details box or the patient profit. When you wish to add the payment from the patient, click on the “Generate invoice” button. When the invoice is generated it gets assigned an invoice number, you can search the invoice with the invoice number. Now the status is generated, and the payment can be made.
Add patient deposit
In the case, that the patient wants to add a deposit to their file for future payments, and not have to pay in every visit, we have designed the patient deposit feature. You can add the deposit in 2 ways.
Way 1: Add patient deposit through the patient profile.
Open the patient profile through various ways, either from the invoice page, the Patients tab or the appointment details box. On the patient tab, scroll down to Deposits to view the patient deposits. Click on the “Add new payment/refund” button to add a new deposit. In the new payment box, choose the payment method from the drop-down list and write the amount the patient paid you and any notes you wish. Click confirm and you can use the deposit in the invoices.
Way 2: Add patient deposit through the invoices.
To add a deposit through the invoice, just open the Finance tab and click on the desired invoice. When you open the invoice, click on the three-doted icon, and choose “Add patient deposit” from the options. In the new payment box, choose the payment method from the drop-down list and write the amount the patient paid you and any notes you wish. Click confirm and you can use the deposit in the invoices.
View audit log
The audit log shows a list of all the events made for the invoice. Open the invoice, click on the three-doted icon, and choose “View audit log” from the options. An audit log page opens and it includes the timestamp of the action made, the staff member or account responsible for this action, the event type and description and the Subject. Click on View Details to view more information on the event.
Note: Only Admins can view the audit log.

Edit generated invoice
Important note to remember is any invoice with non-zero payment cannot be edited.
If the invoice has no payments, you can now edit the invoice. Open the invoice, and click on the “Edit invoice” button. A confirmation box appears. You can edit the invoice by changing the date, altering the billable item table, and adding a new bill item. Click on the delete icon on the item row to delete the item.
To add a new item, click on the “Add new bill item” button. A list of billable items appears, choose the items you wish to add by clicking on the “Add to invoice” button. Finally, click the save draft button.
Copy billable item to another invoice
In some cases, a bill item is needed to be copied to another invoice.
Use Case: When a patient regularly purchases the same services or products, copying bill items saves time and ensures consistency in invoicing.
To do so, click on the Finance tab, click on the Invoice page and choose the desired invoice. In the bill item row, click on the three-dot option and choose “Copy to another invoice” from the options. A list of the patient’s invoices shows up, select the target invoice to send to the bill item. The target invoice opens and the copied bill item is added to the invoice.
Move billable item to another invoice
In some cases, a bill item is needed to be moved to another invoice.
Use case: When a patient decides to have a service or product be paid with another bill item that is in another invoice.
To do so, click on the Finance tab, click on the Invoice page and choose the desired invoice. In the bill item row, click on the three-dot option and choose “Move to another invoice” from the options. A list of the patient’s invoices shows up, select the target invoice to send to the bill item. The target invoice opens and the item is moved to the new invoice.
Add payment or refund to the invoice
After generating the invoice you are now ready to collect the payment from the patient. Open the desired invoice, on the right side of the invoice is the title “Invoice Payments”. This shows a record of the patient’s payments to the invoice. Check the Paid and Remaining amounts displayed. Check the patient deposit under the payment section.
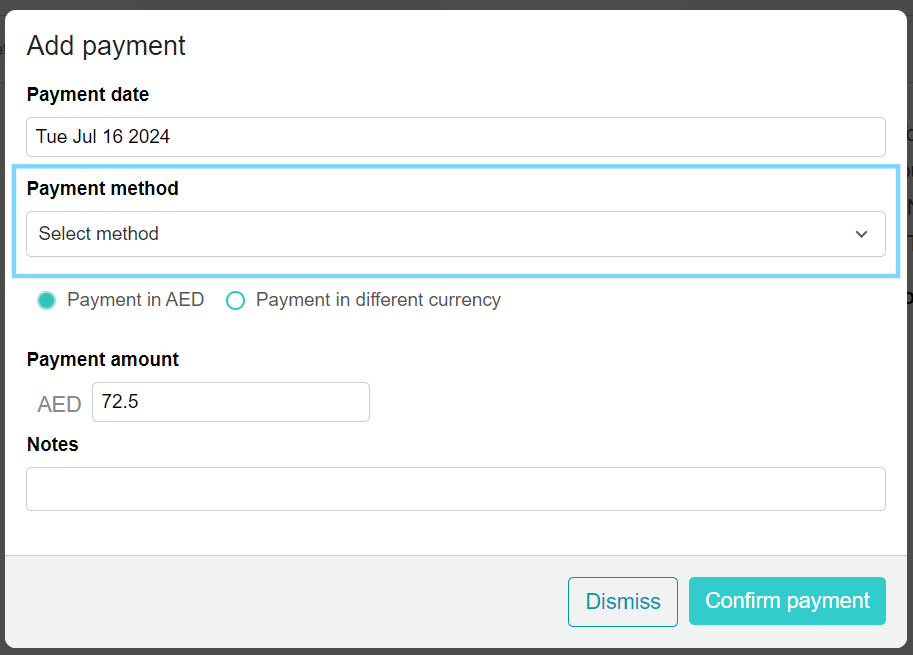
Click on “Add Payment” to add any new payments made to the clinic. A payment box opens up, choose the date, and payment method from the list and write the amount and notes (if any). Finally, click “Confirm payment”.
If the patient has any deposits in their account and wishes to pay using the deposit, simply click the “Use deposit” button found under the patient deposit amount. Enter the payment amount and click to confirm payment.
For refunding a patient, such as accidentally overcharging the treatment, click on the “Add Refund” in orange found underneath the “Add Payment” button. Select the refund method and the amount and confirm the direct refund.
Once you make the changes, a record of all the invoice payments and refunds appears with the payment method, amount and date of action.
Create payment with multiple payment methods
When the amount is being paid in multiple payment methods, simply click on “Add payment” and choose the first payment method with the amount. You can write a note explaining the multiple payment methods. Then confirm the payment. Repeat the same process and this time choose the second payment method and amount and confirm the payment. Repeat for the other methods. The payment record will display all the various methods you added.
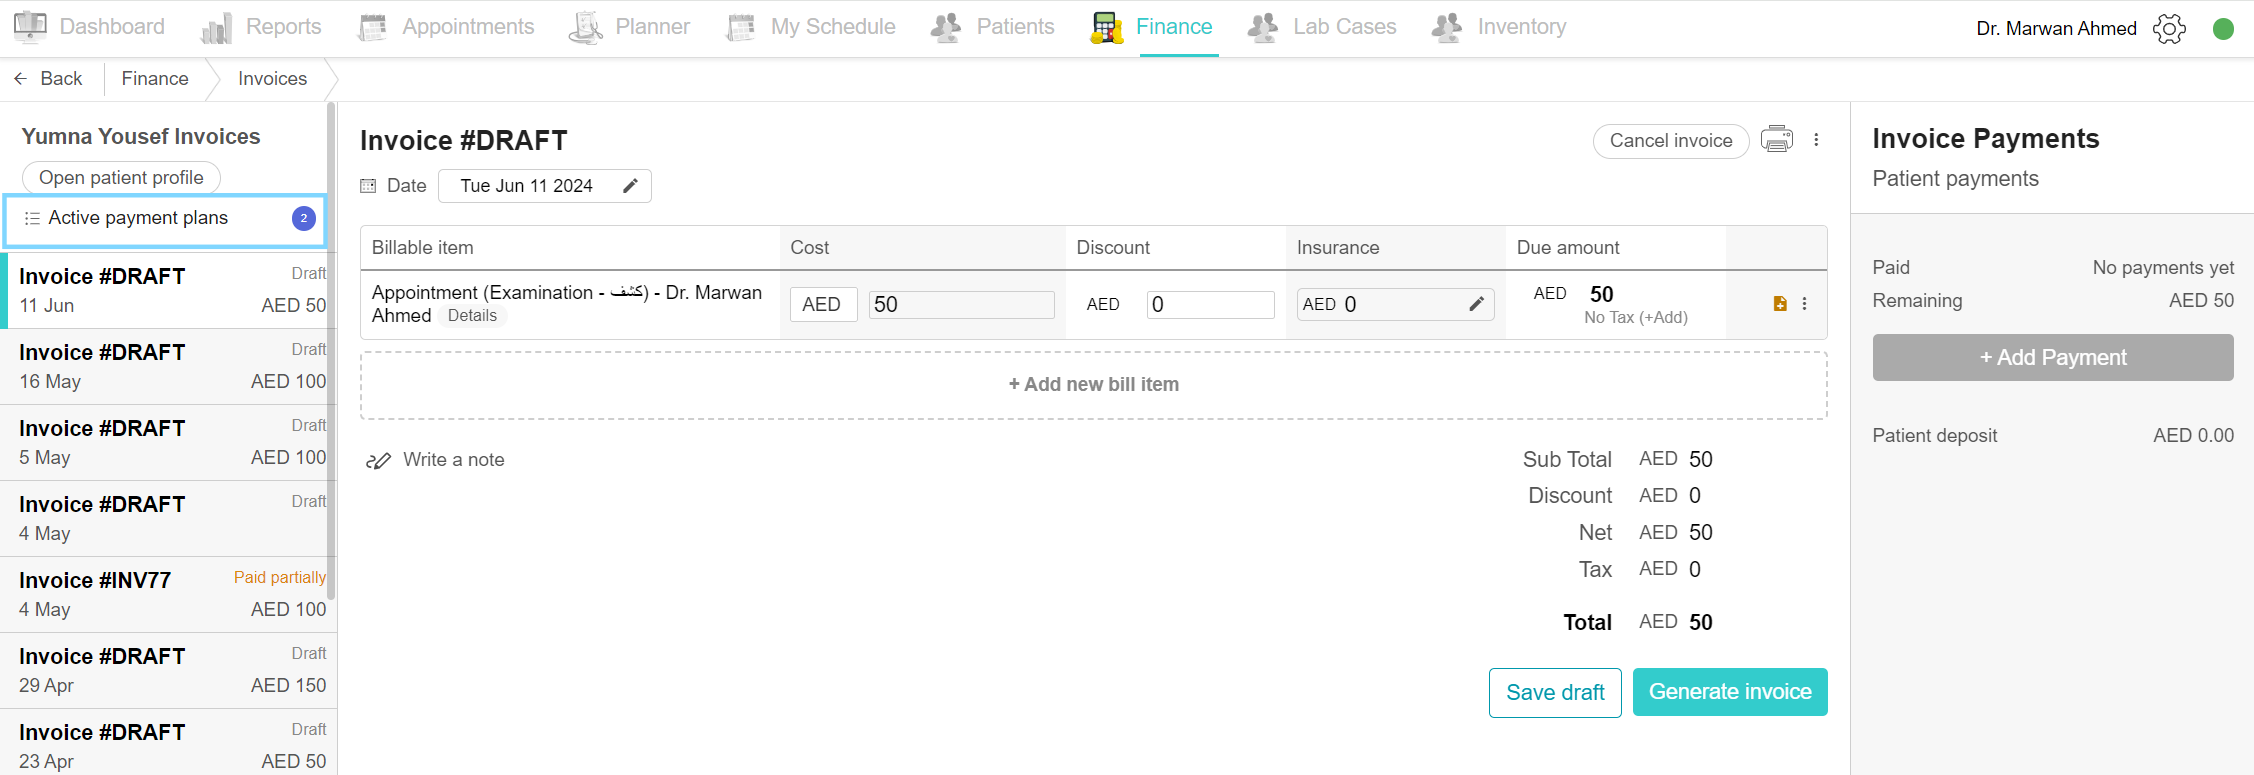
View active payment plans
To view any payment plans added to the patient, either check the patient profile or the invoices. In the case of invoices, click on the Finance tab and choose the Invoice page. Select the desired invoice. On the left side of the invoice underneath the patient name, you can find the “Open patient profile” button and the active payment plans option. “No active payment plan” explains that no payment plan is added to this patient, while “Active payment plans” with a number balloon next to it indicate a plan added to the patient and is active. Click on the text to view the payment plans. Note that these plans are for record only and do not affect the invoices.