
Lab cases
Lab cases
To manage the lab cases created by your clinic, navigate to the Lab Cases tab and open the Lab Cases page.
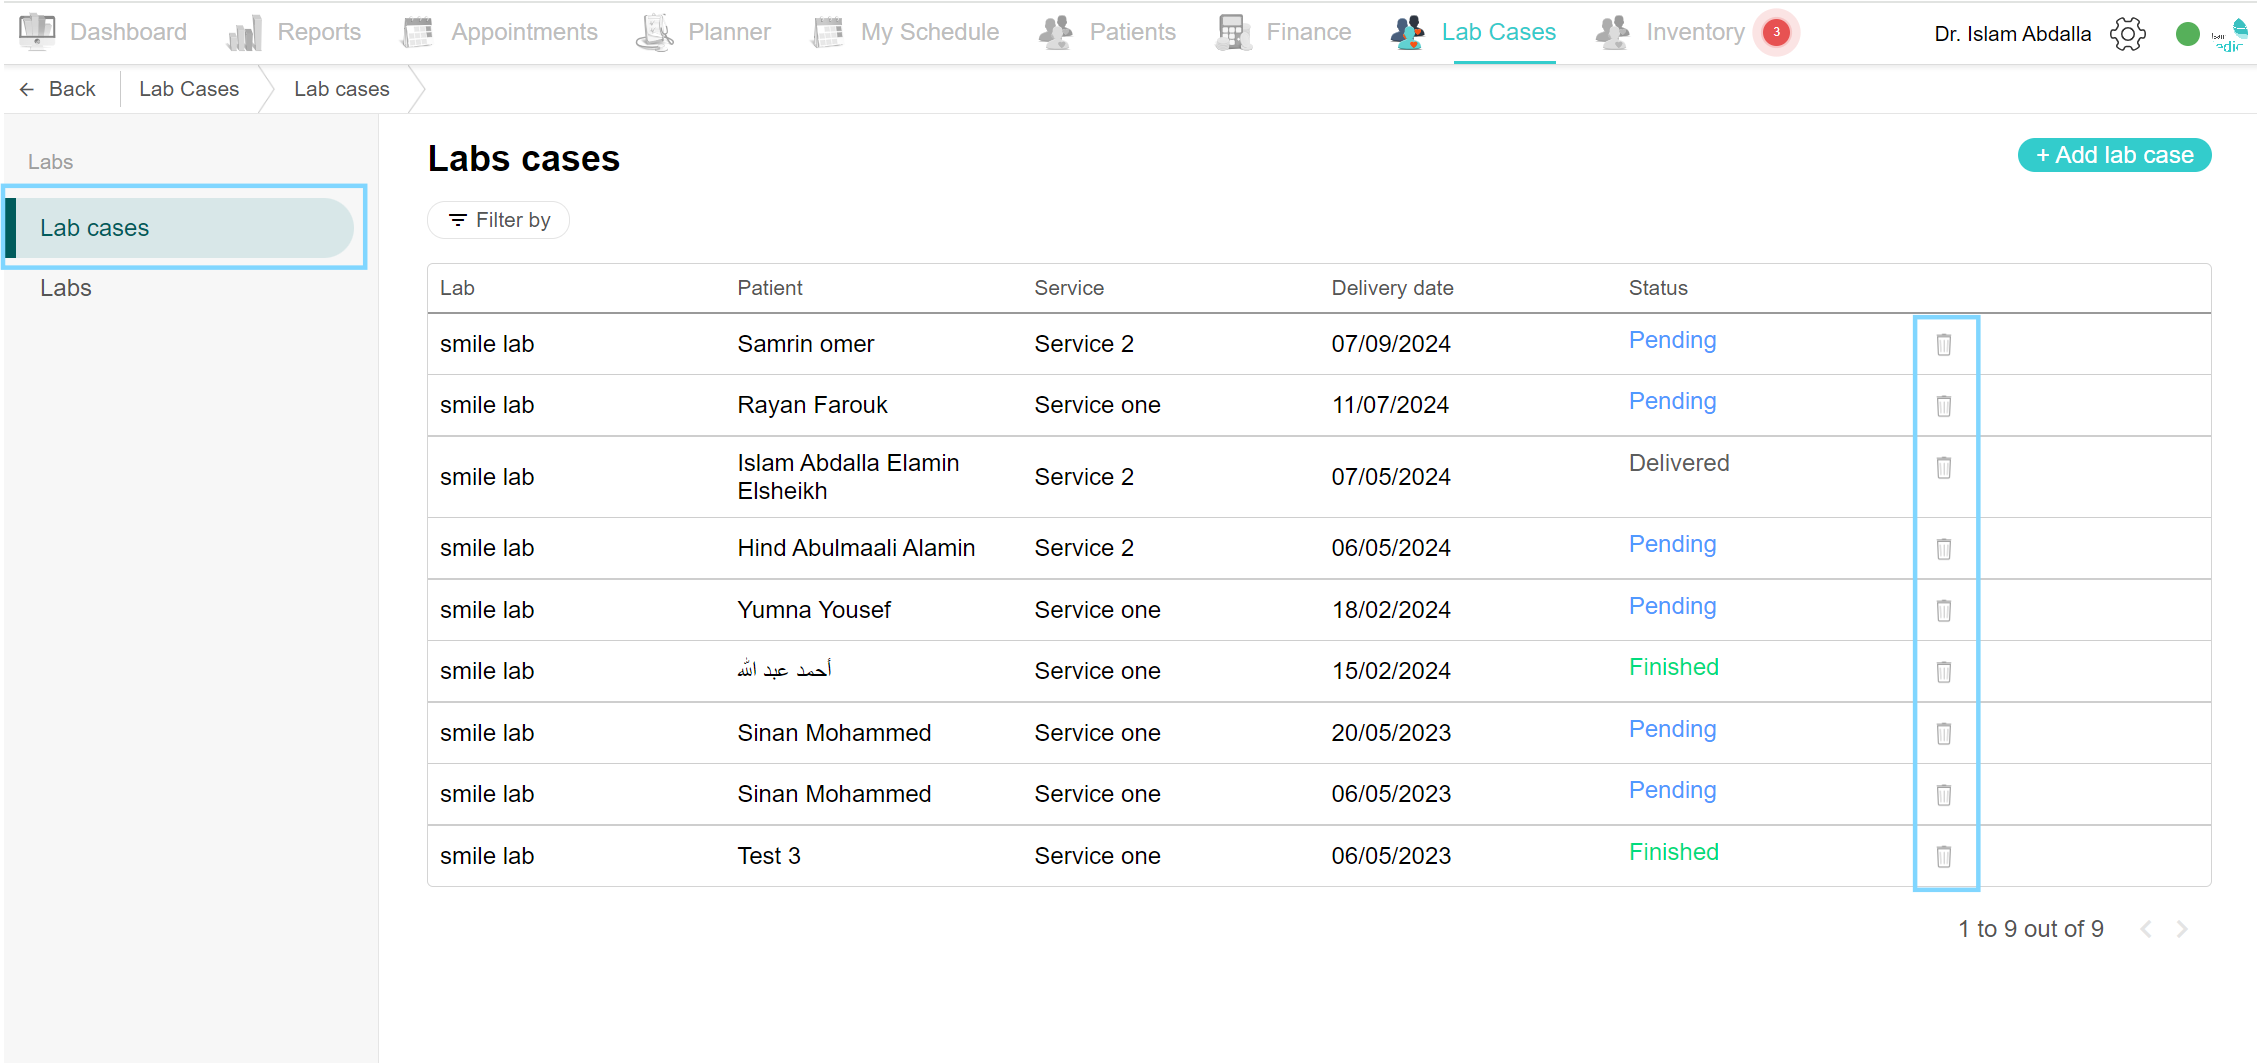
View labs cases list:
Click the Lab Cases tab and select the Lab Cases page. You can view the lab cases list. You can see the Lab name, Patient name, Service name, Delivery date, Case status and delete icon. Click each case to view the details.

View lab case details:
Click the Lab Cases tab and select the Lab Cases page. Click the desired lab case and view the details. The Edit lab case popup box appears, and the page is divided into the lab case details section on the left and the log section on the right. At the top are the lab case statuses:
-Pending: When the case is made the status is made to pending until the case is sent to the lab.
-Sent: When the case the sent to the lab, change the status to sent.
-Delivered: When the case is delivered back to the clinic, change the status to delivered.
-Finished: When there are no longer changes made to the case, switch the status to finished.
On the left, you can find the patient name, lab name, service name, cost and expected delivery date. After that is the payment and expenses part. To add expenses, click ‘Add expense’, add the necessary details and click Save.
On the right, you can find a log of all the events that took place in this case including the date, the person who created the event and the event details.

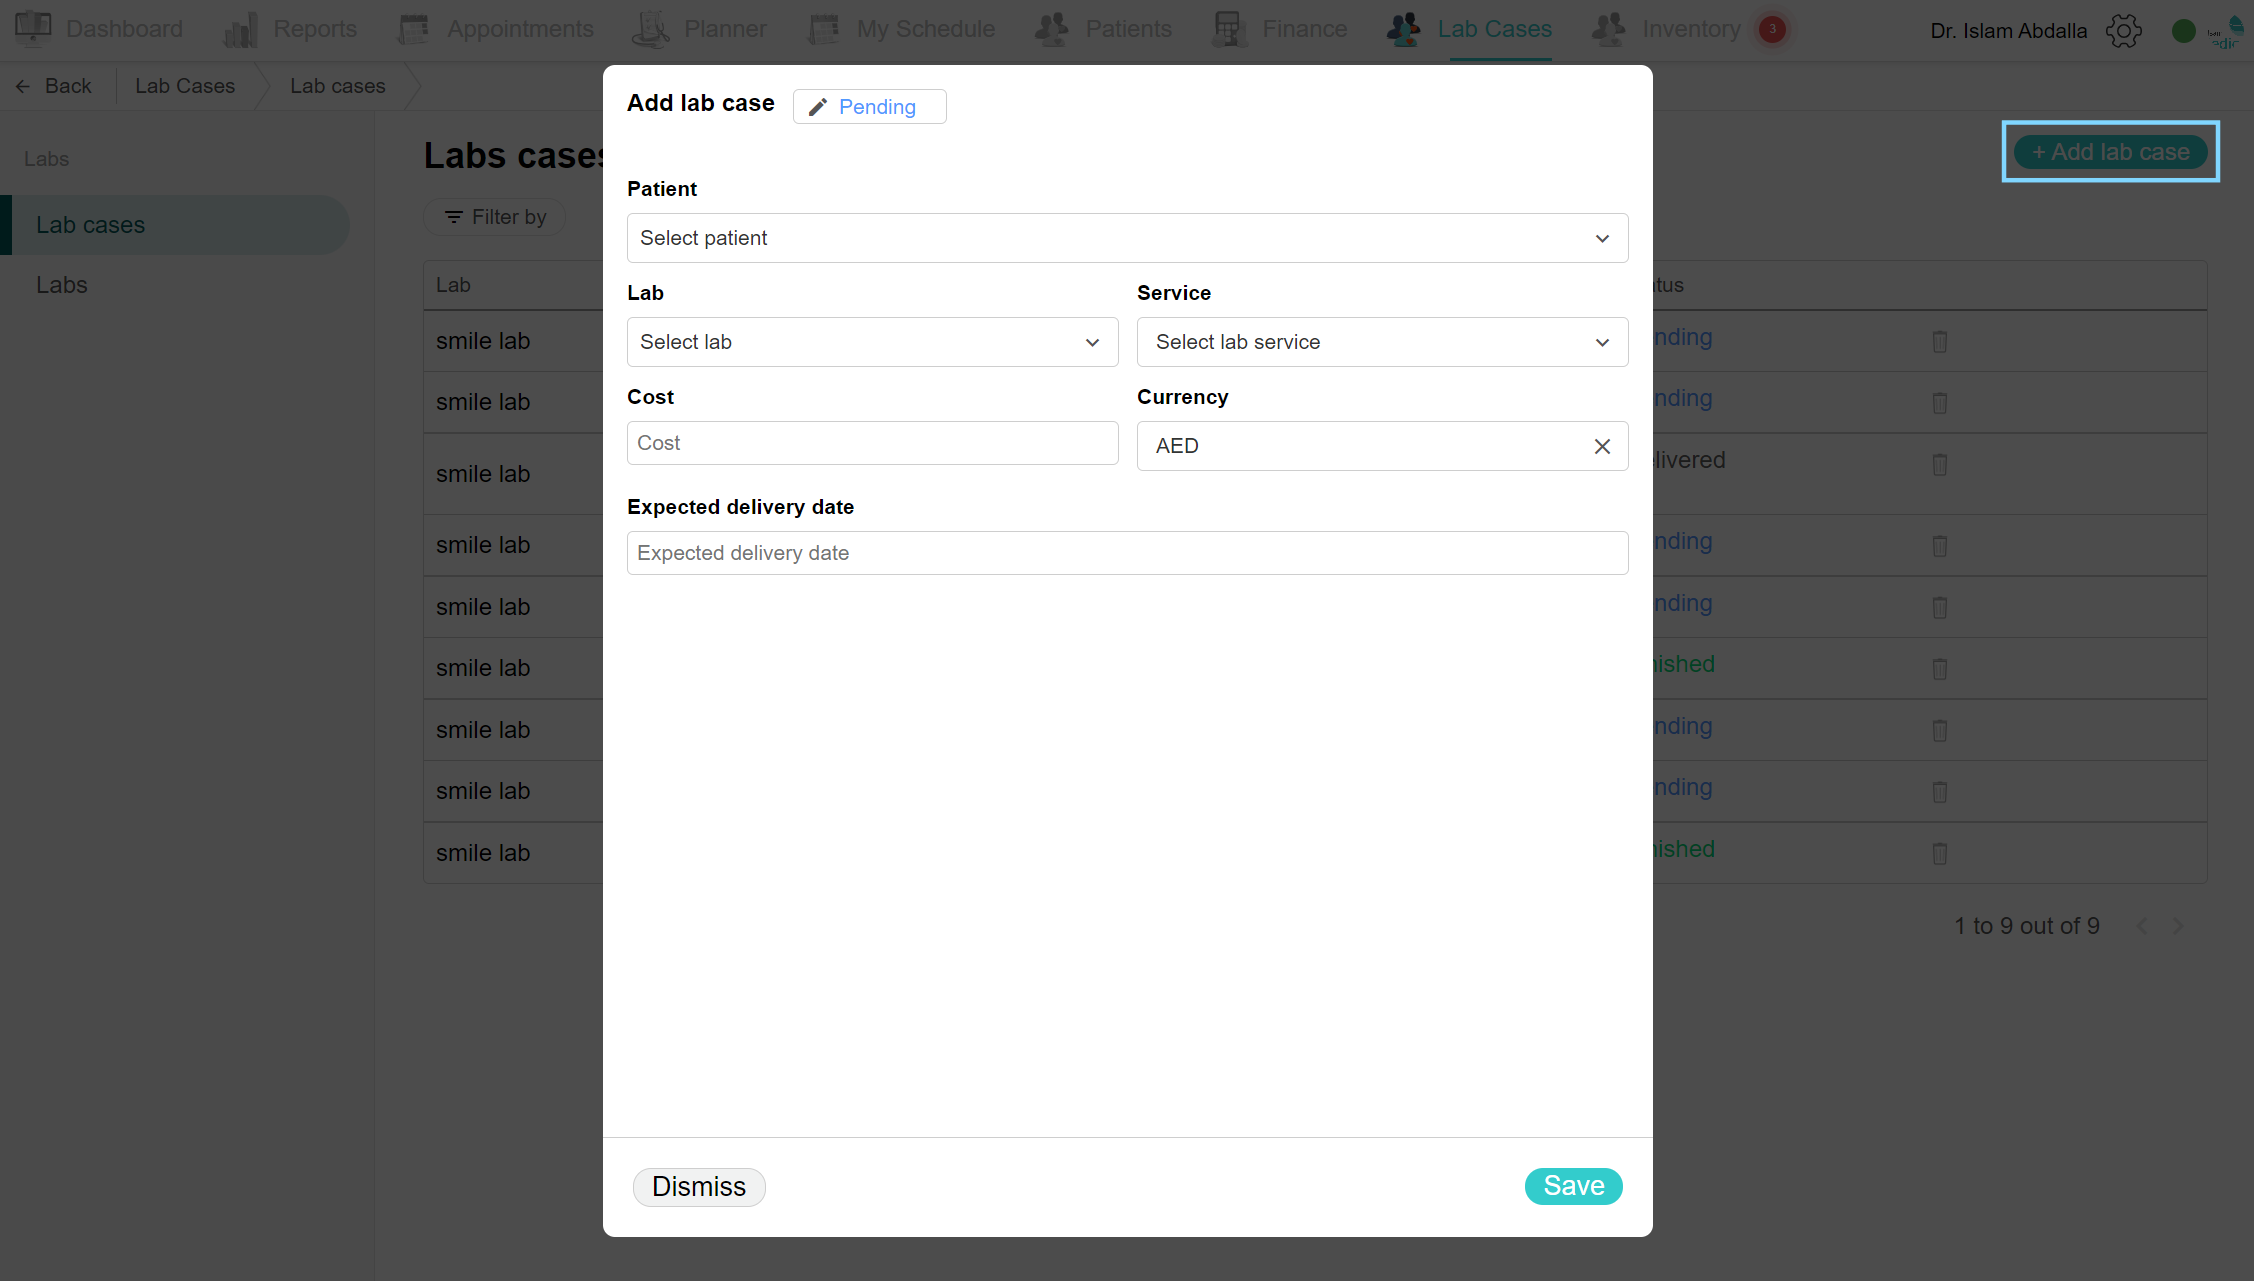
Add lab case:
Click the Lab Cases tab and select the Lab Cases page. At the top of the page, click the ‘Add lab case’ button, and an ‘Add lab case’ popup box opens. As you can see the status is Pending, choose the patient name from the drop-down list, and lab name from the drop-down list before choosing the lab service, then choose the services specific to the chosen lab, and the rest of the fields are filled automatically depending on the service chosen. Finally, click Save.
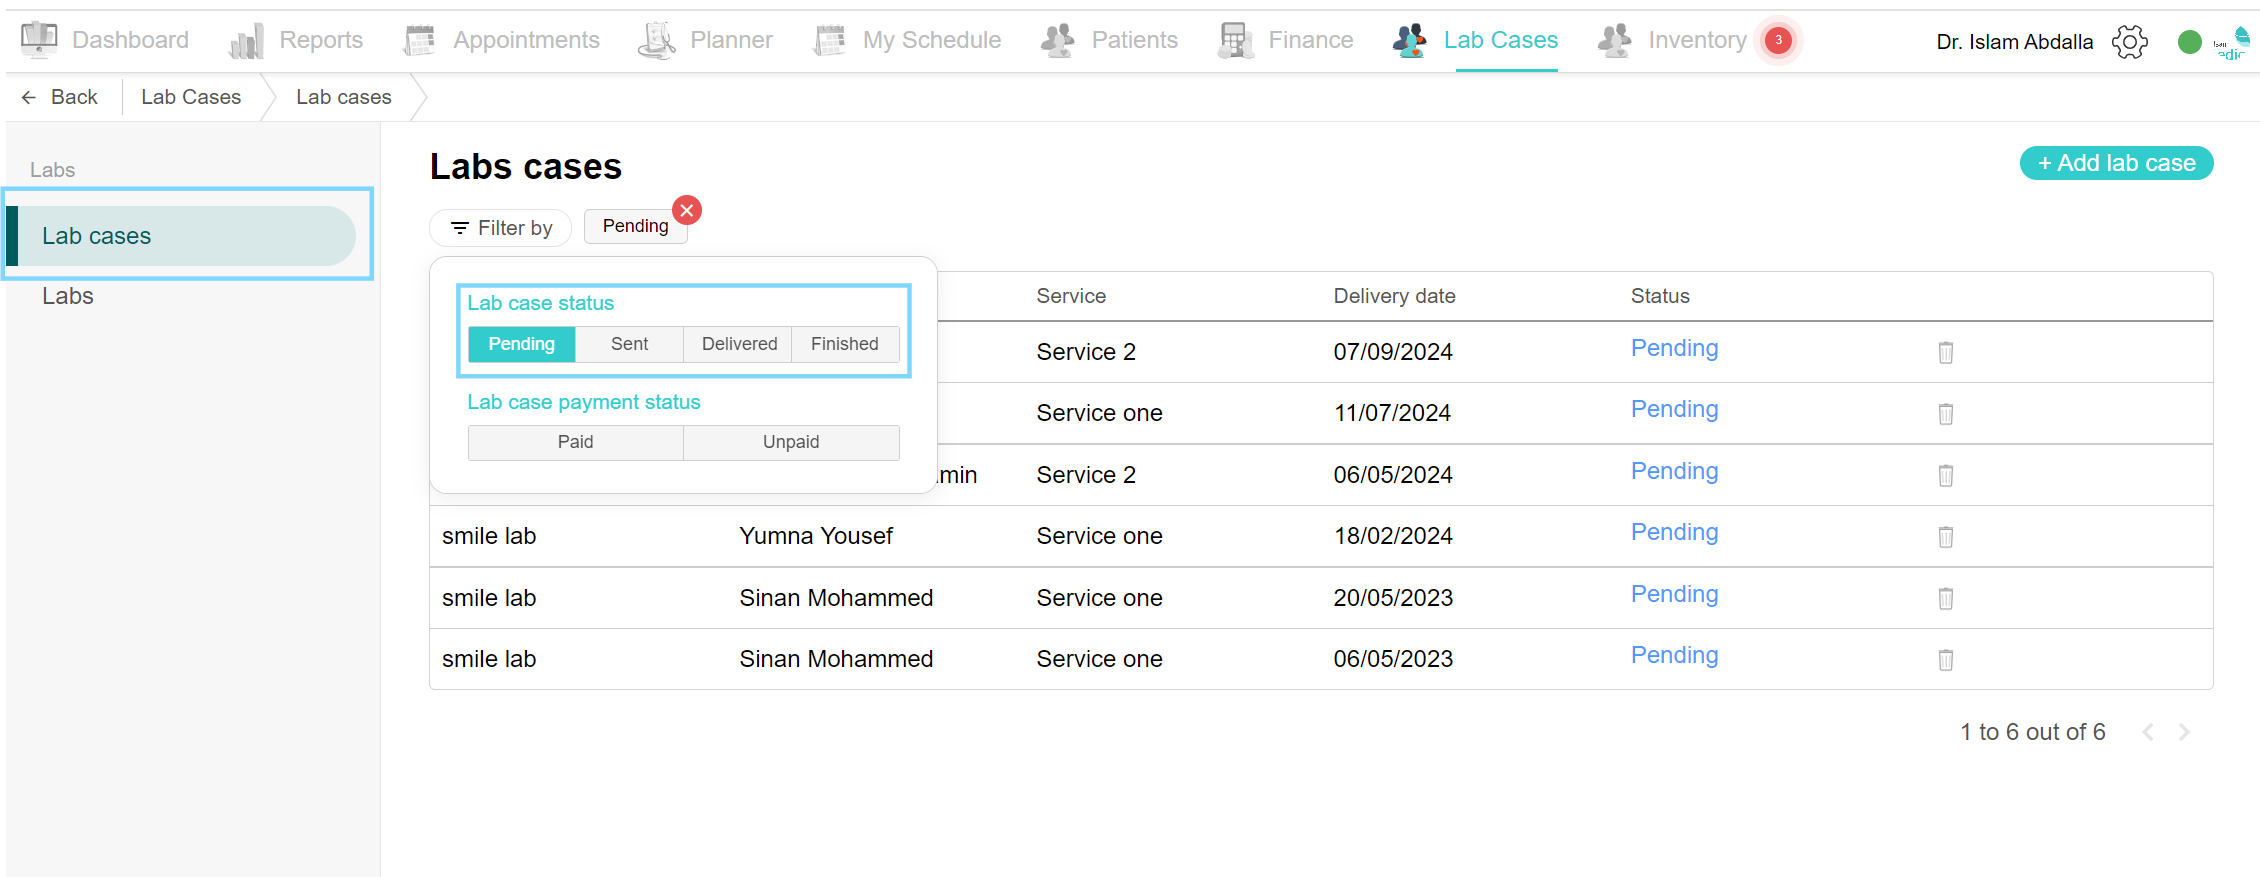
Filter by lab case status:
To view all lab cases with specific status such as Pending, click the Lab Cases tab and select the lab cases page. Select Filter by option and in the Lab case status option, select the desired status for example; Pending. Now all the cases with that status are shown here.
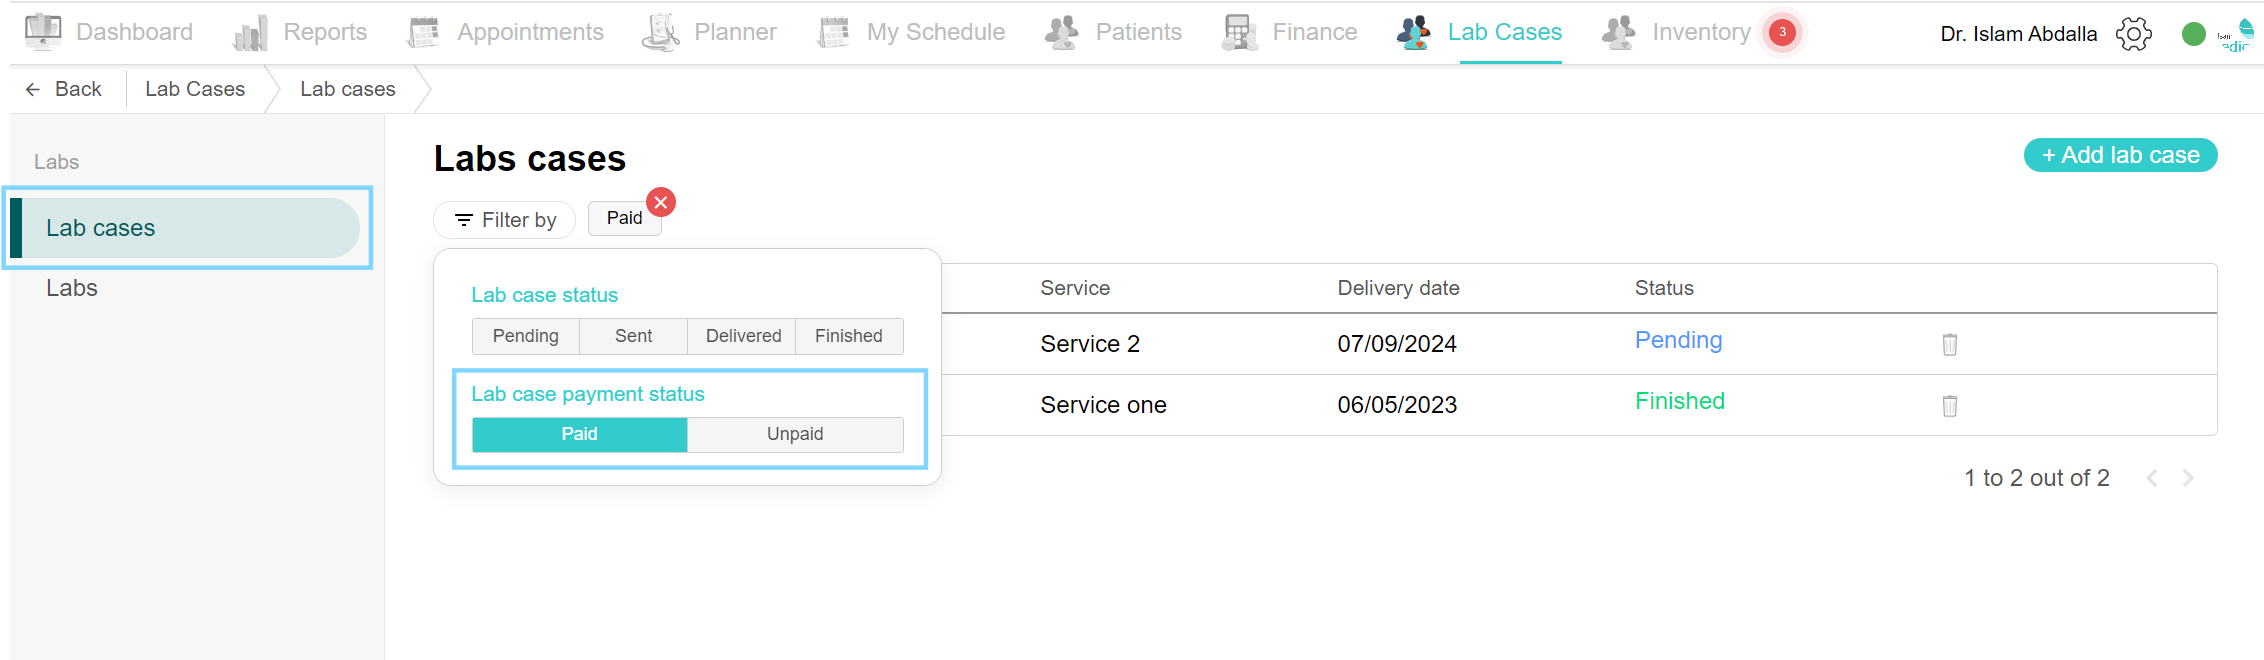
Filter by lab case payment status:
To view all lab cases with specific payment statuses such as Paid or Unpaid, click the Lab Cases tab and select the Lab Cases page. Select Filter by option and in the Lab case payment status option, select the desired option for example; Unpaid. Now all the unpaid cases are shown here.
Delete lab case:
To delete a lab case, navigate to the lab cases page in the Lab Cases tab. With each lab case, you can find the delete icon on the right side of the row. A delete confirmation box appears, click the Delete button to confirm the action.
Edit lab case:
To add any update or add expenses to the lab case, simply edit the lab case. Click the Lab Cases tab and select the Lab Cases page. Select the desired lab case and the edit lab cases popup page opens. On the right, you can find the log of all events made to this lab case. On the left, you can edit the necessary information. Change the cost or expected delivery date if there is a delay. To add payment and expenses, click the ‘Add expense’ button. The Add Expense popup box opens and some fields are automatically filled. Continue filling in the rest of the fields and add a note if desired. Then click Save. The payment status changes to Paid and you can view the expense using the ‘View expense’ button. This payment will appear in the expenses report and can be made into a dynamic report if needed in the Reports tab.
Make sure to keep changing the lab case status to ensure the proper tracking of the process.