
eClaim Management
View insurance claims
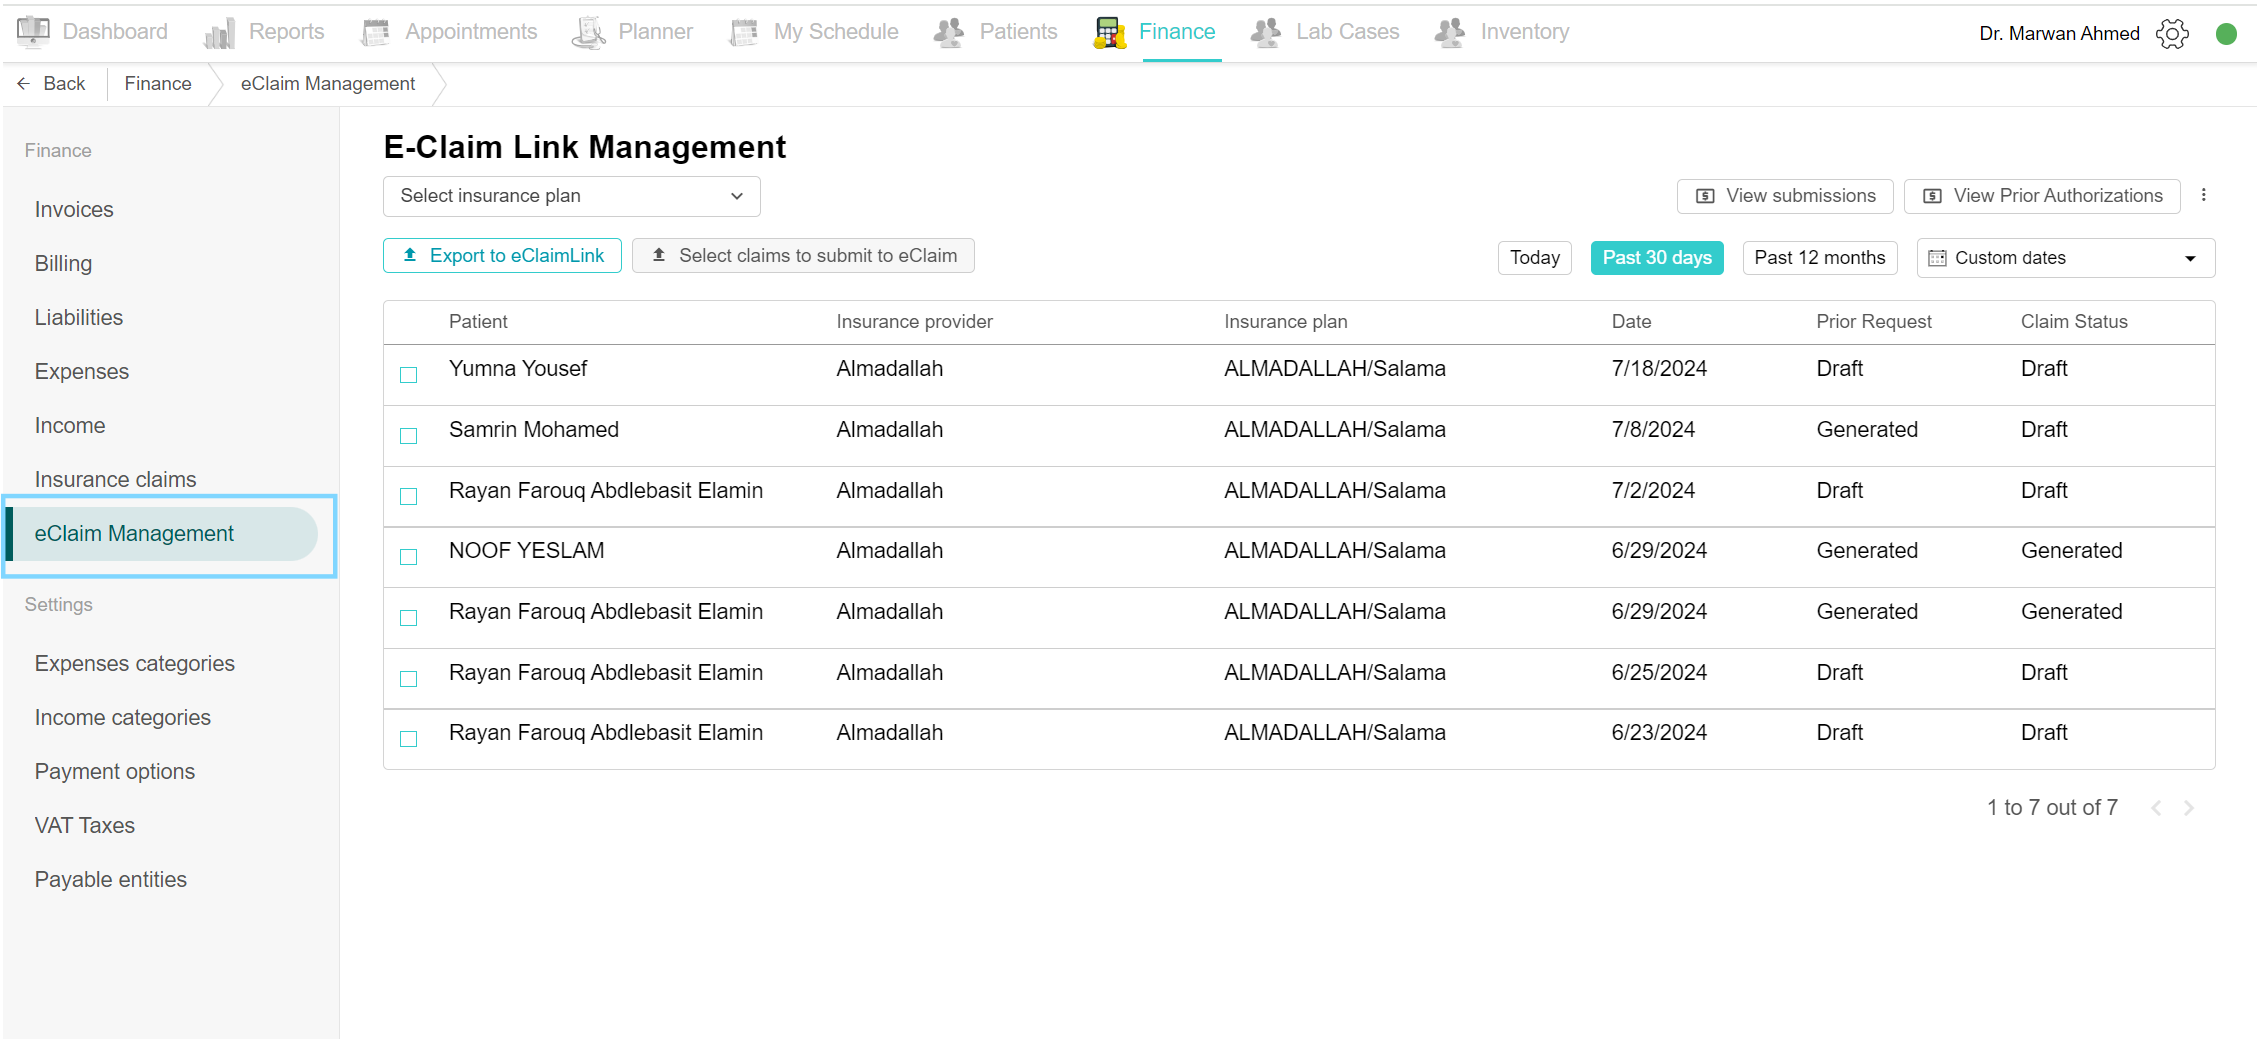
To view all insurance claims with their details, navigate to the Finance tab and click on the eClaim Management page. A list of all insurance claims is shown, it shows the patient's name, insurance providers and plans, date and the status of the prior request and claim. Click on a claim to edit, update or submit.
Filter claims by date
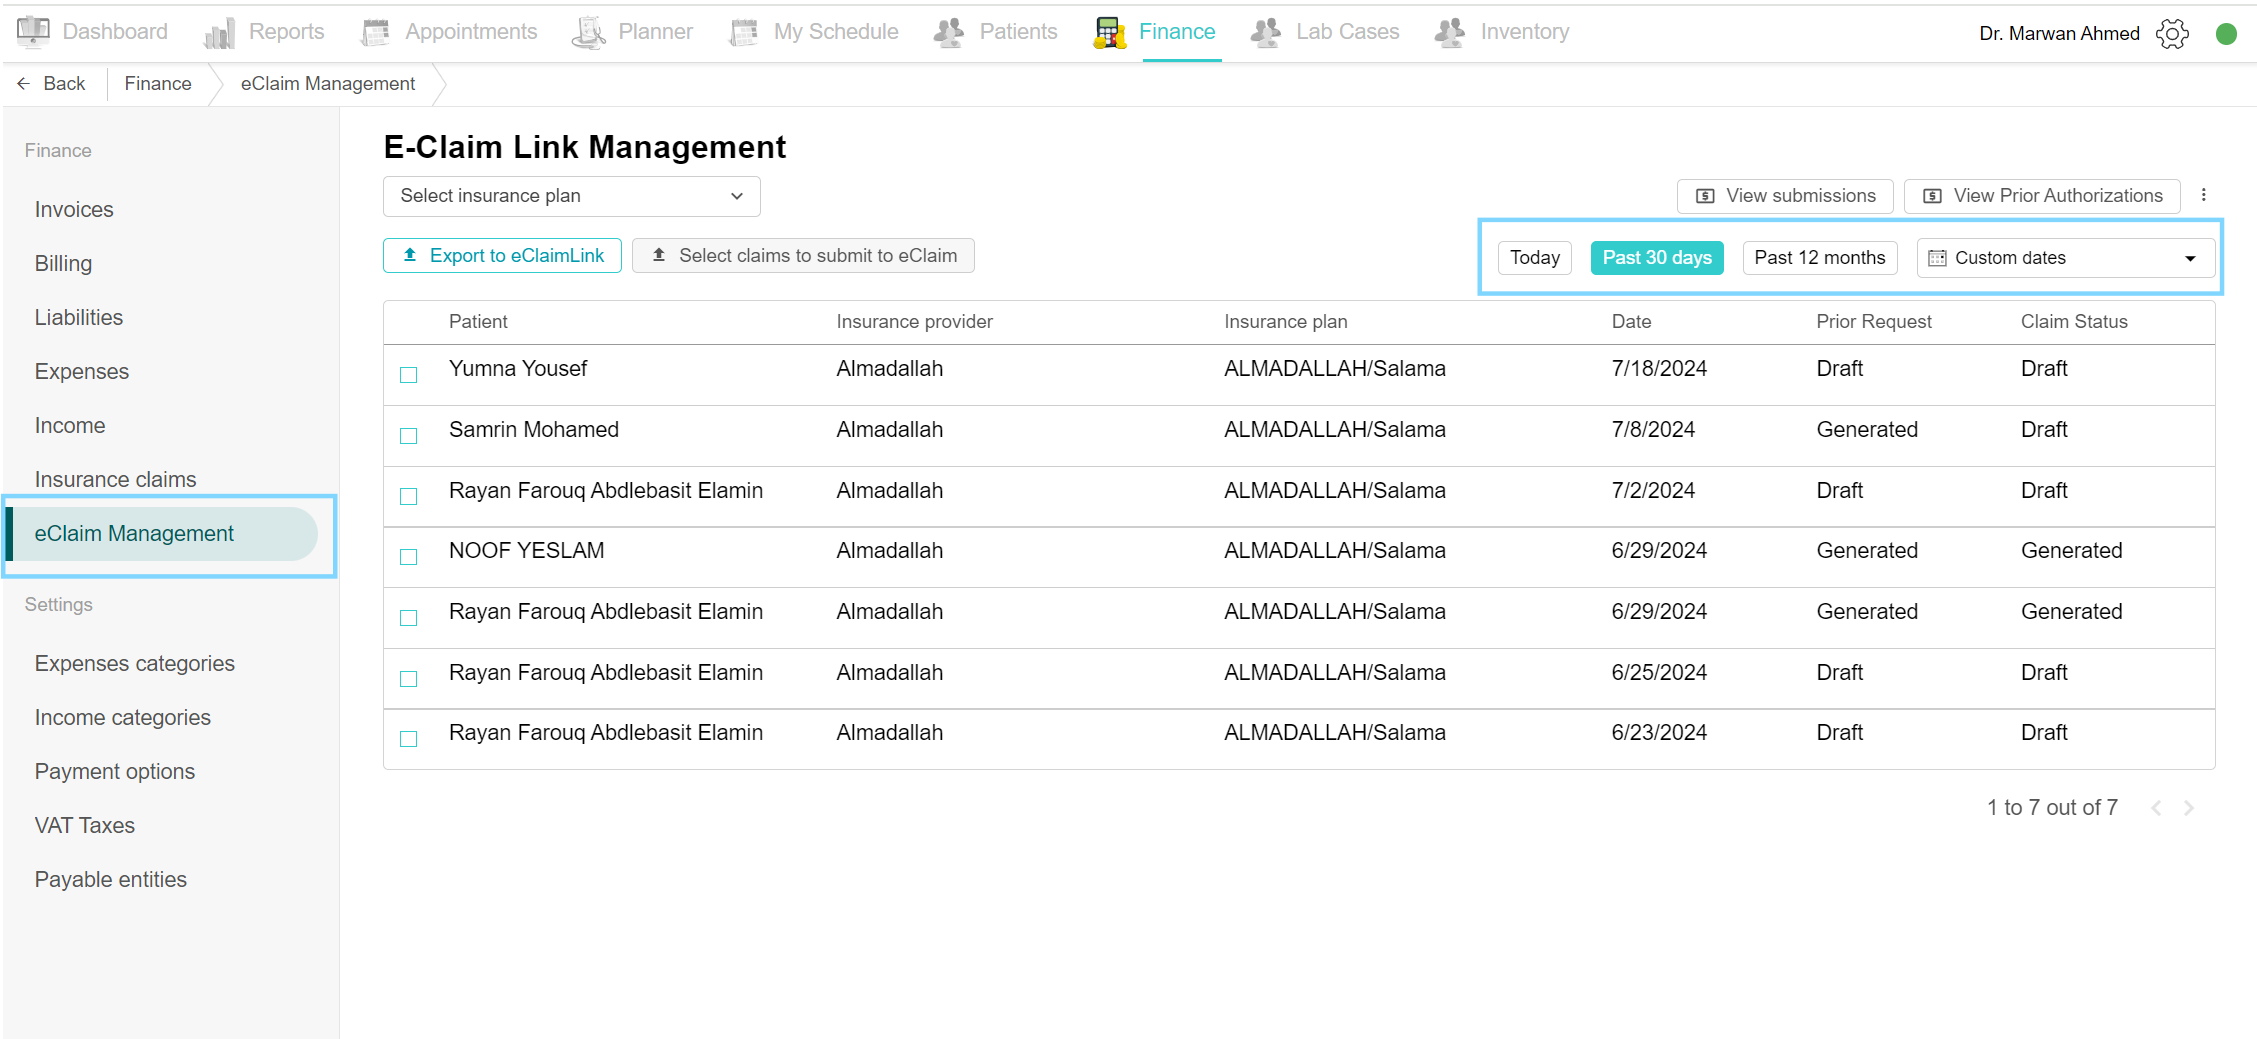
Open eClaim Management from the Finance side menu. By default, today's claims are visible. You can view claims by selecting filters like "Past 30 days", or "Past 12 months", or by choosing custom dates. Click on "Custom Dates", select the desired period, and view the claims during that period.
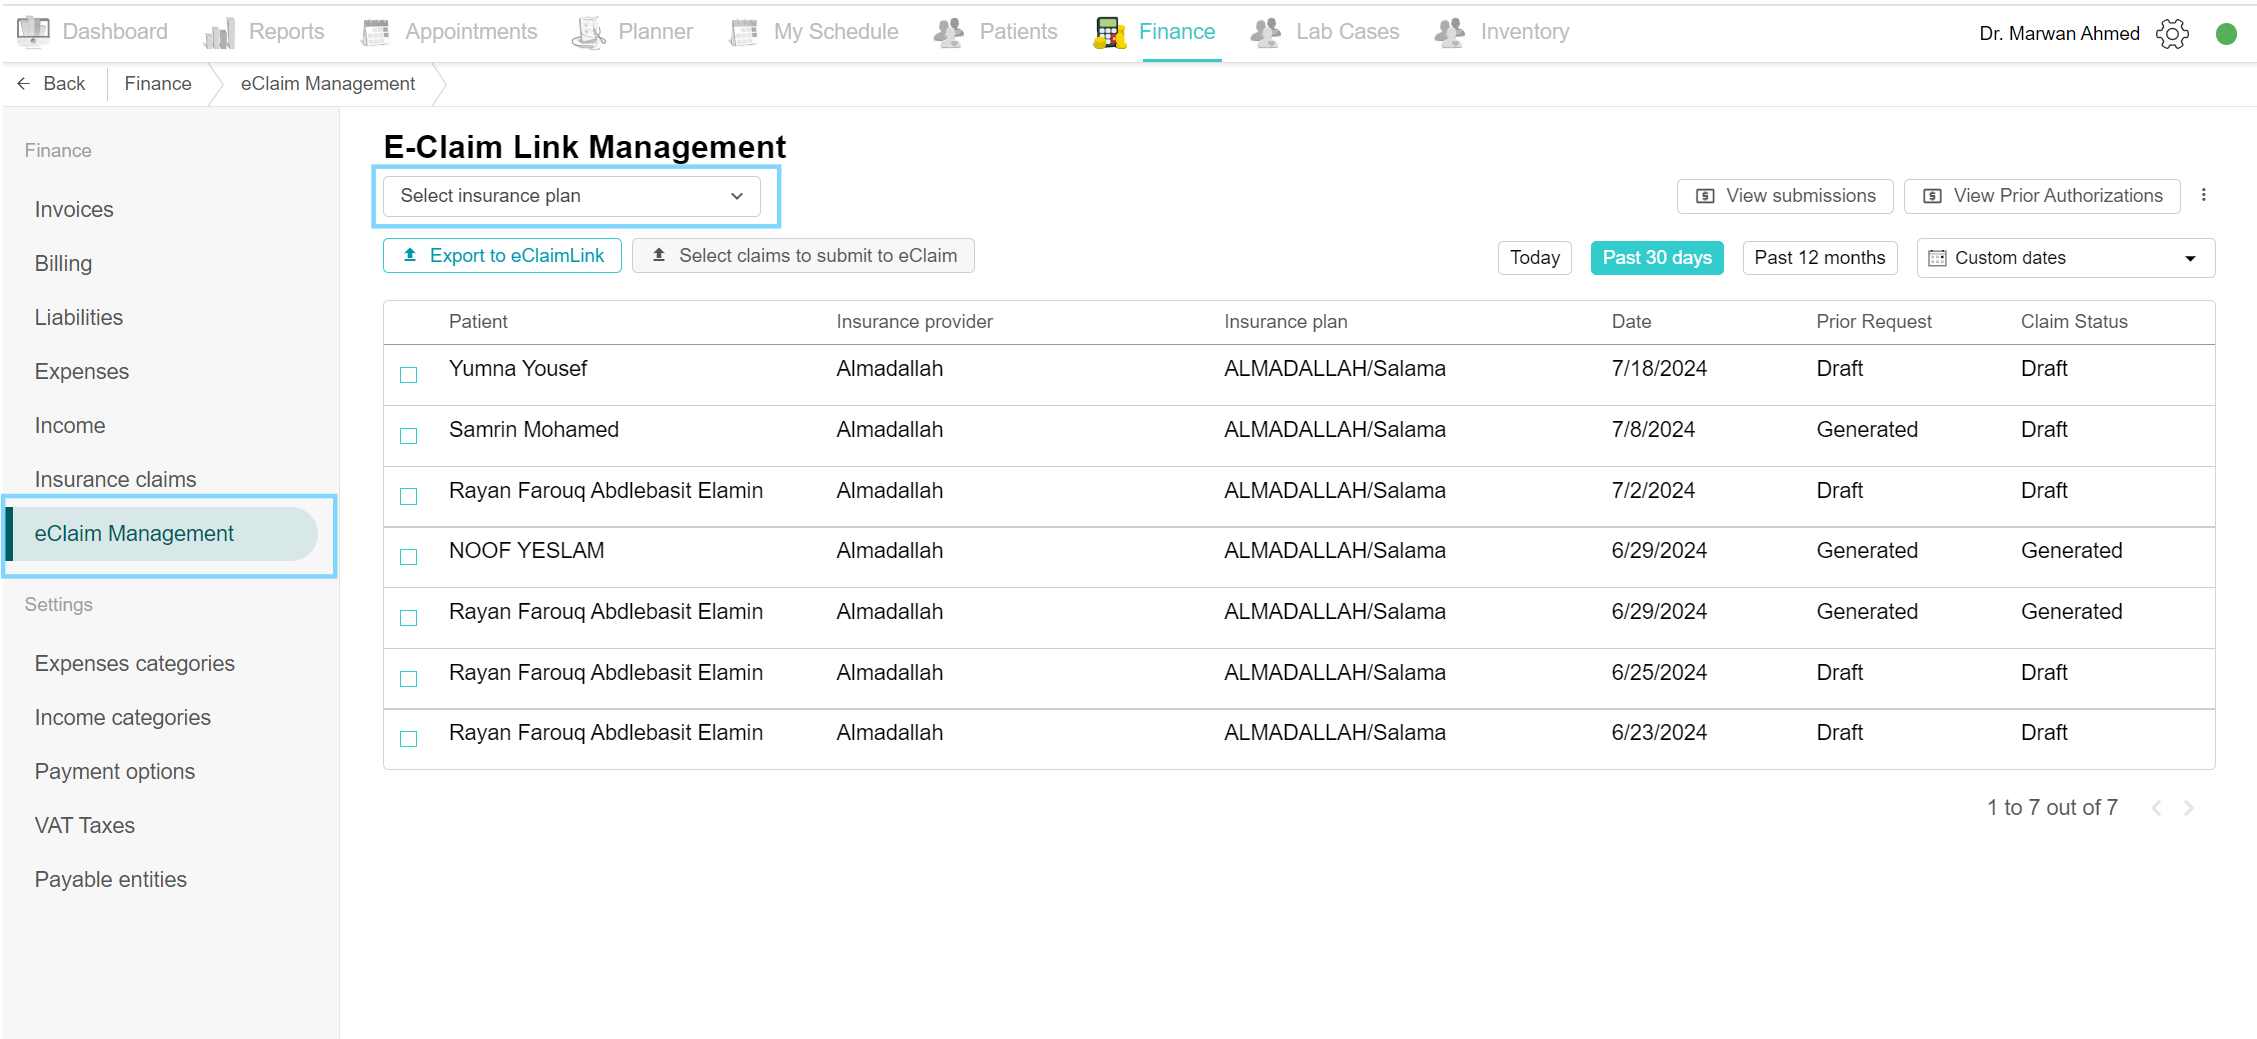
Filter by Insurance plan
View submissions
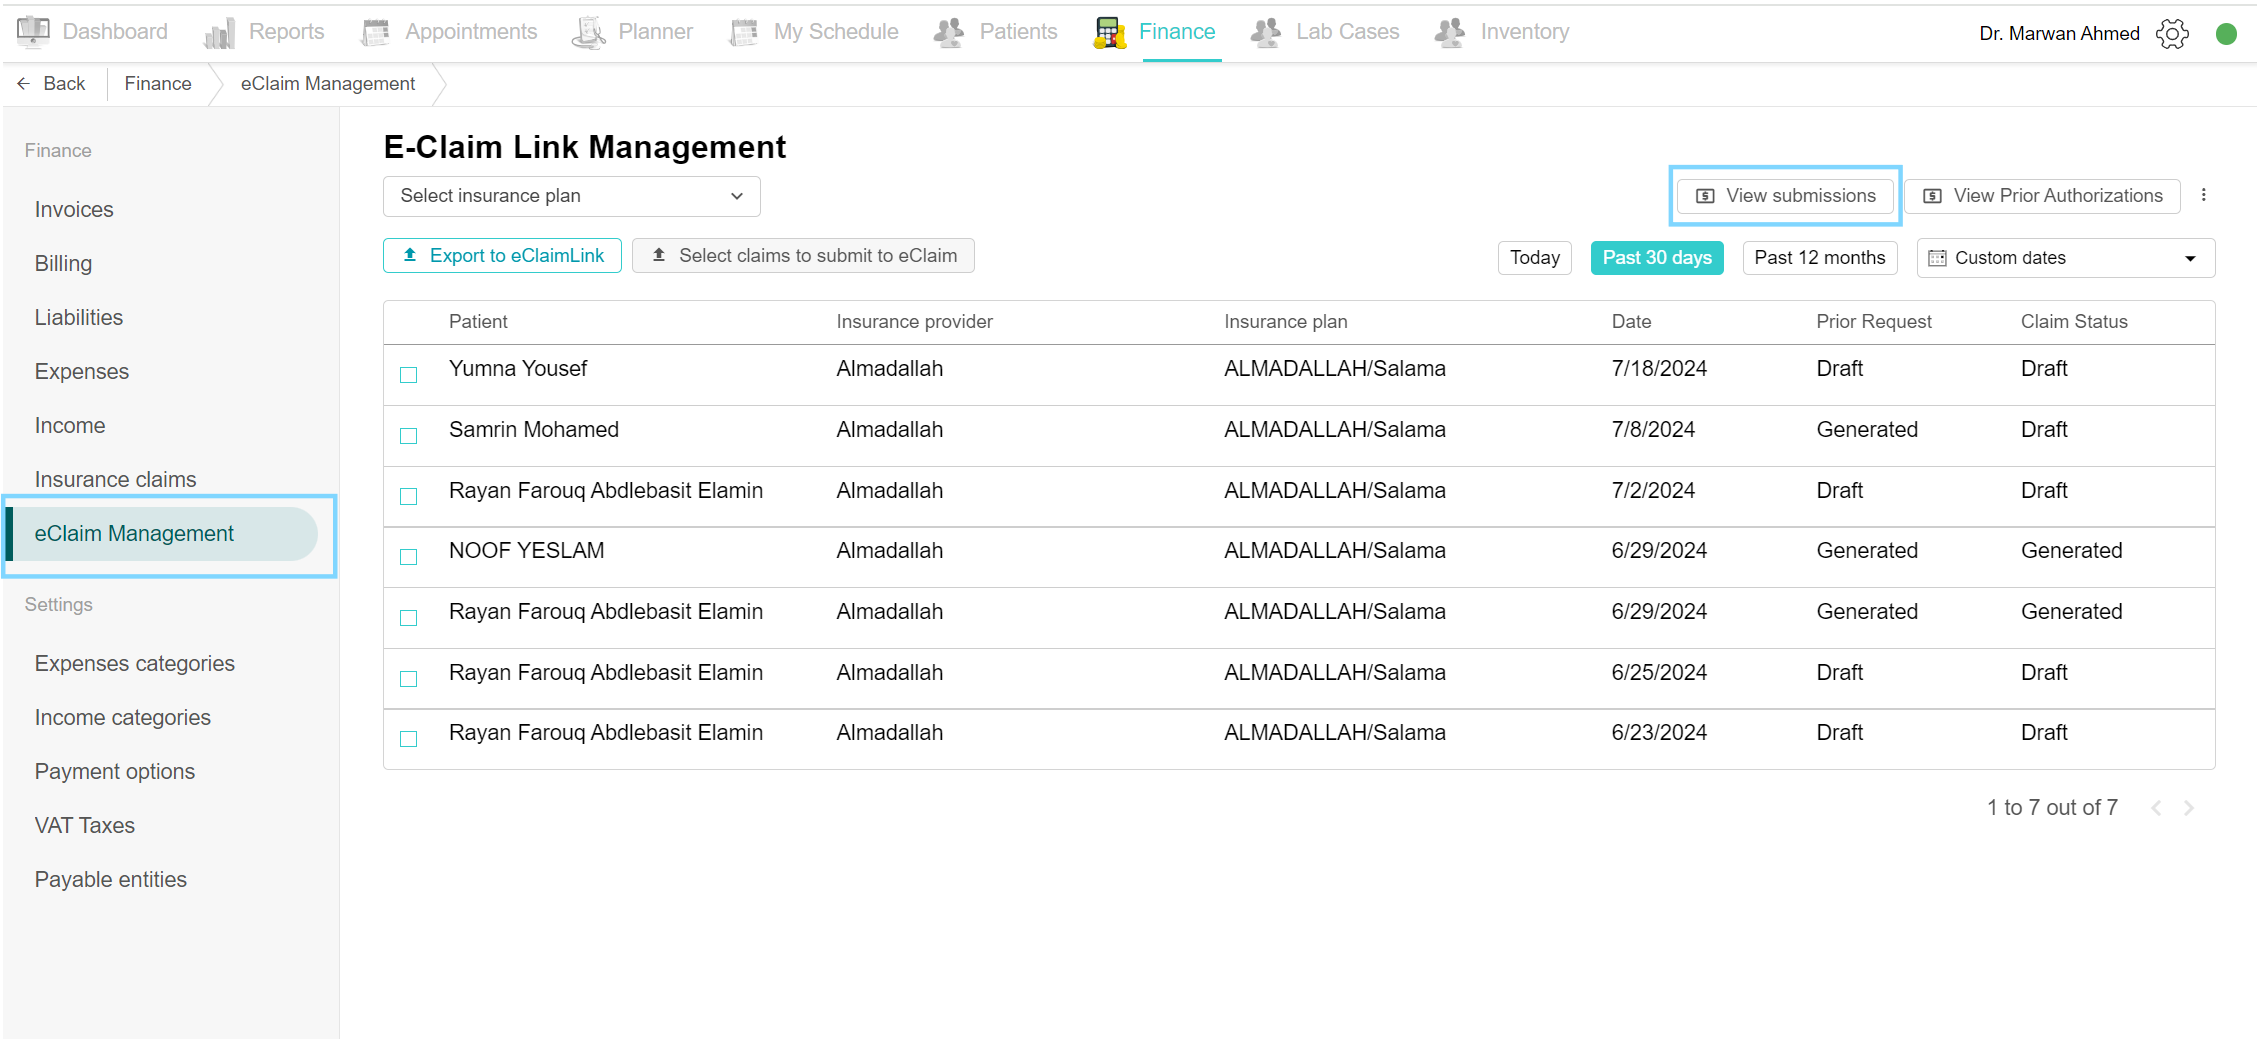
It displays previously submitted claims. Go to the Finance tab and click on the eClaim Management page. On the top of the page, click on “View submissions” to view all the submitted claims.
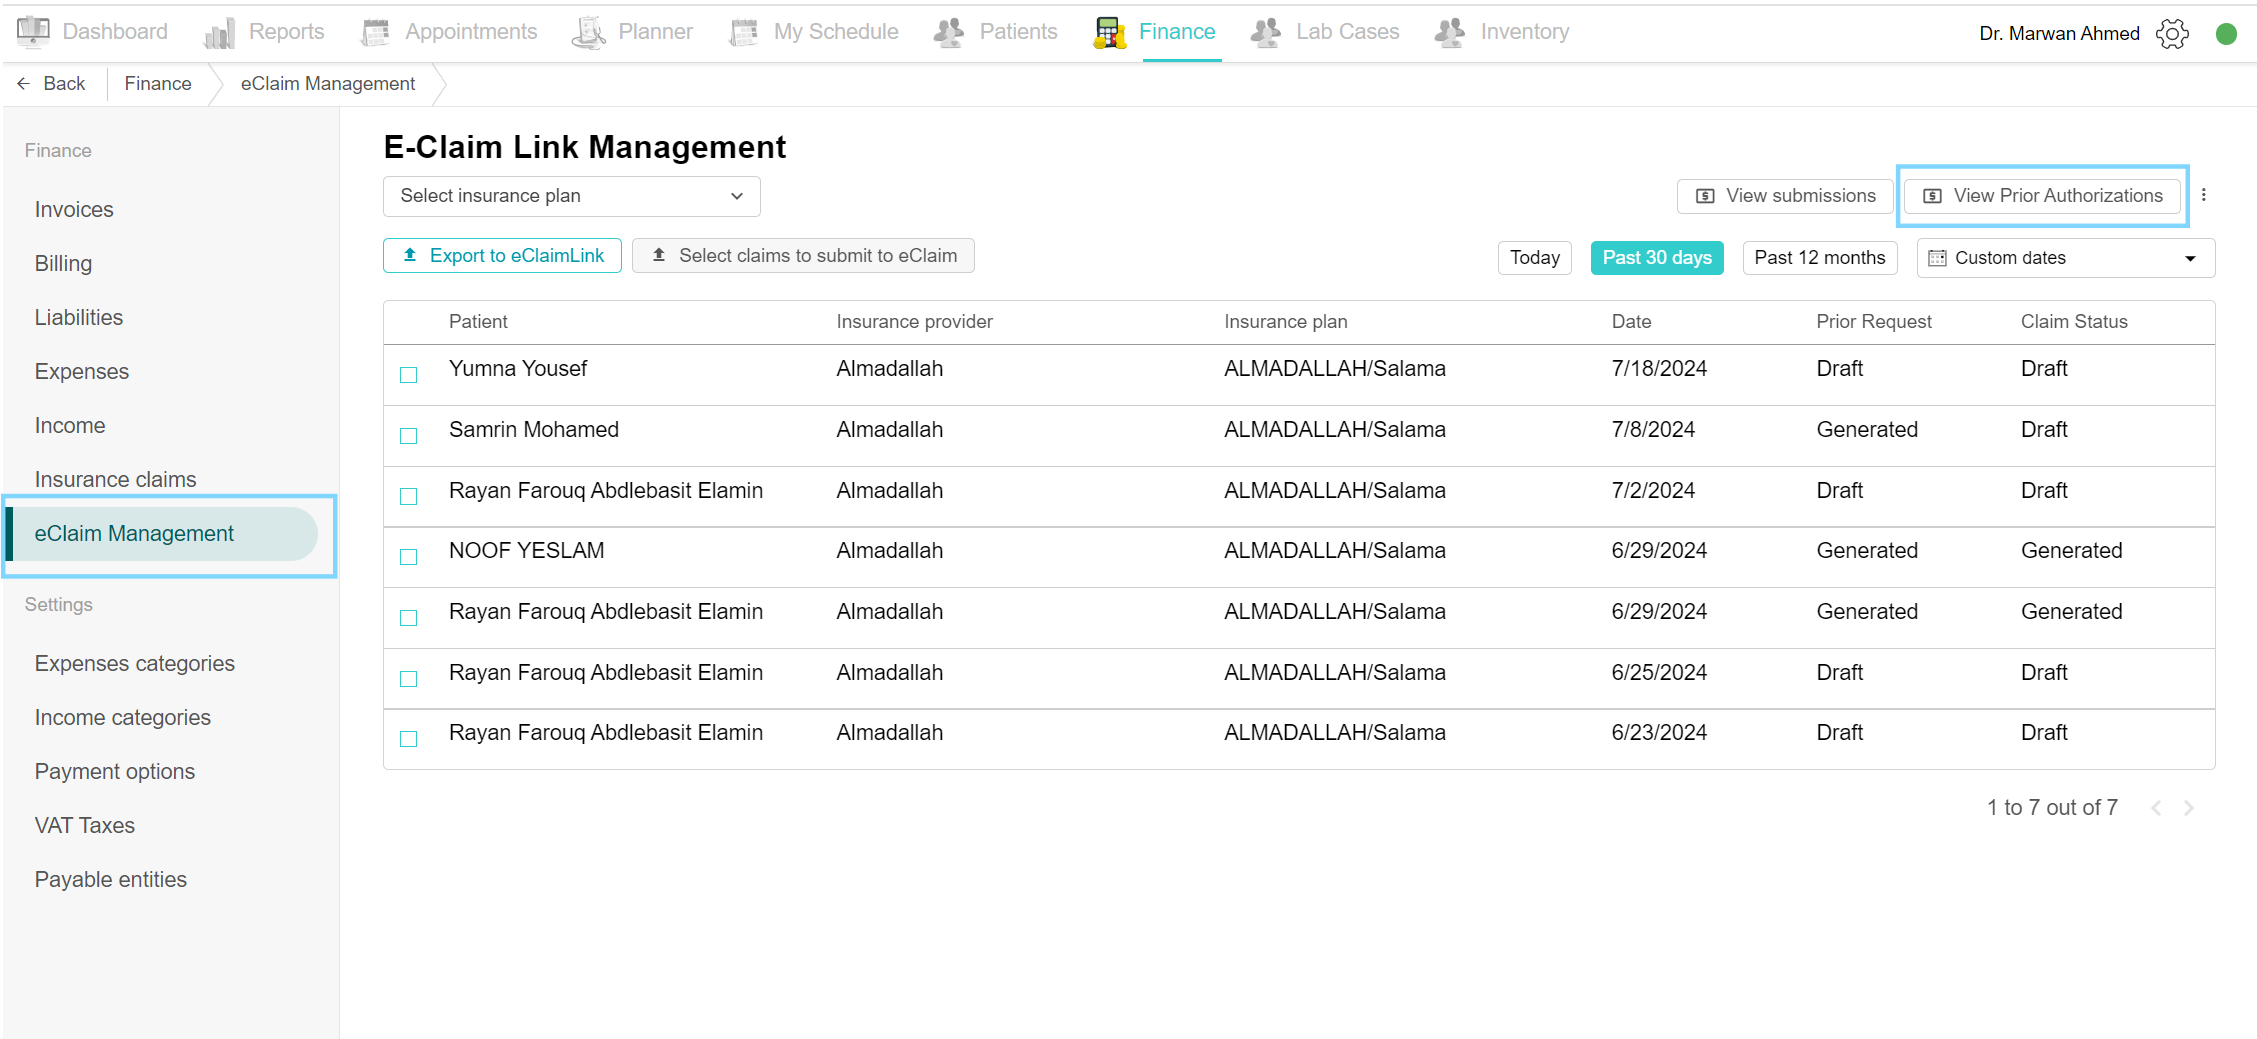
View Prior Authorizations
Go to the Finance tab, and click on eClaim Management to view the list of claims. On the top click the “View Prior Authorizations” button. This shows a list of prior authorizations related to claims.
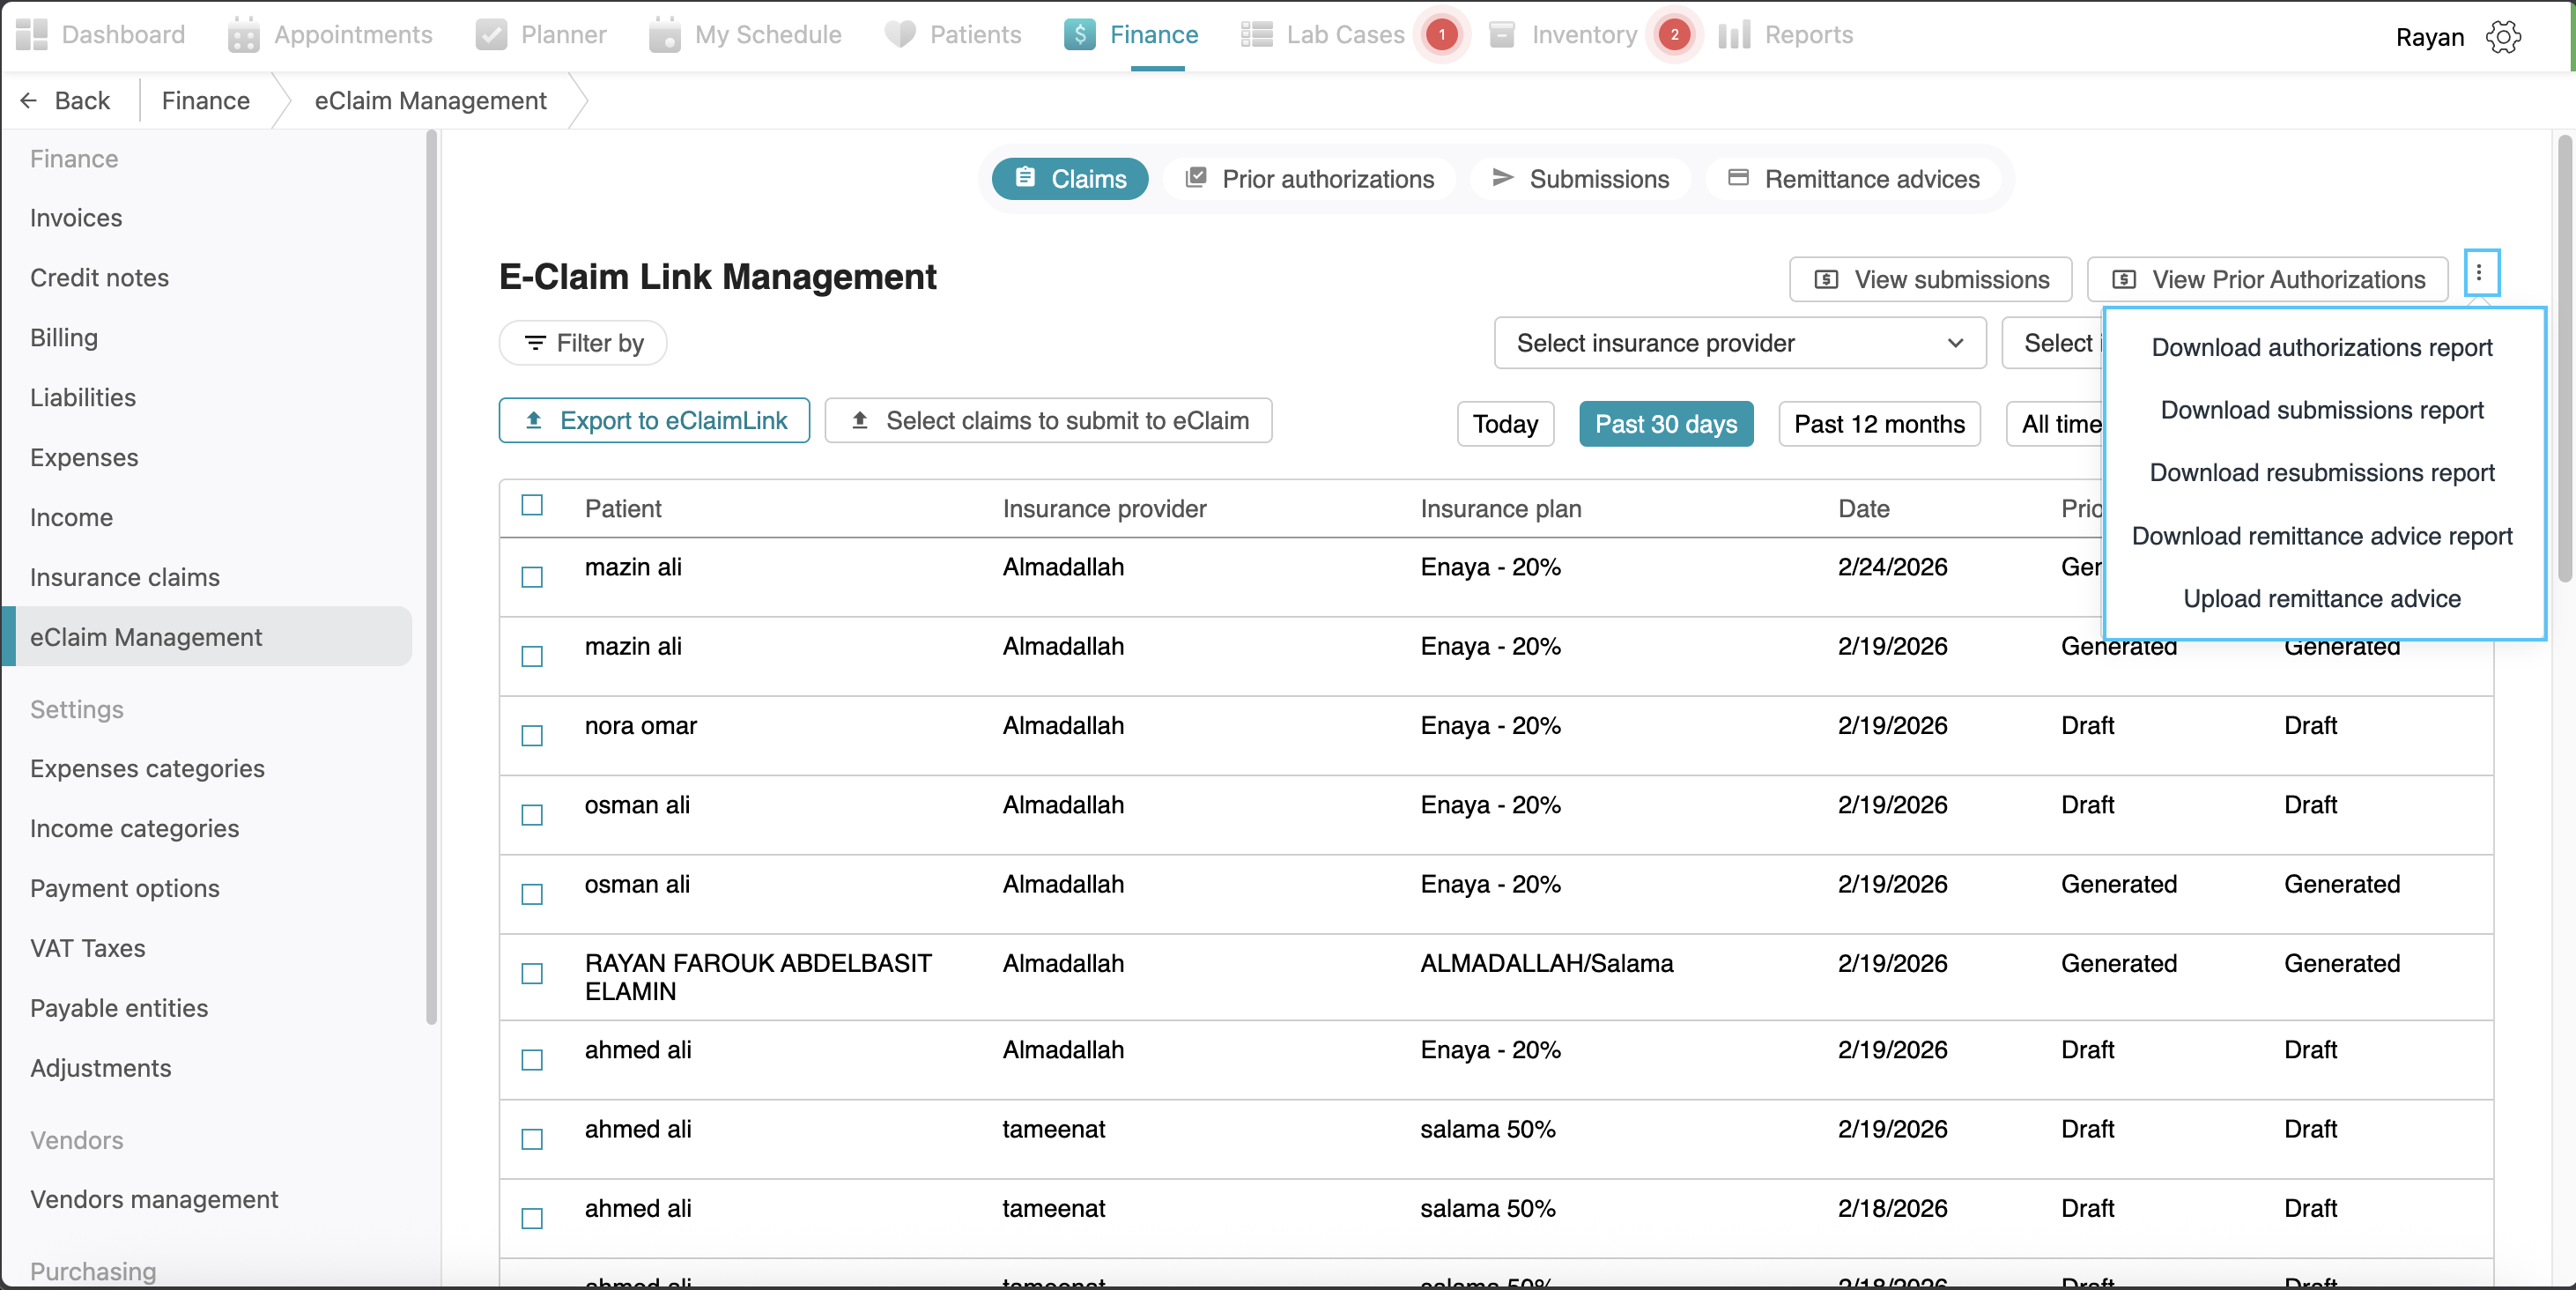
Download Insurance-related reports
You can download all the reports you want for your claims; like authorizations, submissions, resubmissions and remittance advice reports . Go to the Finance tab and click on the eClaim Management page. Click the three-dot option on the side of the “View Prior Authorizations” button. Select the report you want from the options. fill the details needed and the report is downloaded. (Change screenshot here)
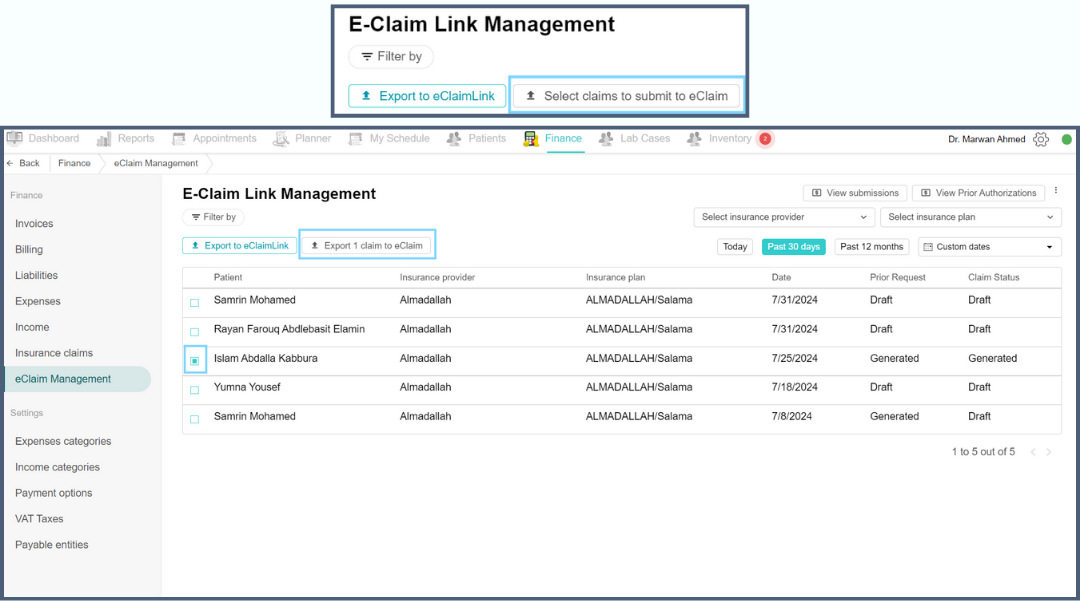
Select claims to submit to eClaim
This feature allows users to select specific claims for submission to the eClaim system. Go to the Finance tab and click on the eClaim Management page. To submit claims, select the claims desired and notice the “select claims to submit to eClaim” button gets turned to the “Export 1 claim to eClaim” button. Click the button, choose the disposition flag and send to E-Claim Link. To view it, click the View Submissions button.
Generate prior request
You can generate prior requests from this page, once a claim is drafted it will appear on the eClaim Management page in the Finance tab. The claim is listed with the patient name, insurance provider name and plan name, the date, prior request status and claim status. Click on the claim to open the insurance claims details page. Click on Generate prior request, a prior request page appears, and add the necessary details (such as Authorization Type, Disposition Flag, etc). Finally, click the Save Prior Request XML button and then click the Send to eClaimLink button.

Generate prior authorizations
To generate prior authorizations, open the eClaim Management page and select the desired claim. Click on the Generate prior request button, and make the necessary edits. In the Authorization Type, select AUTHORIZATION from the drop-down list and select PRODUCTION from the Disposition Flag list. Finally, click the Save Prior Request XML button and then click the Send to eClaimLink button. Make sure to change the status of the claim to “Pending approval” to keep the doctor in the loop of the process. Once the reply from eClaimLink is back, it will show in the response column in the prior request section and in the prior authorization section. If approved, set the claim to “Approved” status.

Generate new claim XML
Claims are sent to the portal in XML format. This will contain all the necessary information on the claim, insurance details of the patient, treatment performed with the diagnosis and any additional observers to help with the treatment. This claim XML can be downloaded to review the claim details. To do so, navigate to the claim on the eClaim Management page and select the claim. Click on Generate new claim XML, and add the necessary details. Finally, click Save Claim XML. You can download the XML by clicking the link “Download XML file”.

Submit claim
The important part of the claim is finally submitting it to the insurance providers to cover the treatment price. Submissions of claims are performed on the eClaim Management page of the Finance tab. You can submit either a singular claim or a number of claims under the same insurance plan. Tick the claims you want to submit and click the “Select claims to submit to eClaim” button. Choose the Disposition Flag and click Send to E-Claim Link.
Another option to export submissions to eClaim link, is by clicking the “export to eClaim link” button in blue color. This option will allow you to select an insurance provider, insurance plan, and the date range of the claims that you want to export. Then the matching claims will appear, and you will select the disposition flag and you have the option to select them all, unselect all, or manually click on the ones you want to submit, then click “send to eClaim”. (visualization: screenshot)
Remittance Advice
The Remittance Advice section allows you to track and manage payments received from insurance companies for submitted claims. This feature provides a clear overview of whether claims have been paid in full, partially, or rejected.
View Remittance Advice:
To access the remittance advice, navigate to the Finance tab and select Remittance Advices from the top menu. The resulting list displays key details for each transaction, such as the transaction date, the Sender ID for the insurance provider or TPA, and the current processing status. You can also see the number of individual claims included in the remittance and the date the record was created in the system. To find specific records quickly, use the time filters to view data from today, the past 30 days, the past 12 months, all time, or a custom date range. (visualization: screenshot)
Processing Remittance Advice: (visualization: video)
To dive deeper into a specific payment list, click on a record to open the Remittance Advice summary. This view displays the Payer ID, the disposition flag, and the total number of claims. From here, you can click View XML to download and view the raw data file from the insurance company to verify payment details. If a record requires further review, you can use the Set status to NEW button to revert its state. When you are ready to move to the reconciliation screen, click the Process button.
Once in the Bulk Add Advice Payment screen, you can map insurance payments directly to the clinic's internal records. Begin by reviewing each claim’s net amount against the actual payment received. If a claim was not paid, the system will provide a denial code and comments to explain the reason. To finalize the process, select your preferred payment method, such as the cash register or a card. You can then click Select fully paid to automatically match all claims where the payment matches the net amount. Finally, click Set paid and confirm by clicking Add payment to mark the claims as 100% paid within Balsam Medico.
Upload Remittance Advice:
If you want to manually upload remittance advice files that you have, Go to the Finance tab and click on the eClaim Management page. Click the three-dot option on the side of the “View Prior Authorizations” button. Select “upload remittance advice” from the options.then select the file you want, and a pop-up will appear. In the pop-up you will see the list of your remittance advice uploaded with their details, click on the claim or select all, select the payment method and click ”set paid”, the amount will be visible to you and finally click “add payment” (visualization: video)
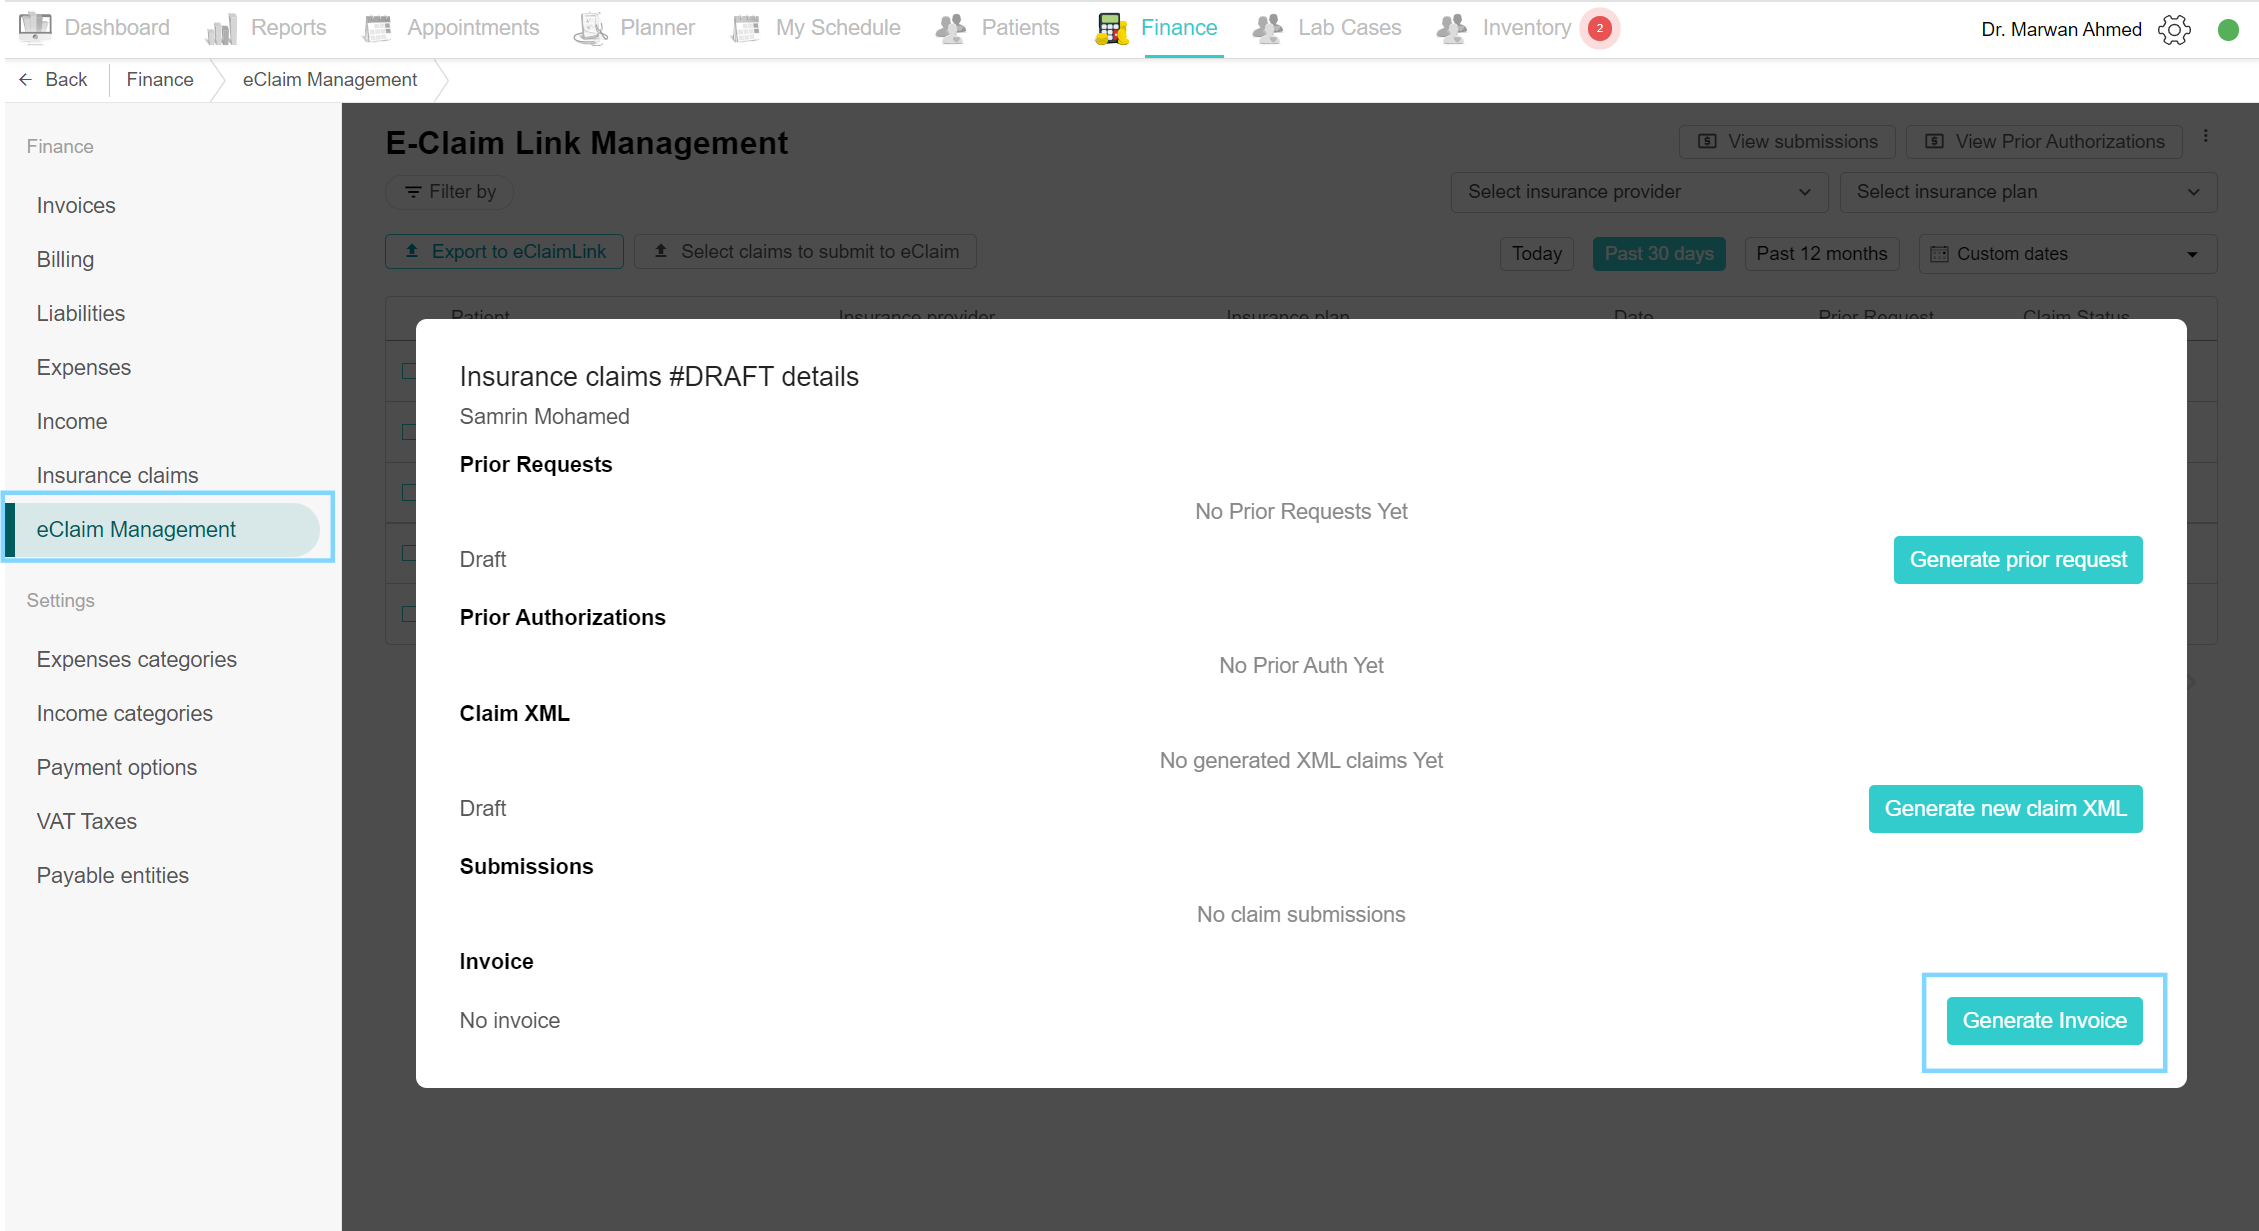
Generate invoices to insurance providers
When the claim is submitted to the portal, the payments are due. Create an invoice for the insurance plans to receive the payment of the claim. Select the desired claim from the eClaim Management page. Scroll down to the Invoice section. Click on Generate Invoice. After generation, you can either create a new invoice or download the generated invoice. To download, click on the Download invoice button and the invoice will include the patient details, claim details and the cost of the insurance-covered treatment.
Additional videos: