
EMR
Visit Notes
All visit notes are automatically saved with the author's name and date. To review them, go to the "Patients" tab, click on the patient's name, and select "Visit Notes".
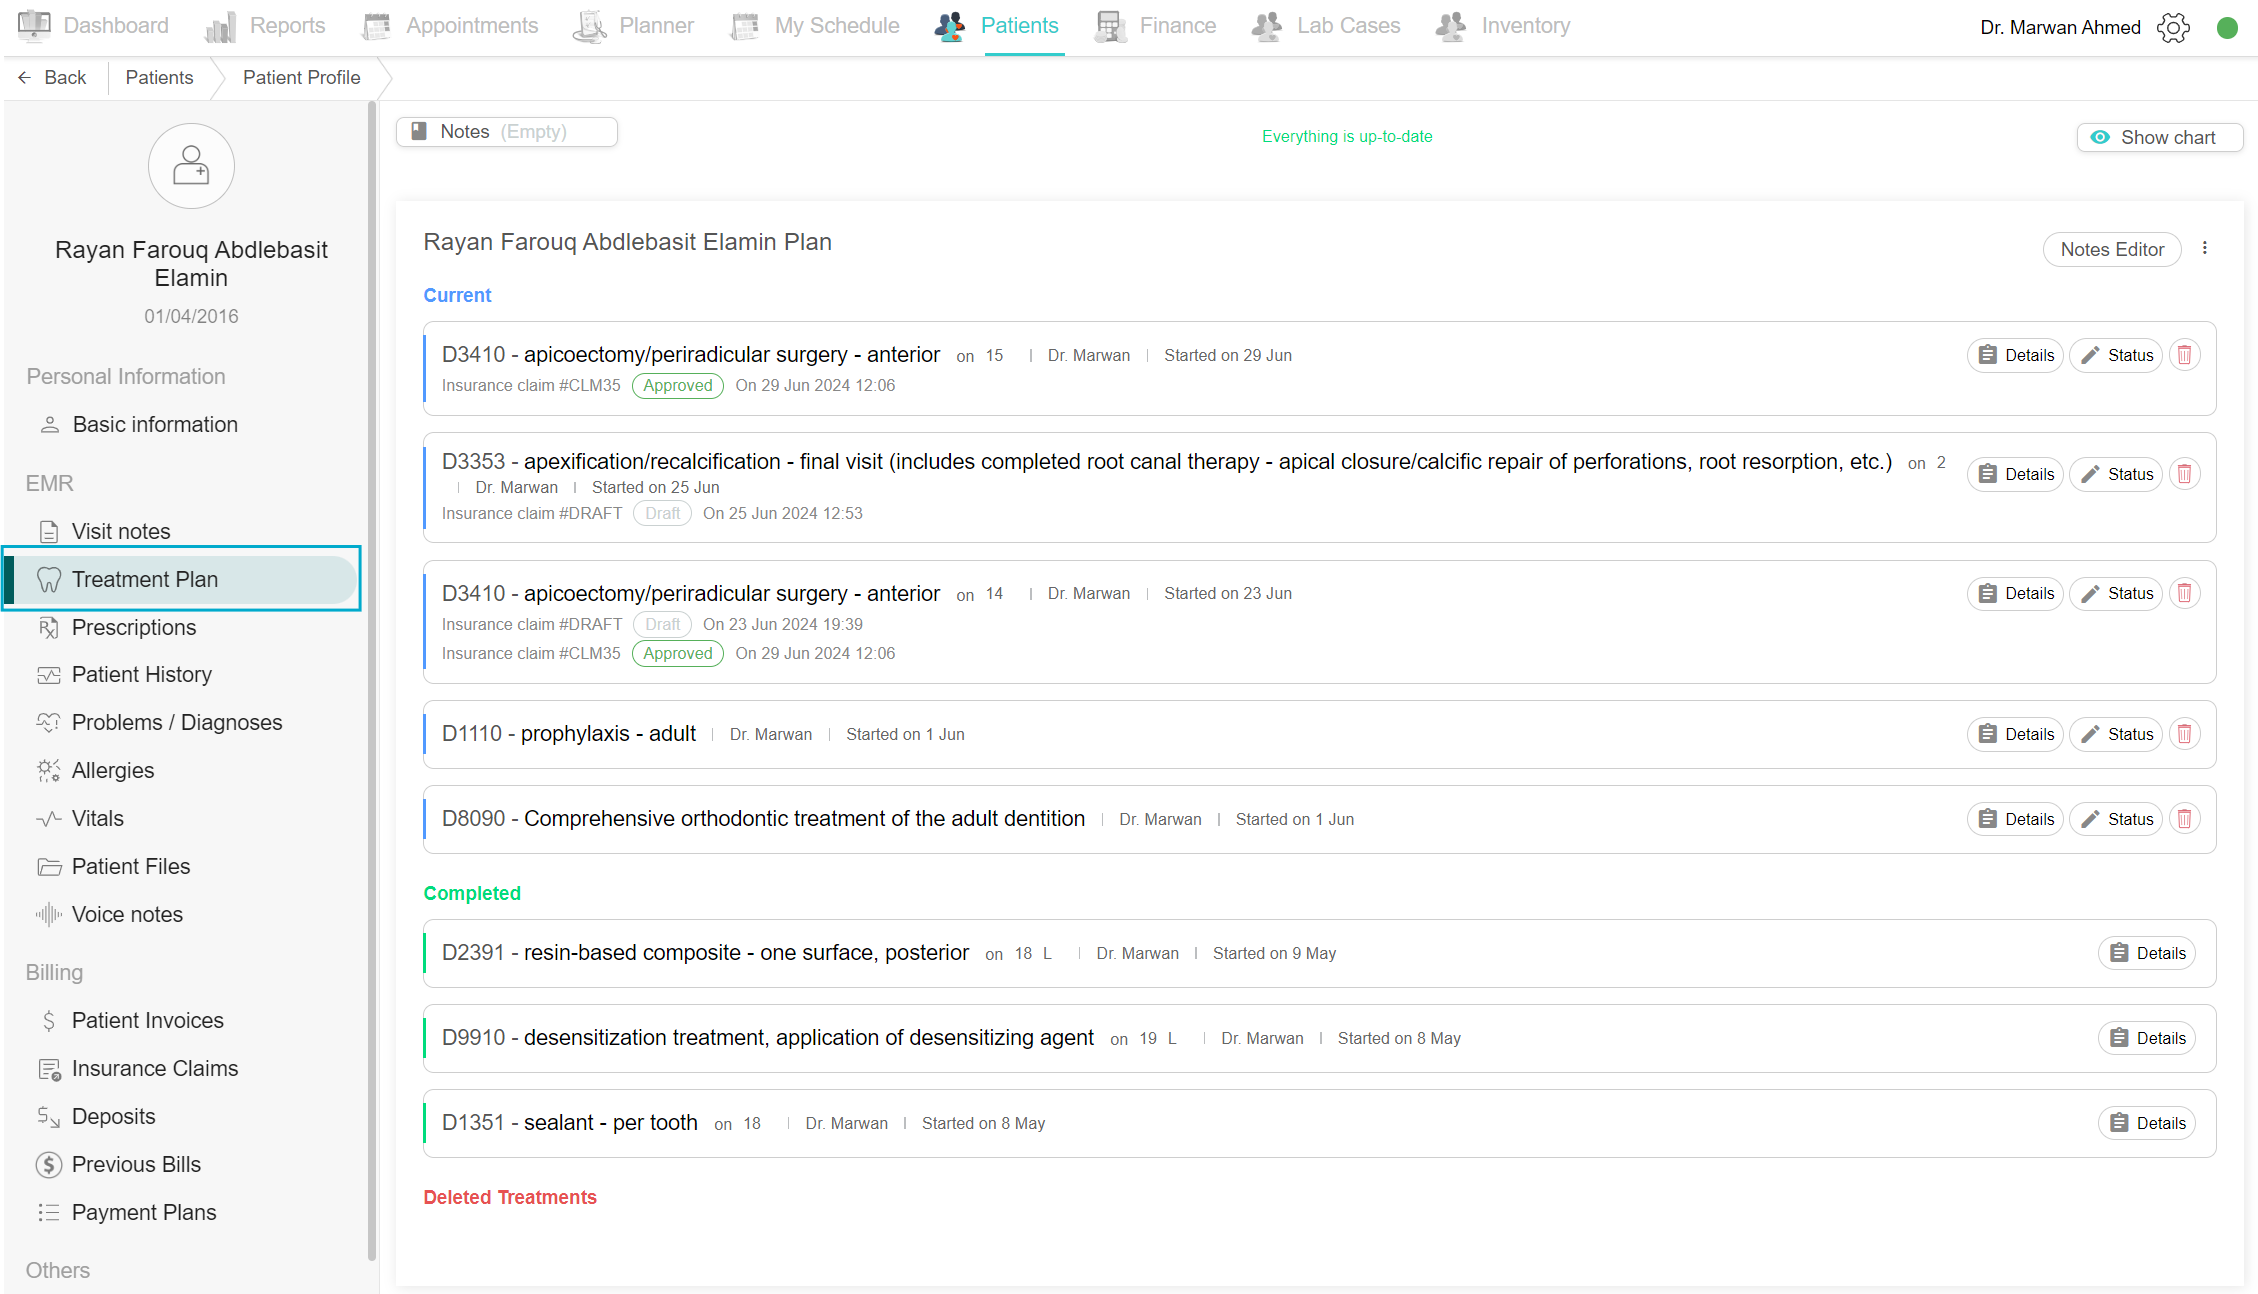
Treatment Plan
To see previous treatments, go to the "Patients" tab, select the patient's name, go to the patient profile, and in the EMR section, select "Treatment Plan". You will see all treatments with their status and date.
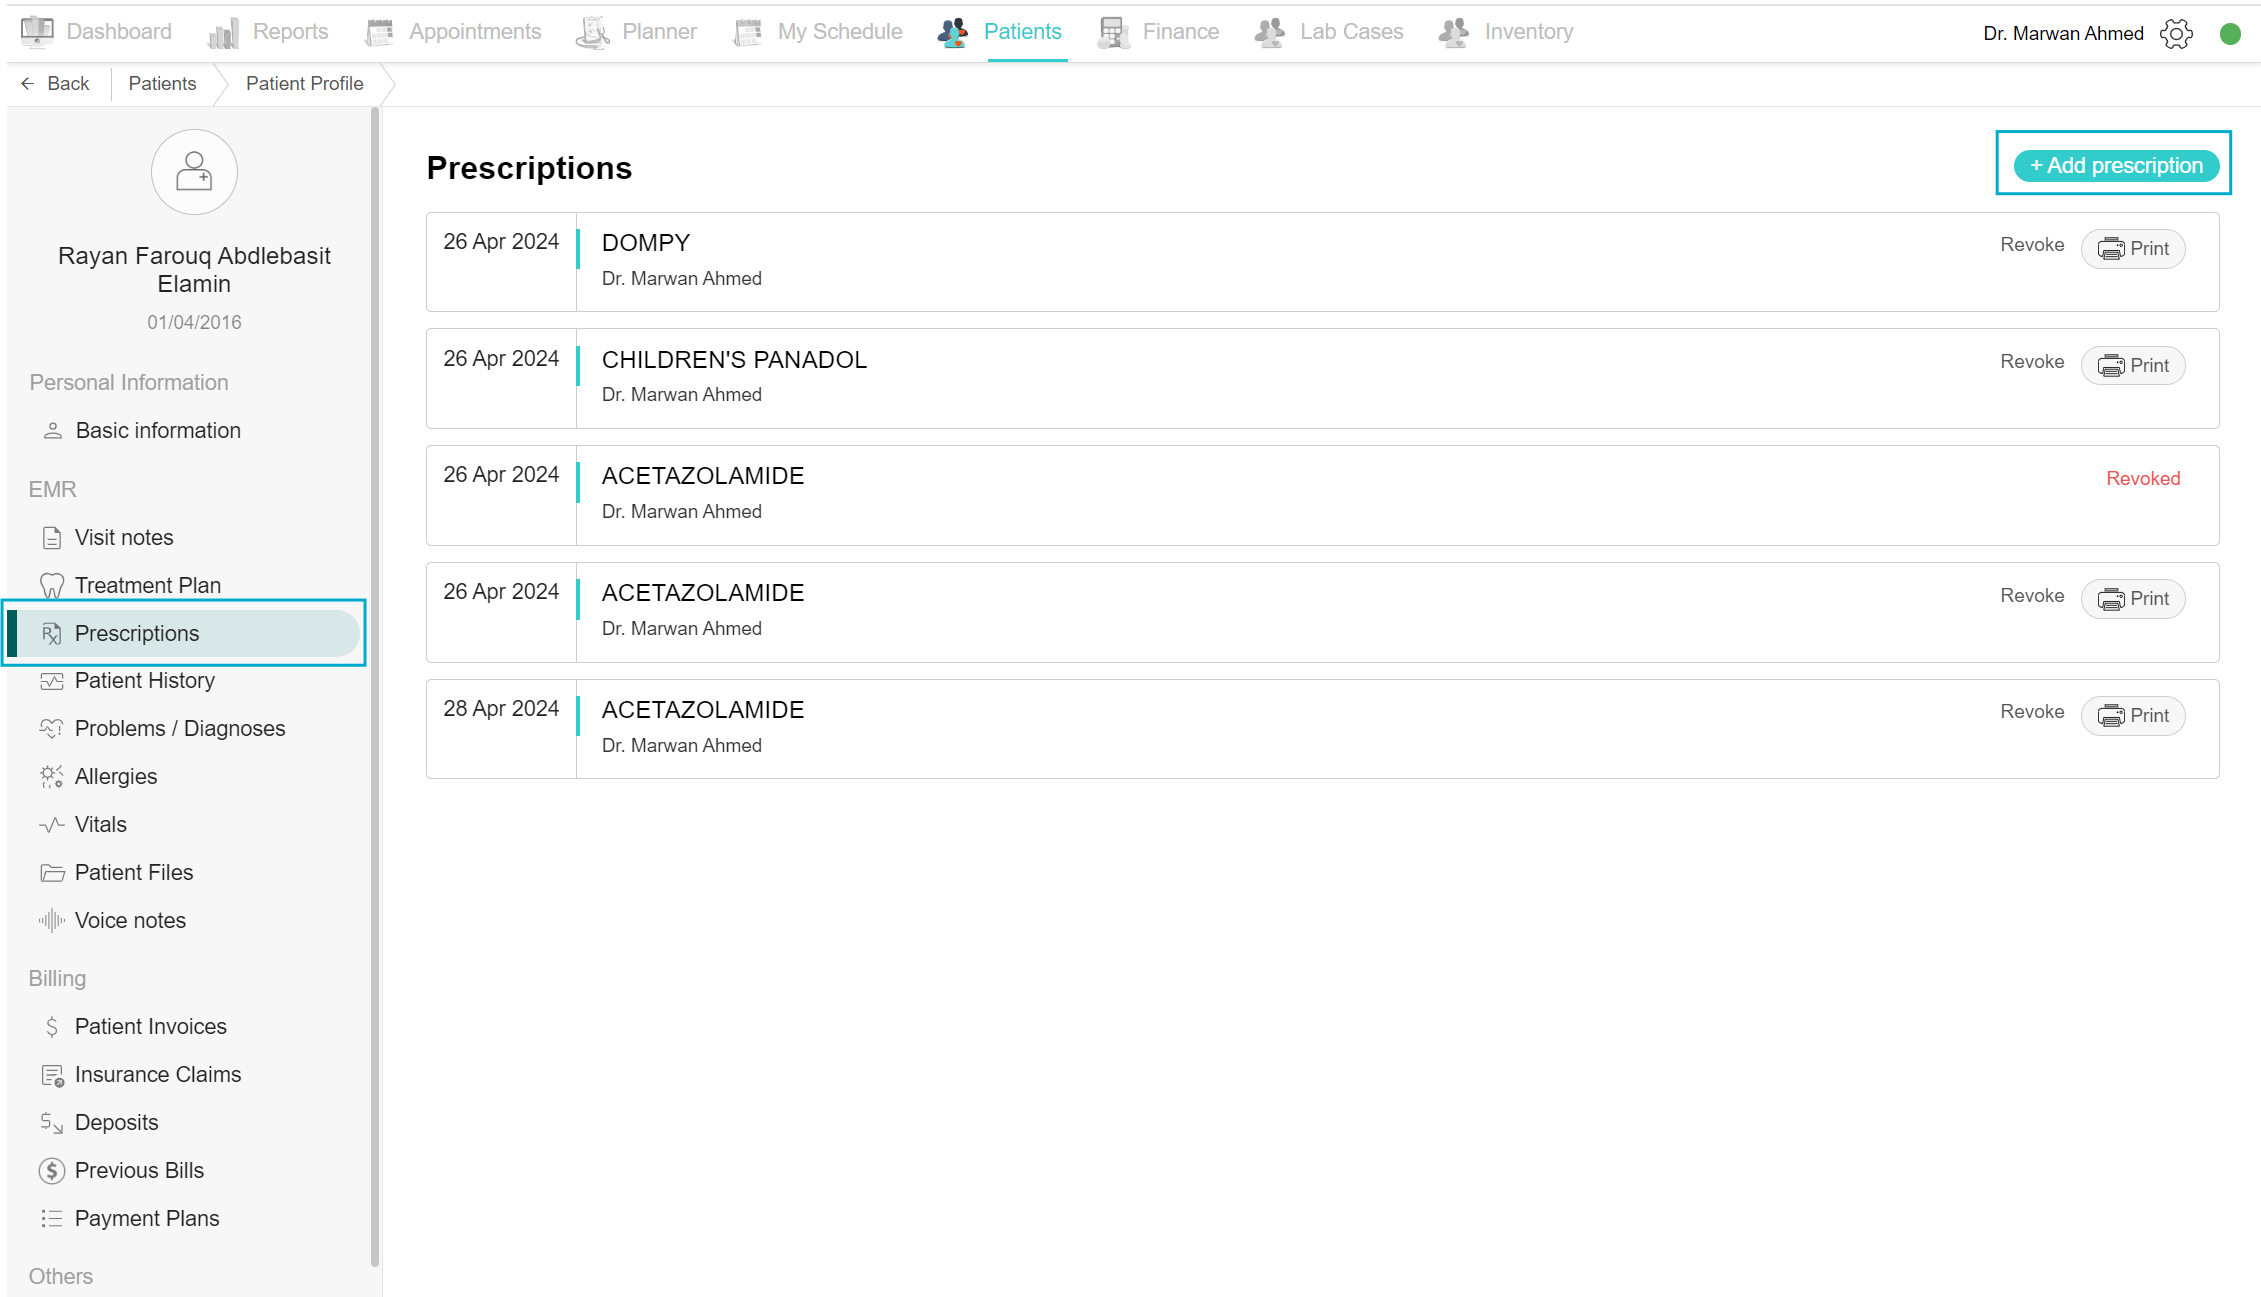
Prescriptions
Add prescription:
Writing prescriptions is easy. Click on the patient's name, select "Prescription" in the EMR section, click on the "Add Prescription" button, select the drug from the list, and save it. Click Print and Lock to disable editing the prescription and print it for the patient.
Revoke prescription:
If the doctor wishes to cancel the prescription, that is to revoke the prescription. To revoke a prescription, choose the desired prescription, and click the “Revoke” button next to the drug name. A confirmation box appears, click “Revoke prescription” to continue the cancellation process. Now the prescription is given the status “Revoked”.
View Patient History
To view patient history or make changes, go to the "Patients" tab, click on the patient's name, and select "Patient History" in the EMR section. Review the patient history. Edit as needed and click the "Save" button.

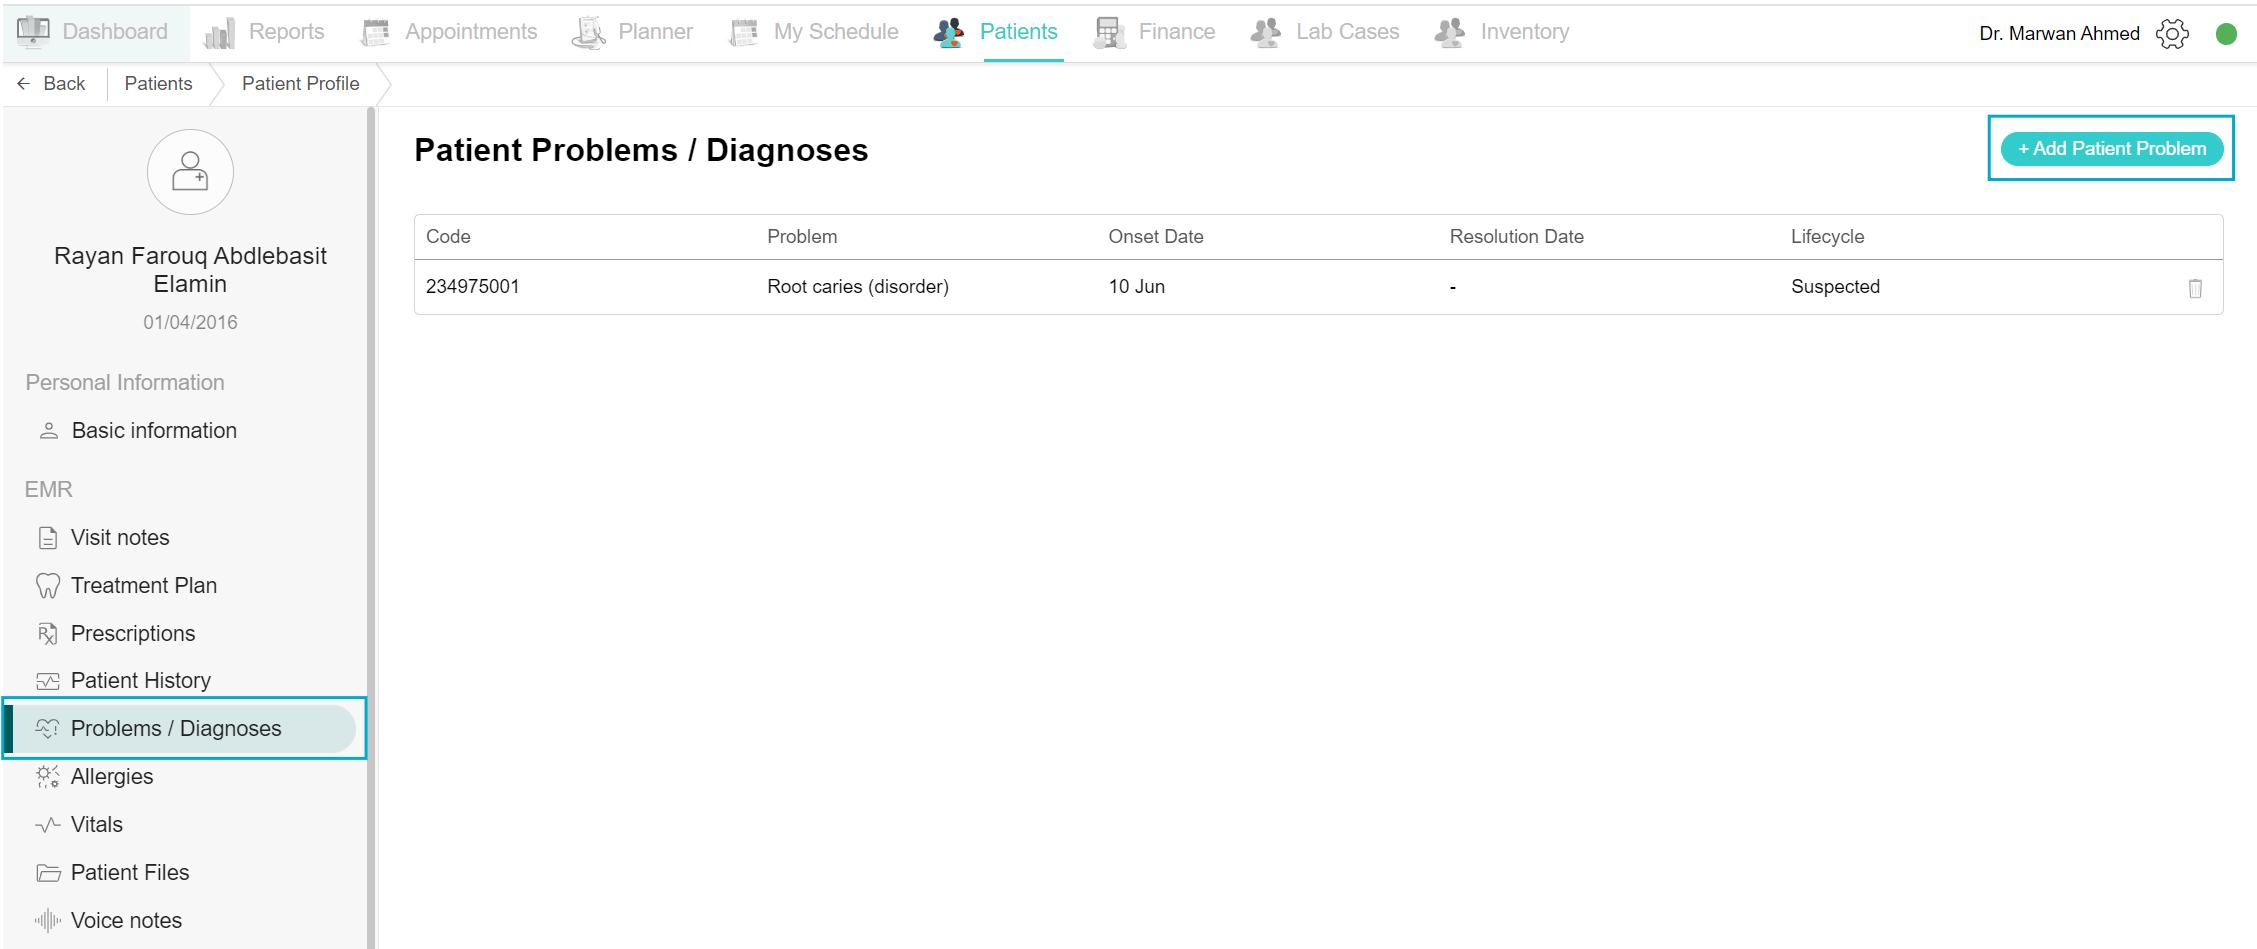
View Problems
To add a new problem, go to the "Patients" tab, select the patient's name, and select "Problems ". You will see all previous problems and can add new ones by clicking on the "Add Patient Problem" button. Use ICD codes according to DHA.
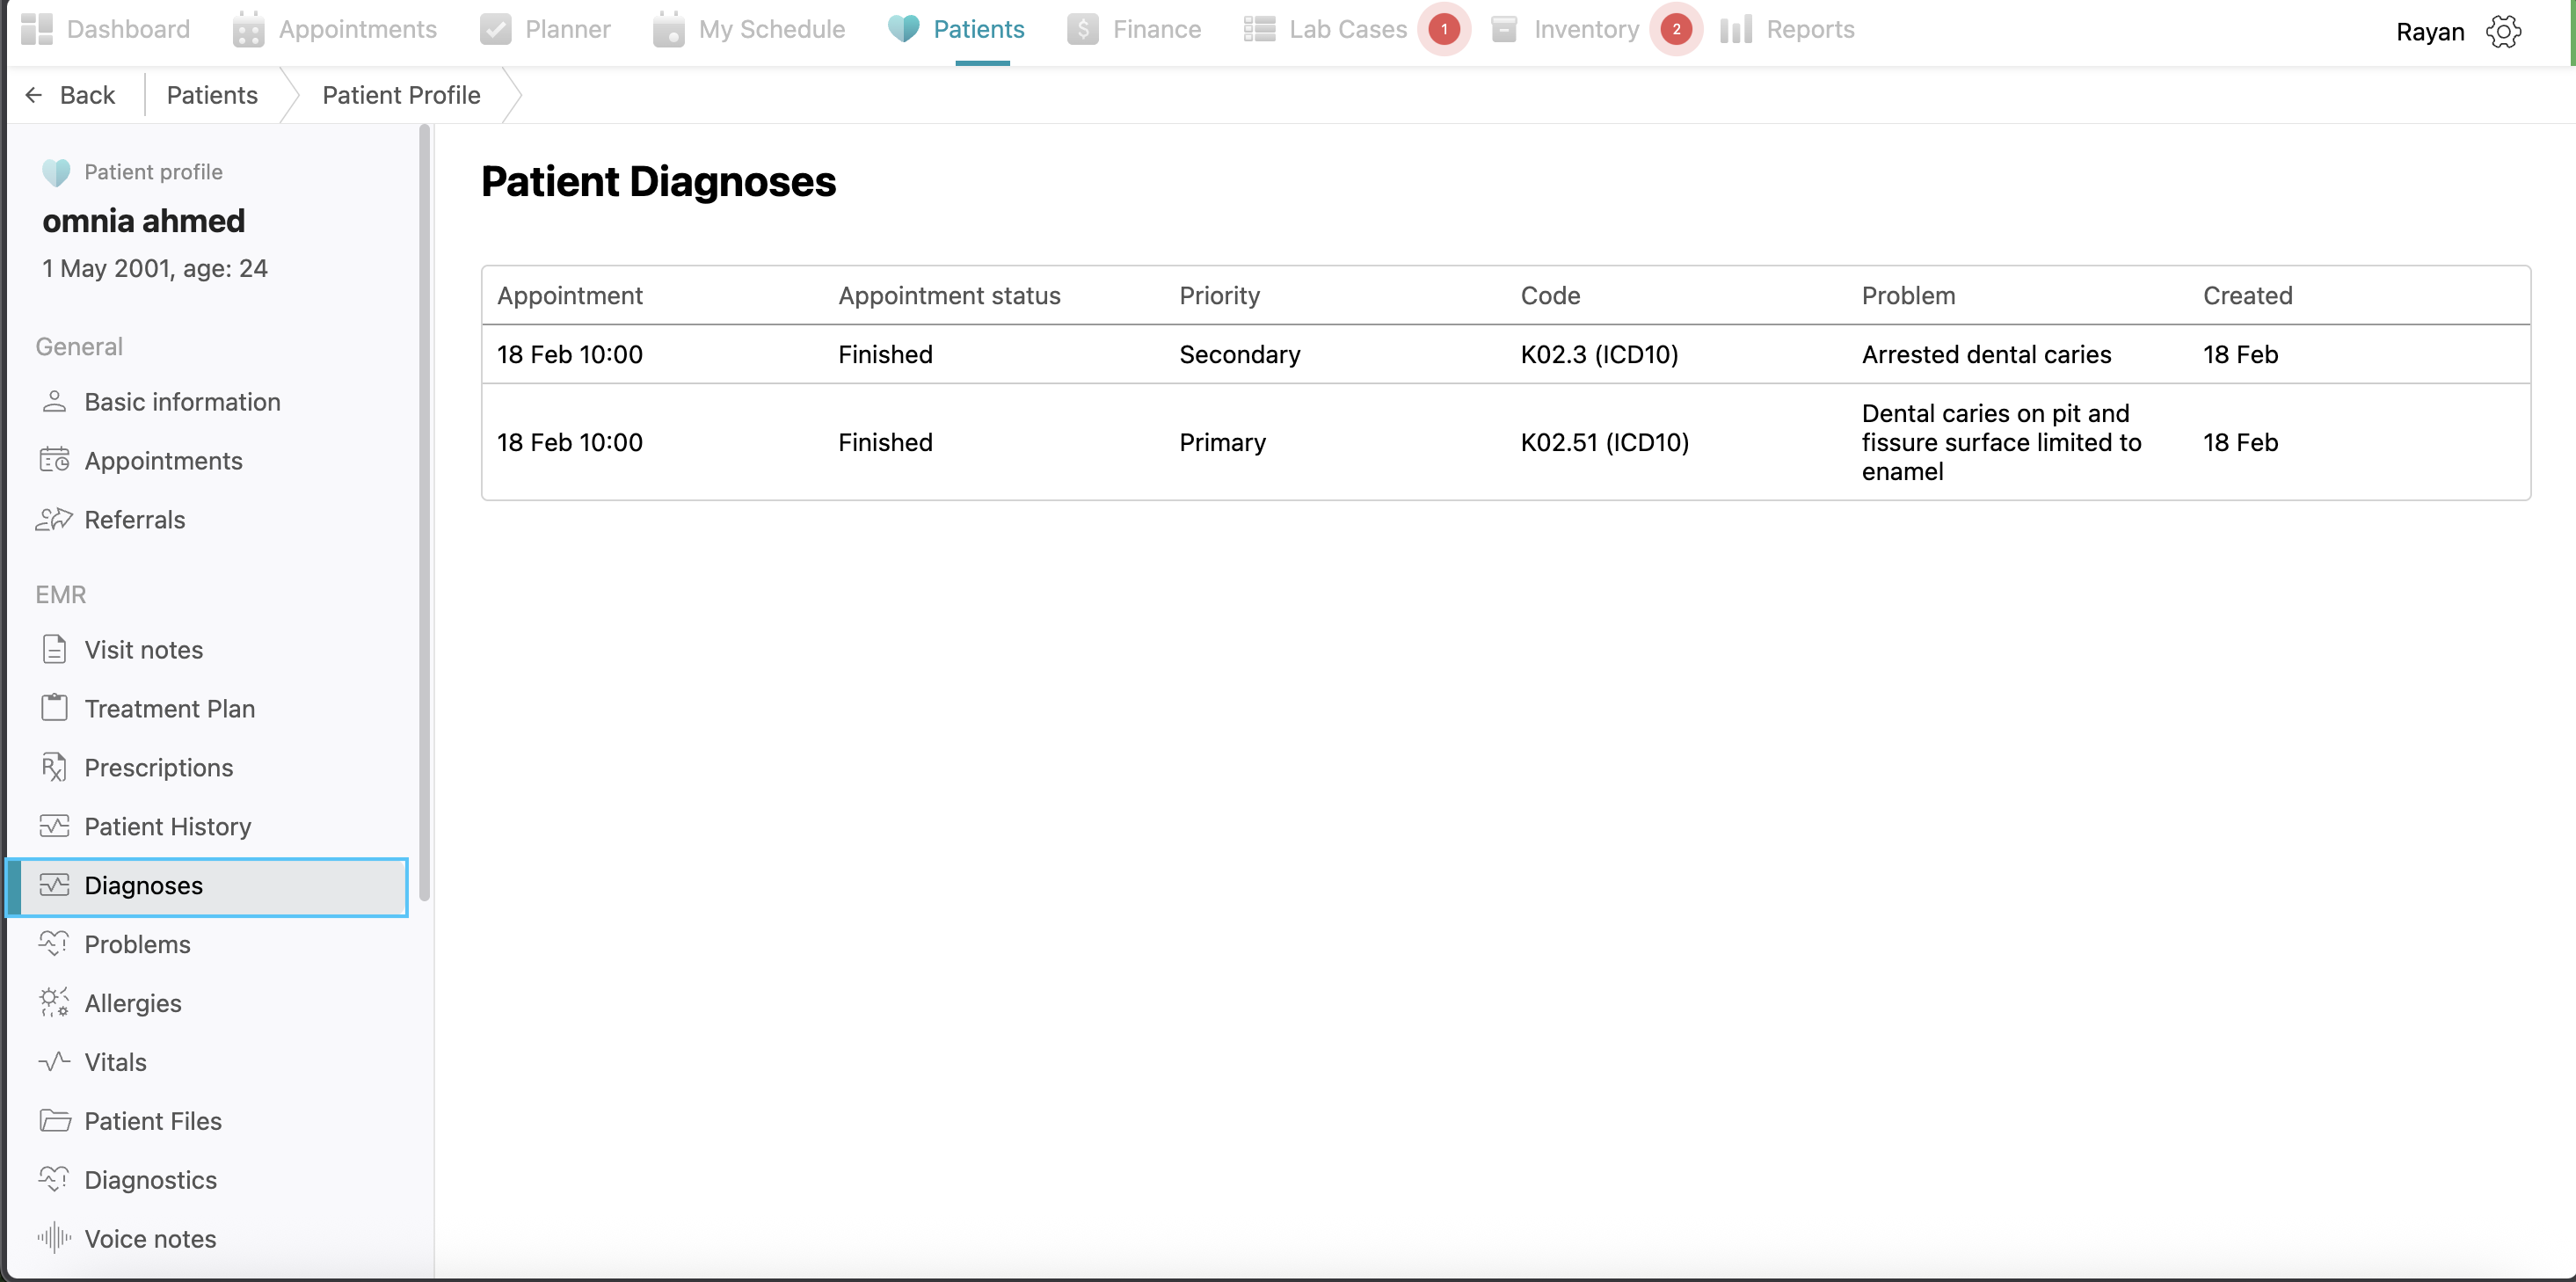
View Diagnoses
If you click on the diagnosis, you can see all the previous diagnosis of this patient with the appointment time, appointment status, priority of the diagnosis, code of the diagnosis, the problem related to this diagnosis and creation date of the diagnosis.
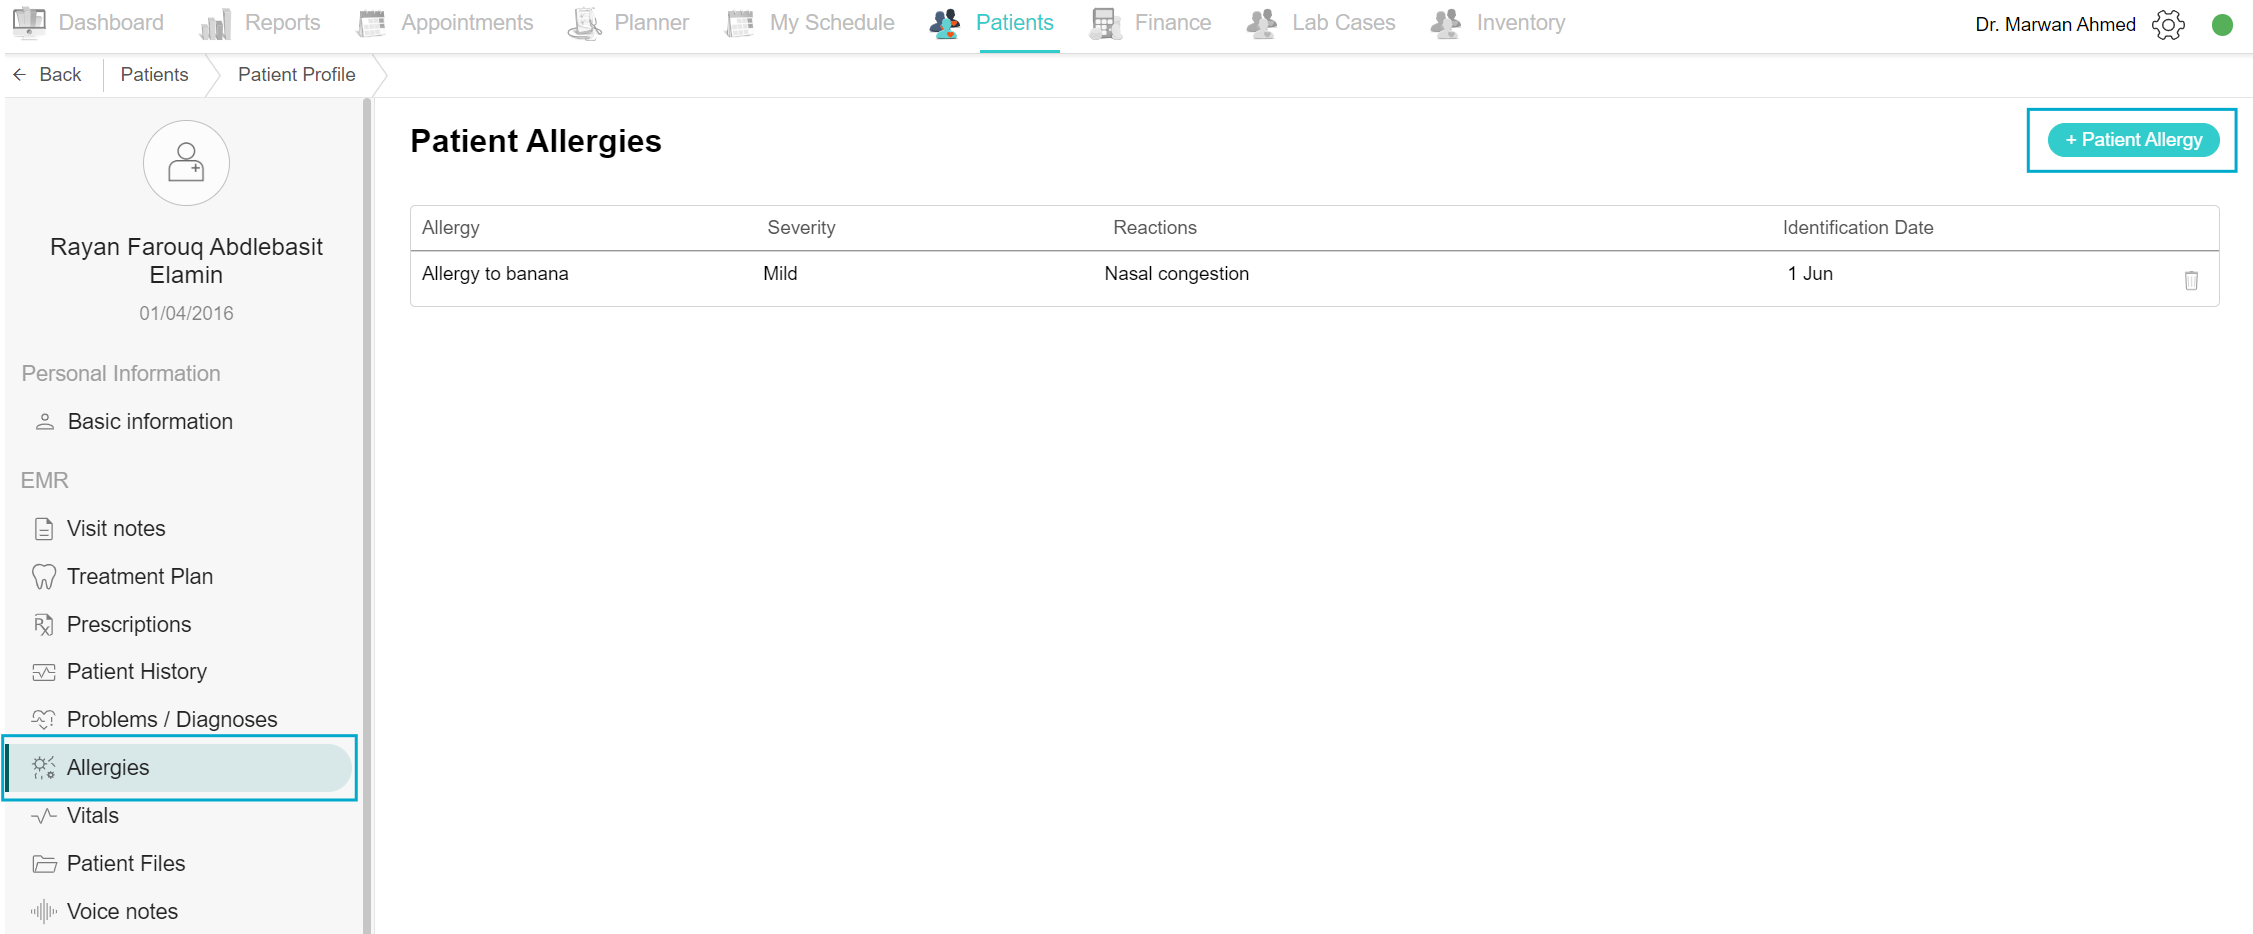
View Allergies
To check the previously added allergies, you can find the list when clicking “Allergies” in the EMR section. To add a new allergy, go to the "Patients" tab, click on the patient's name, and select "Allergies" in the EMR section. Click on the "Add Patient Allergy" button, select the allergy type and sensitivity, and click Save.
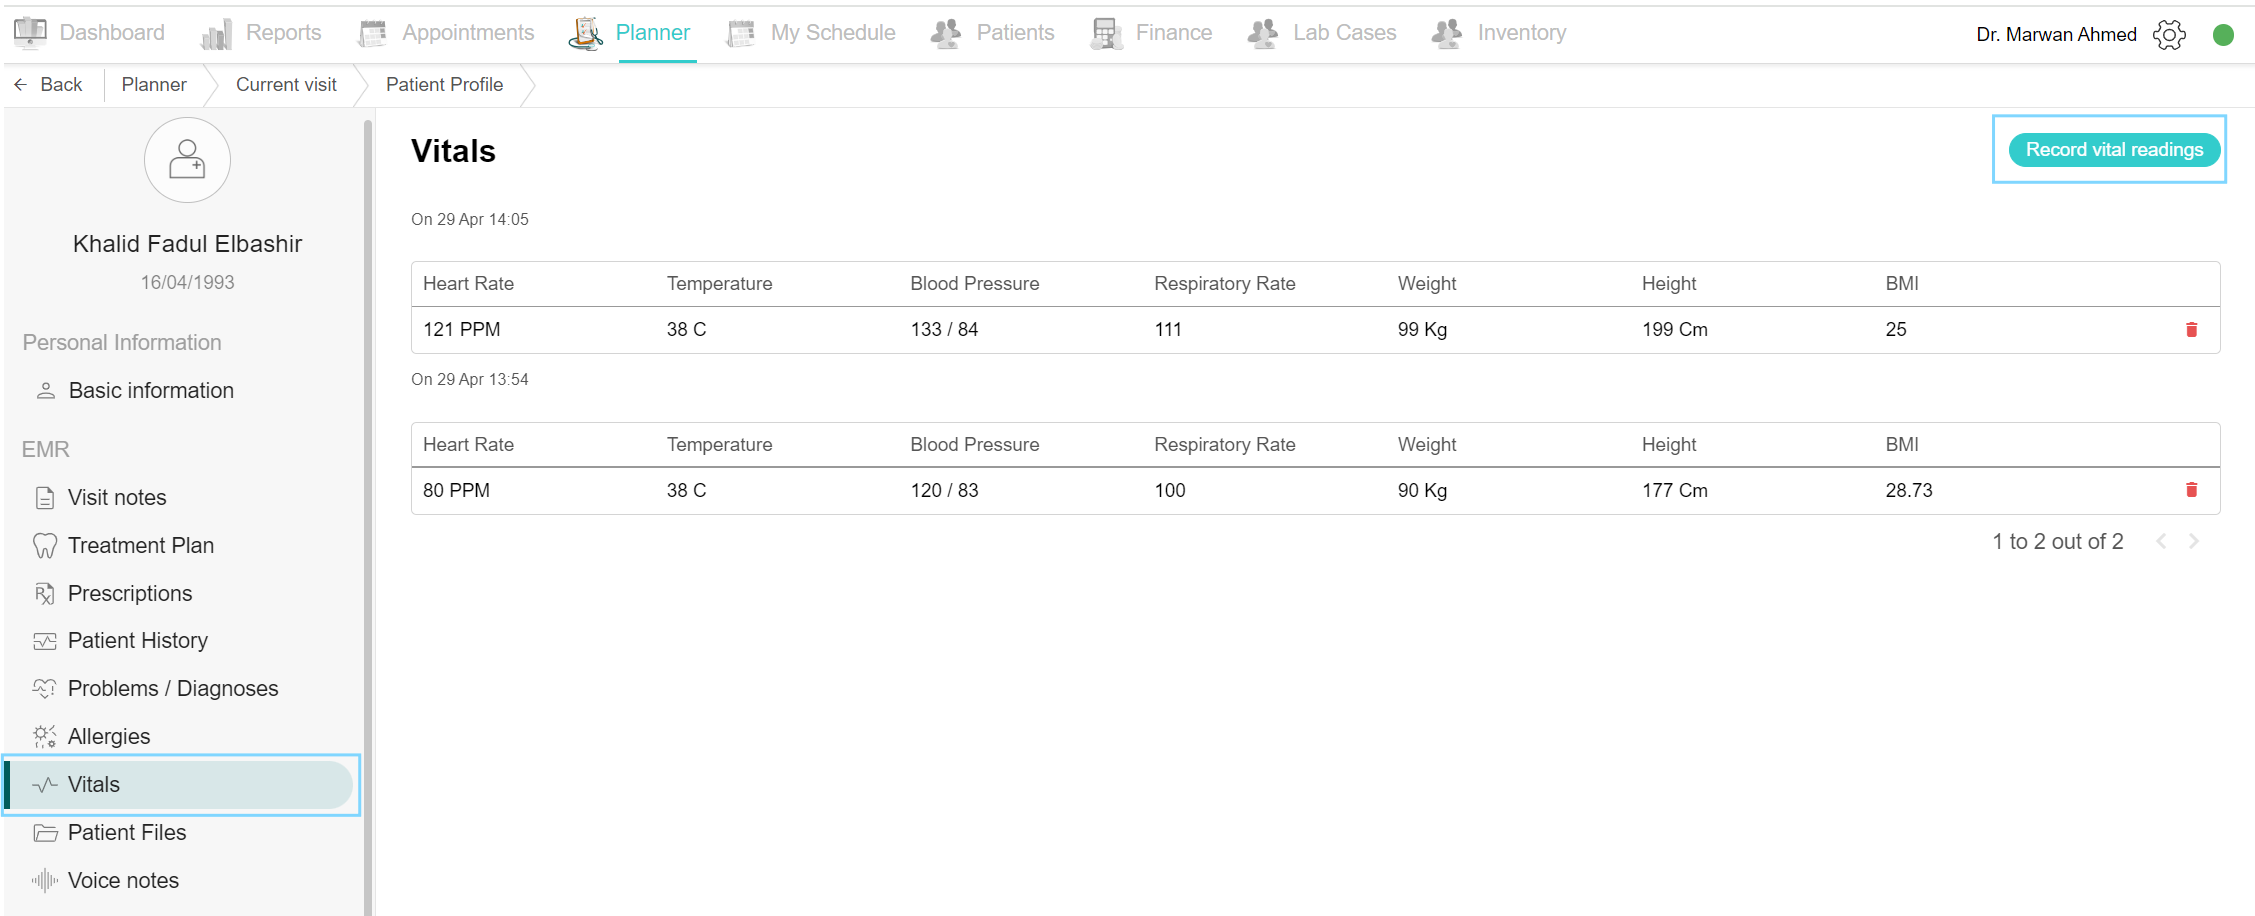
View Patient Vitals
All recorded vitals are saved in the system and can be accessed at any time. To see vitals recorded three months ago, for example, go to the "Patients" tab, click on the patient's name, go to the patient profile, and select "Vitals". You can also add new vitals by clicking on the "Record Vital Reading" button.
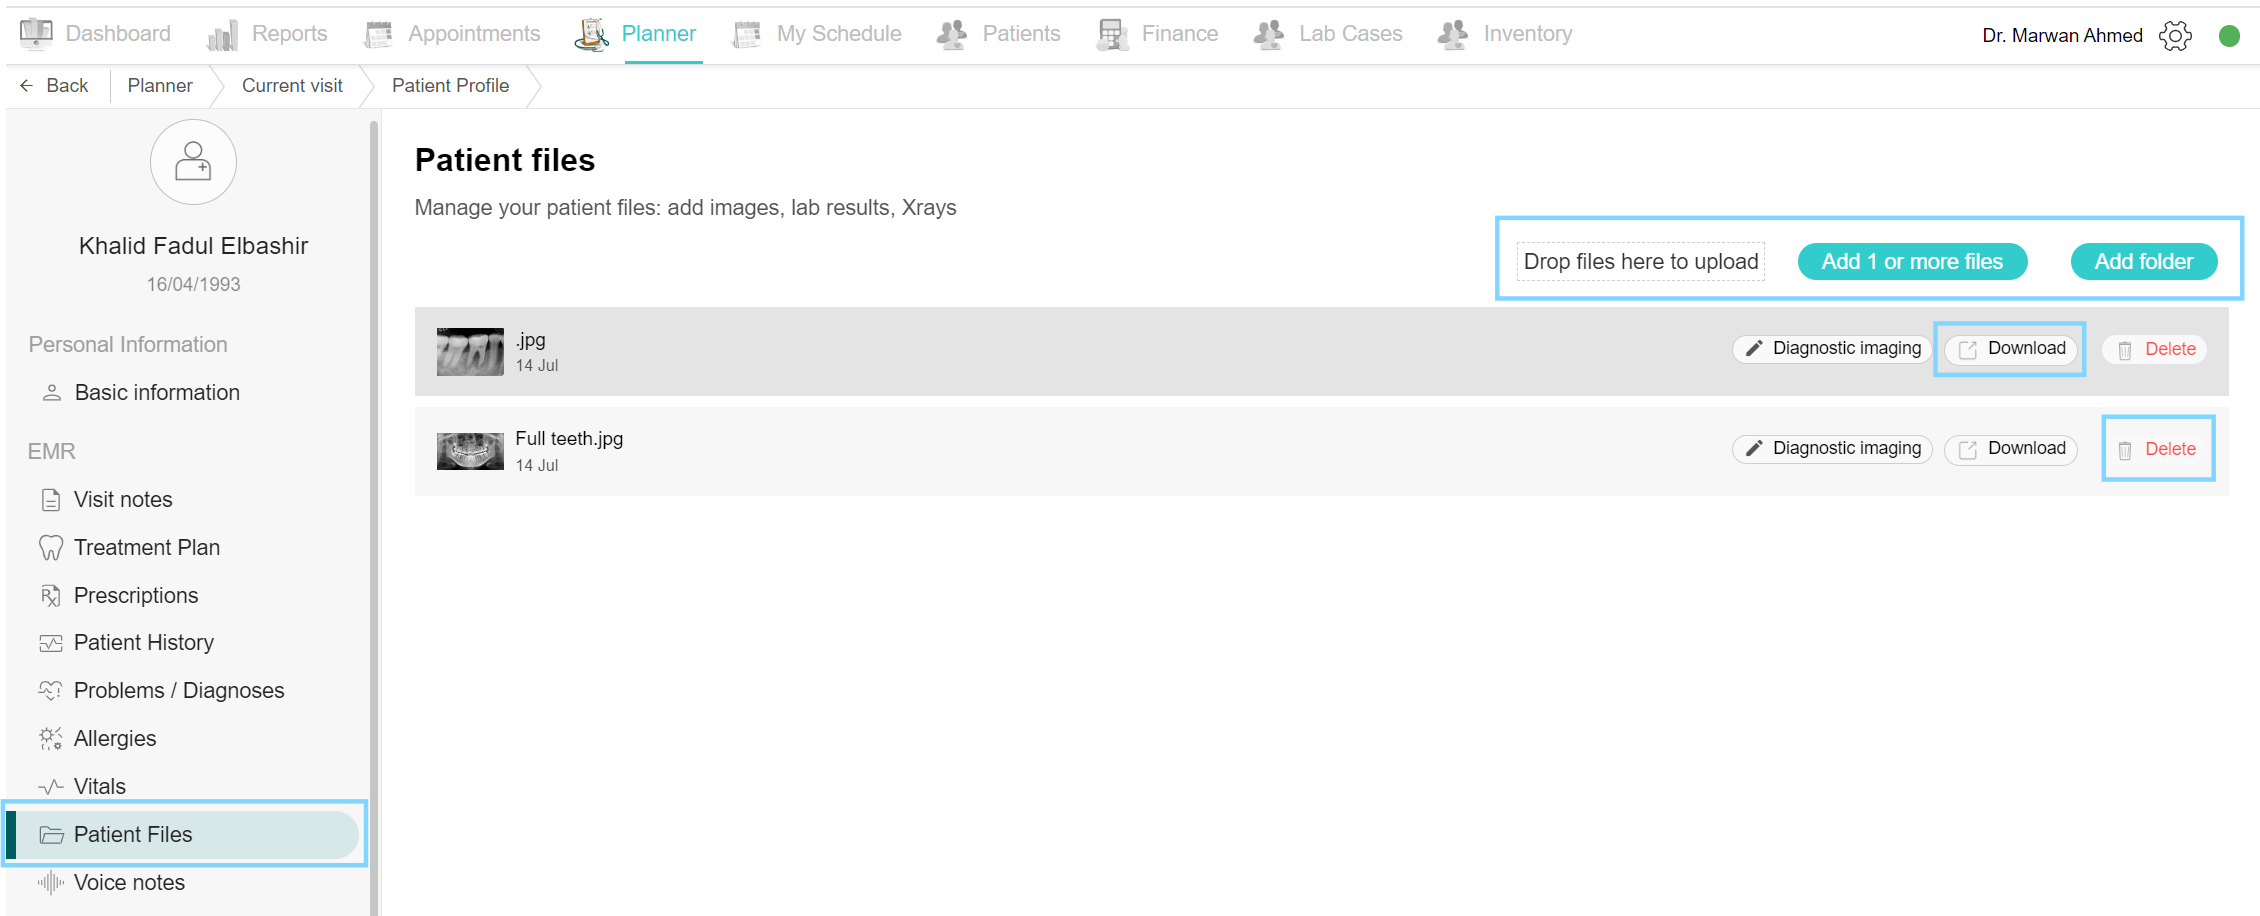
View Patient Files
To add files to a patient's record, such as an x-ray, go to the "Patients" tab, click on the patient's name, and select "Patient Files" from the EMR section. Click on the "Add 1 or More File" button. You can also add a folder by clicking on the "Add Folder" button. To add files from a computer desktop, you can either drop files to upload or upload files. All added files will remain accessible at any time.
When the file is added and shown in the system, there are two options next to it, a download button and a delete button.
To delete a patient file, select the desired file and click the “Delete” button. A confirmation box appears, click the “Yes, delete this file” button to delete the file.
To download a file, select the desired file and click the “Download” button, select the download location and click Save.
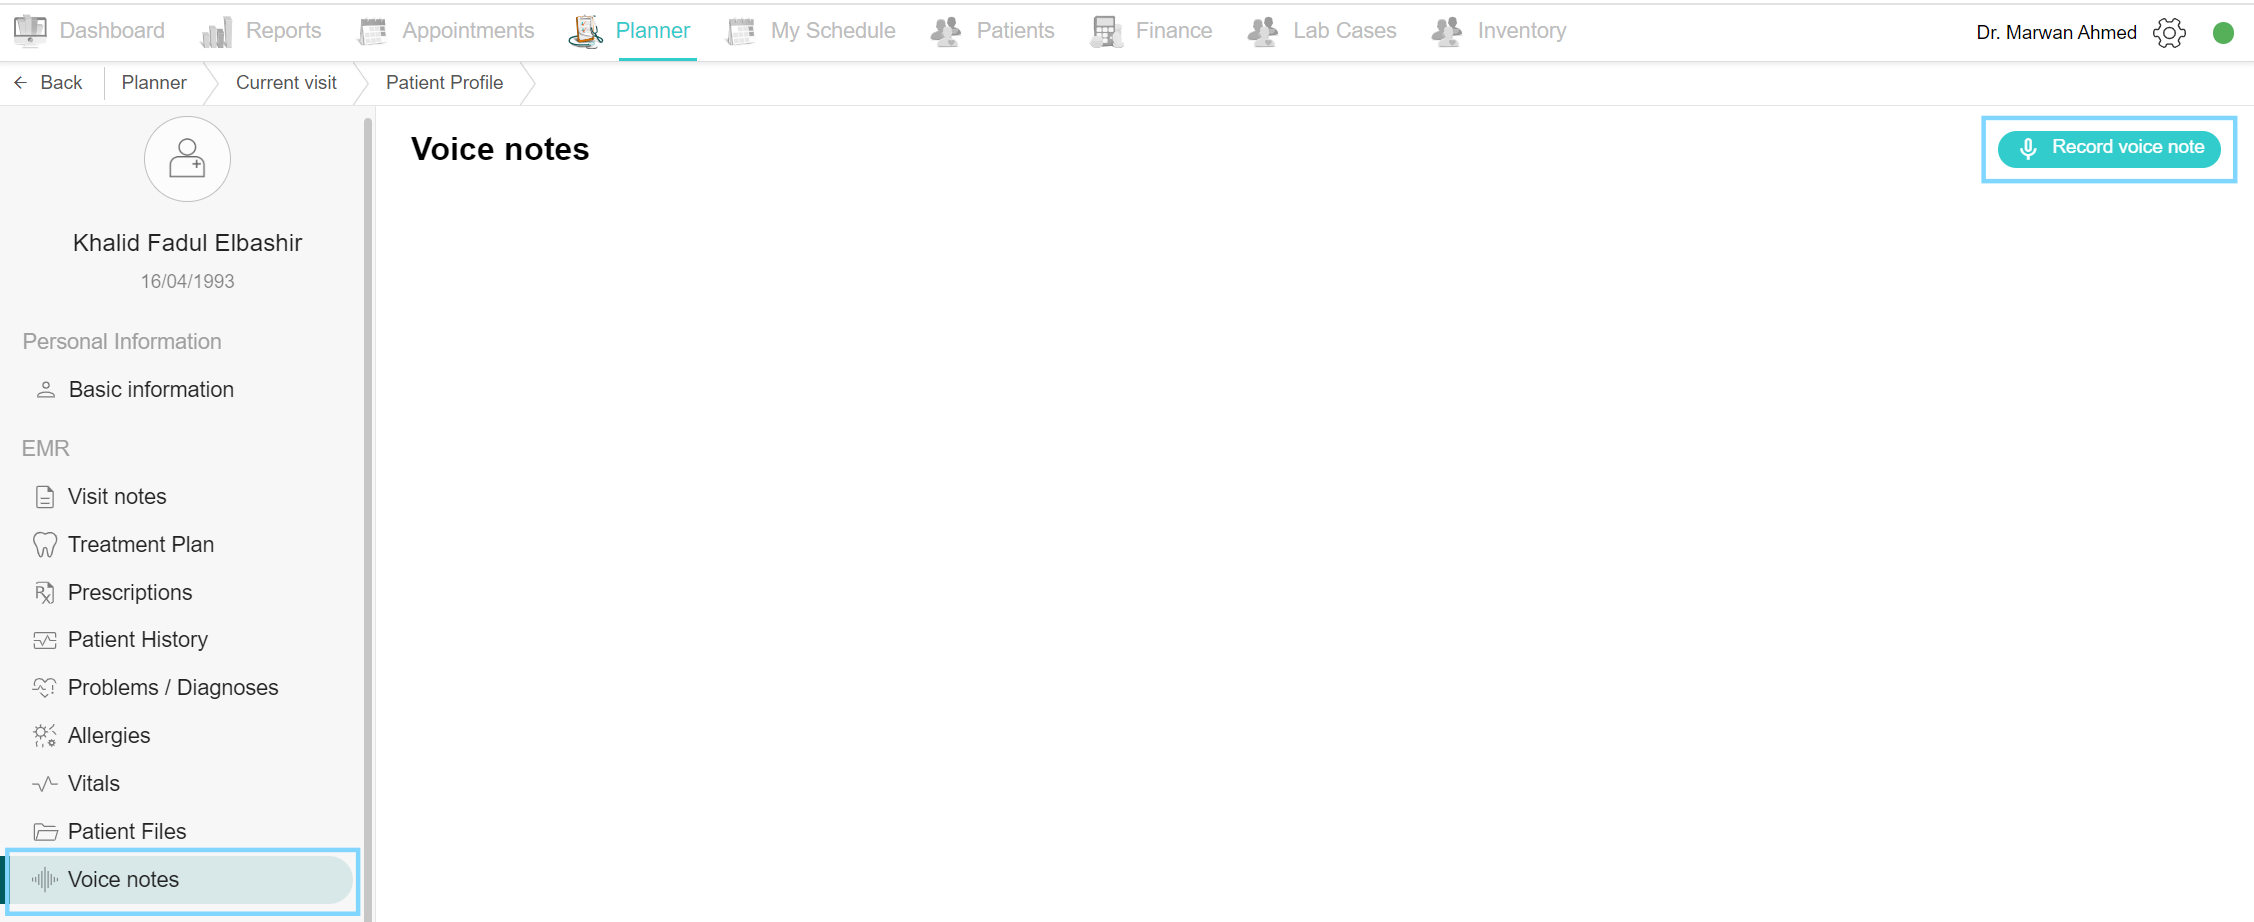
View and Record Voice Notes
To record a voice note, navigate to the Patients tab, select the patient, and then click Voice Notes. On the top is the Record Voice Note button, click it and start recording. After completing the note, click Save to save it or Cancel to discard it. You can also listen to all notes for this patient through this tab.
No Comments