Planner tab
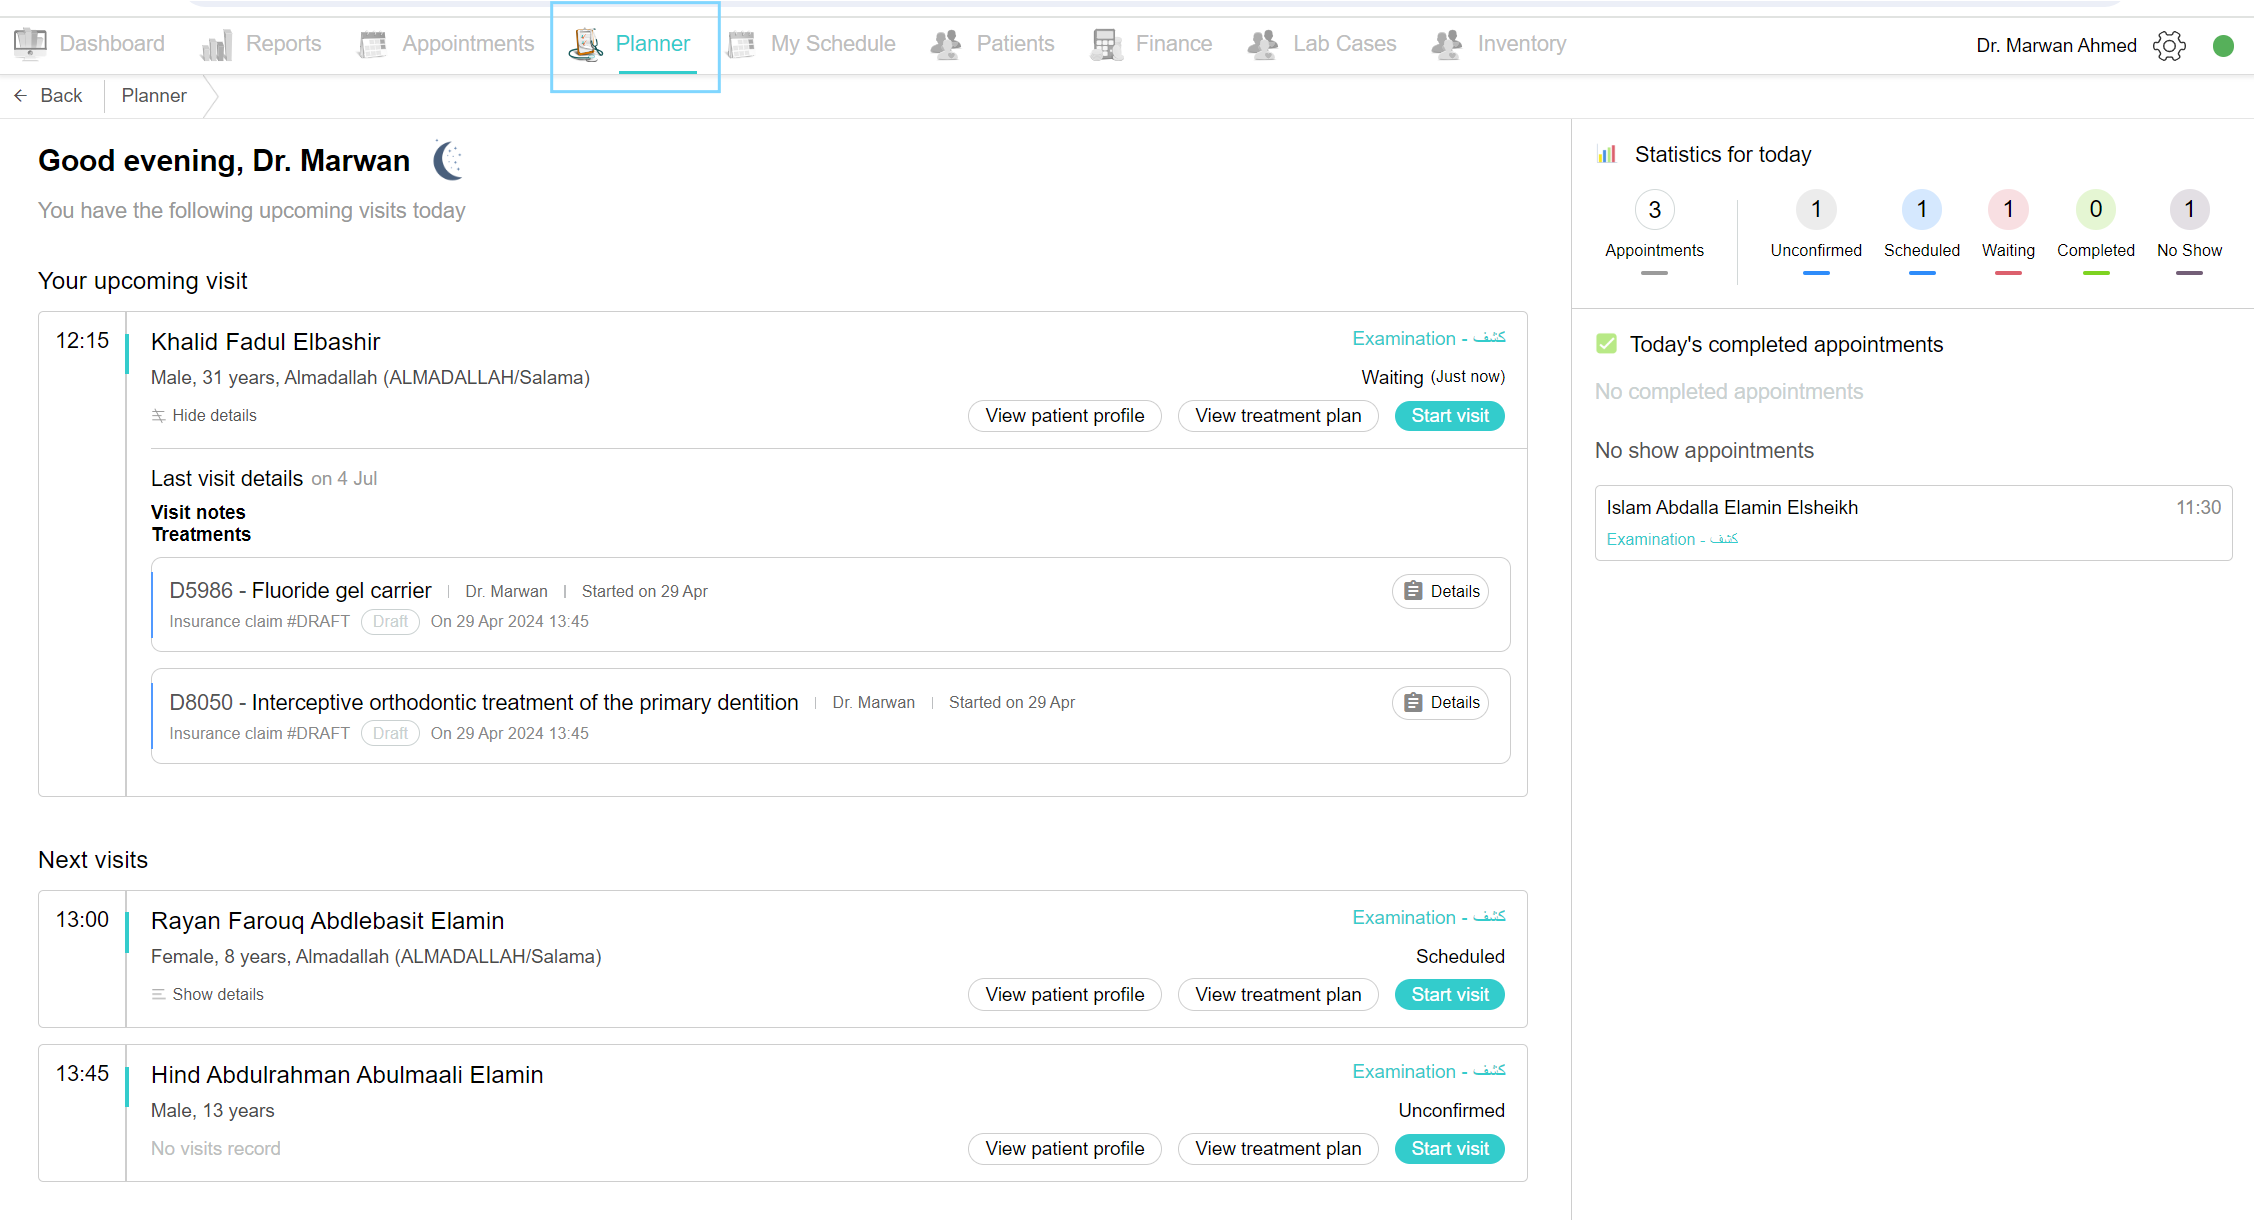
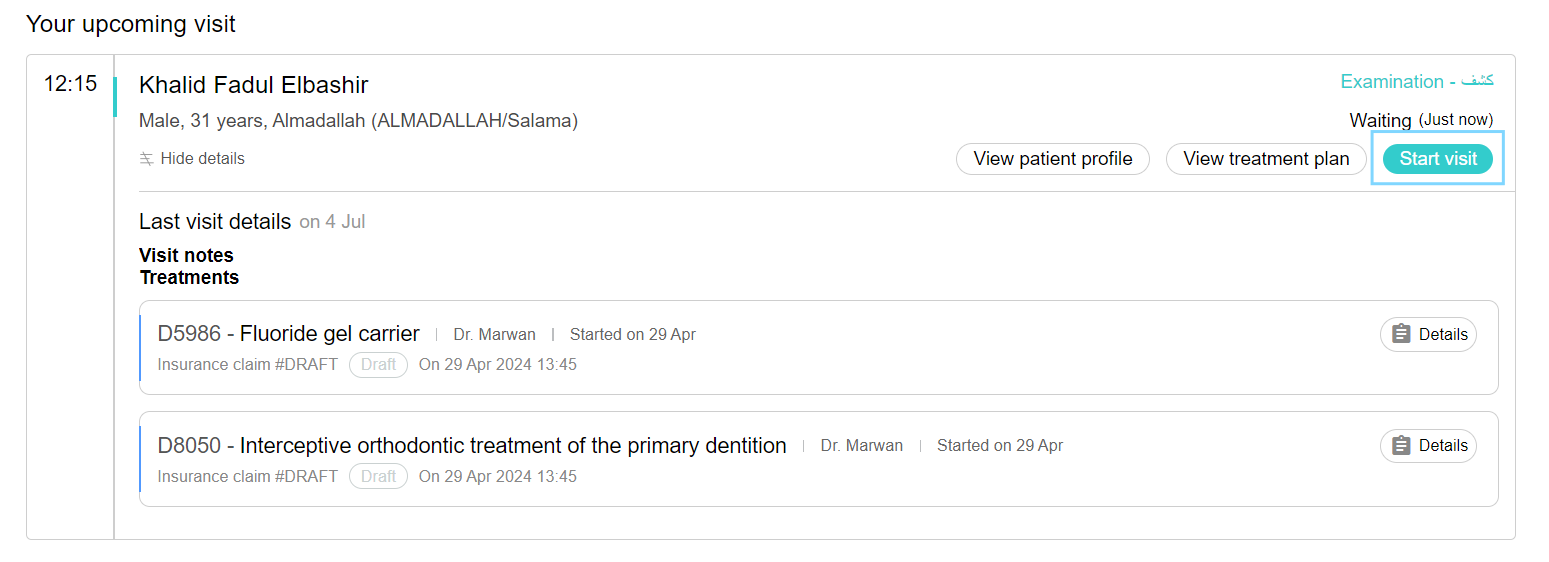
If you want to see all appointments for today and start your visits as a doctor, go to the planner tab. You will see on the left side your upcoming visit with the patient's name and details of your last visit and the subsequent visits. You can view the patient profile by clicking on the "View Patient Profile" button under the patient's name and start the visit by clicking the "Start Visit" button.
On the right side, you will see all of your appointments for today with their statuses.
What happens when you start the visit:
The “Current Visit” page opens, it consists of everything needed for the doctor on one page.
1. On the left side, you can see the patient information. If you want to see the patient profile, click on the "View Profile" button.
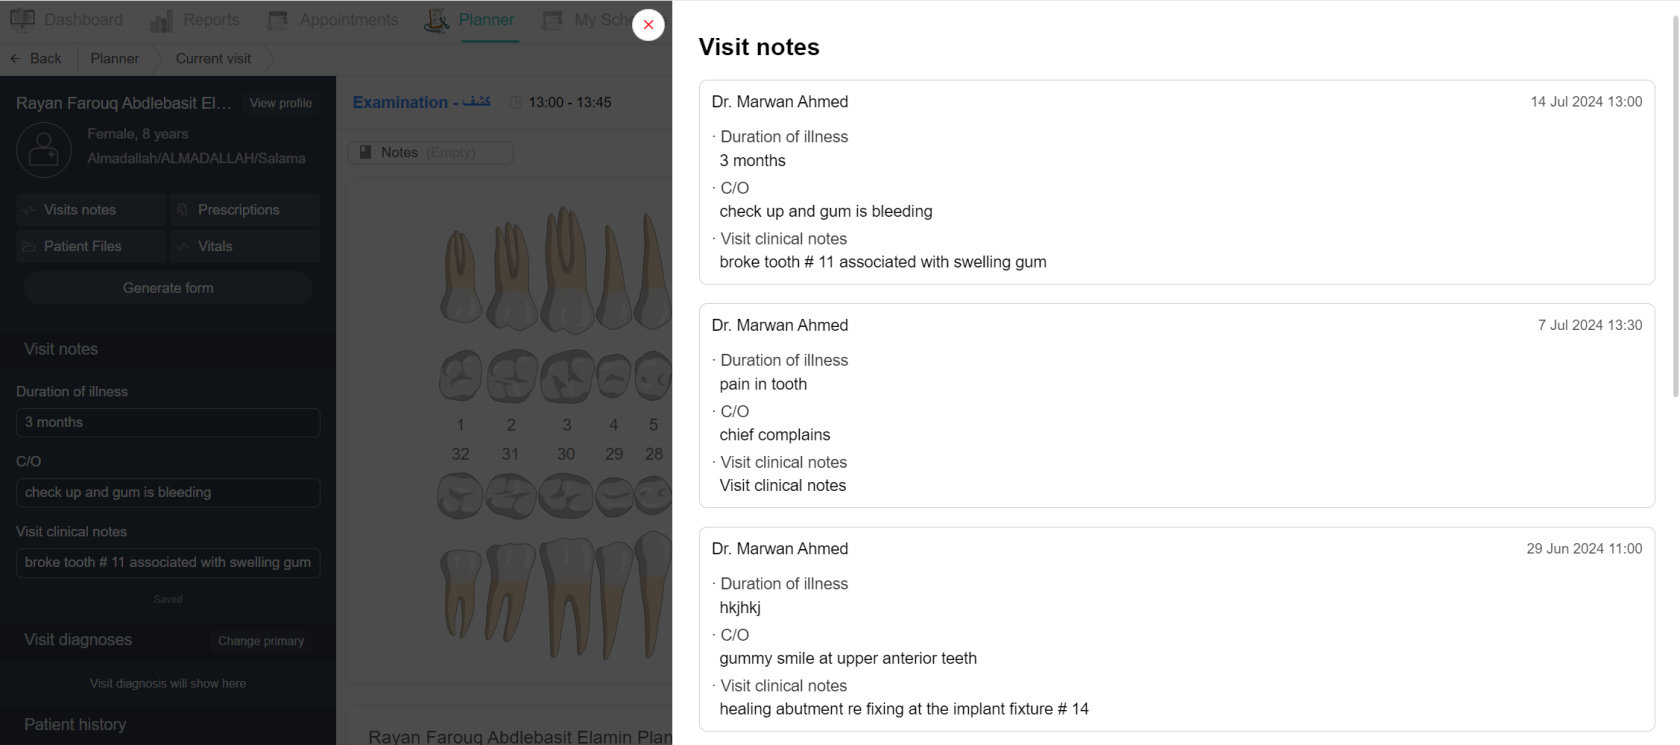
2. By clicking on "Visit Notes," you will see the record of the visit notes that have been added, including who added them and their dates.
3. For prescriptions, you can write drugs for your patient by clicking on "Prescriptions." Click on the "Add Prescriptions" button, select the drug from the drug list, and then you can change the instructions. After that, click on the "Print and Lock" button to save and print it. You can see all of the prescriptions for this patient in this view.
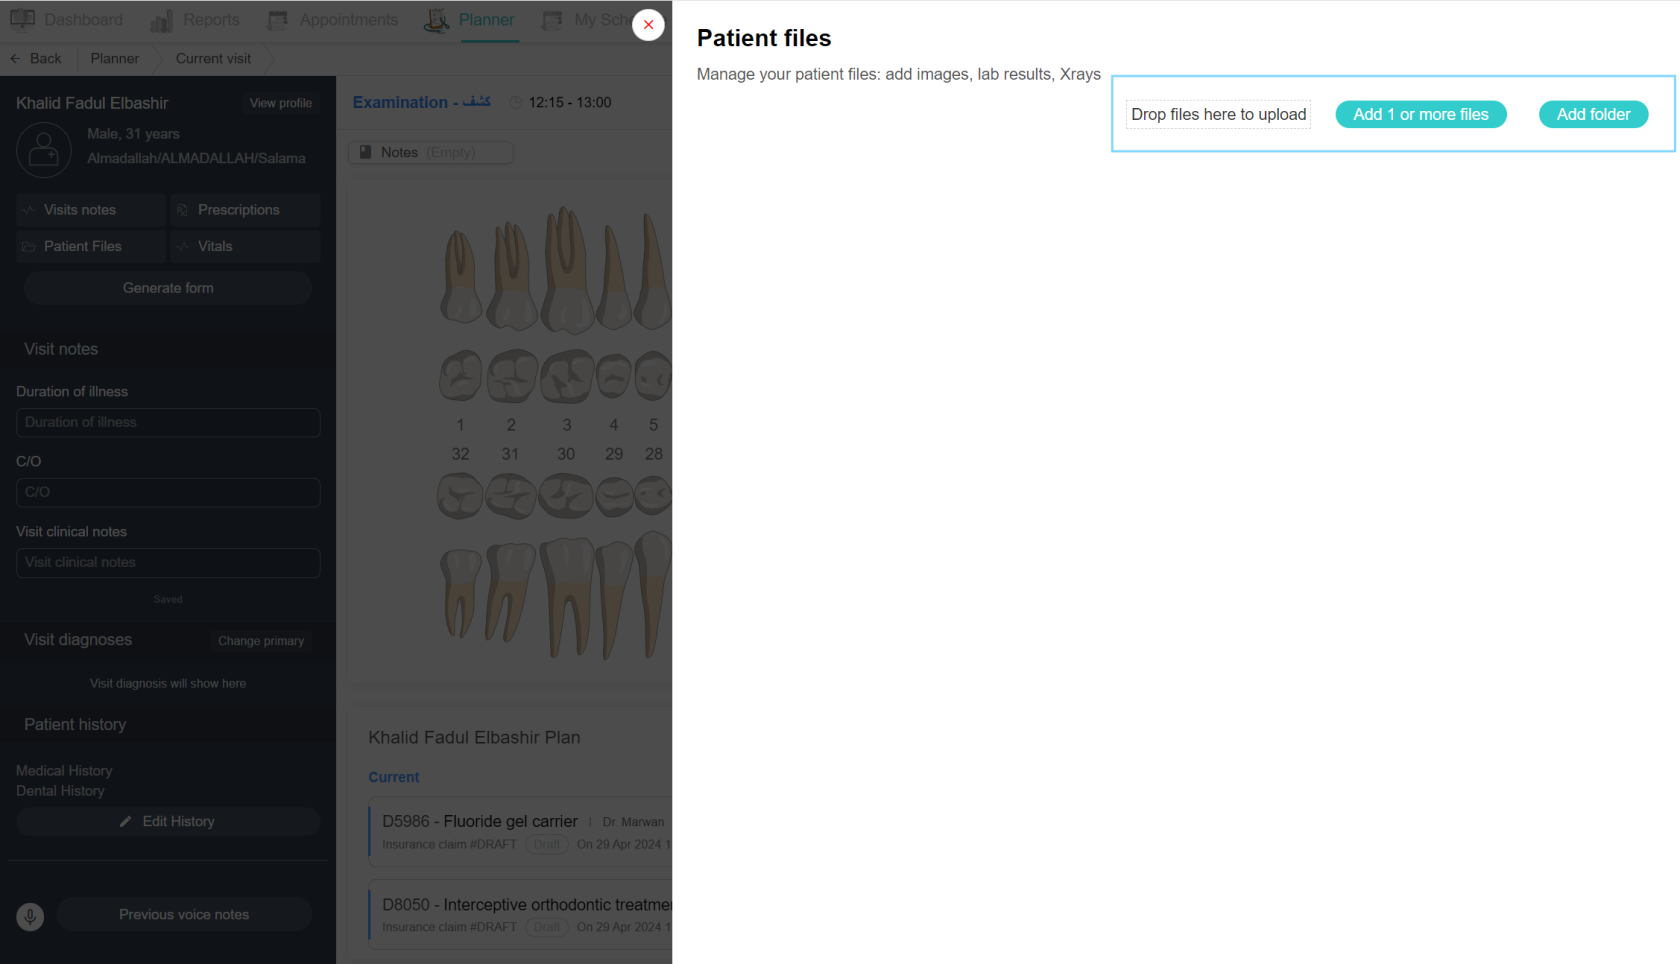
4. If you want to add a file to this patient, such as an x-ray or before and after images or lab results, click on "Patient Files". Click on "Add More Files" or "Add Folder" and select the file you want to add and upload it. You can see all of the files added to this patient at any time in this view.
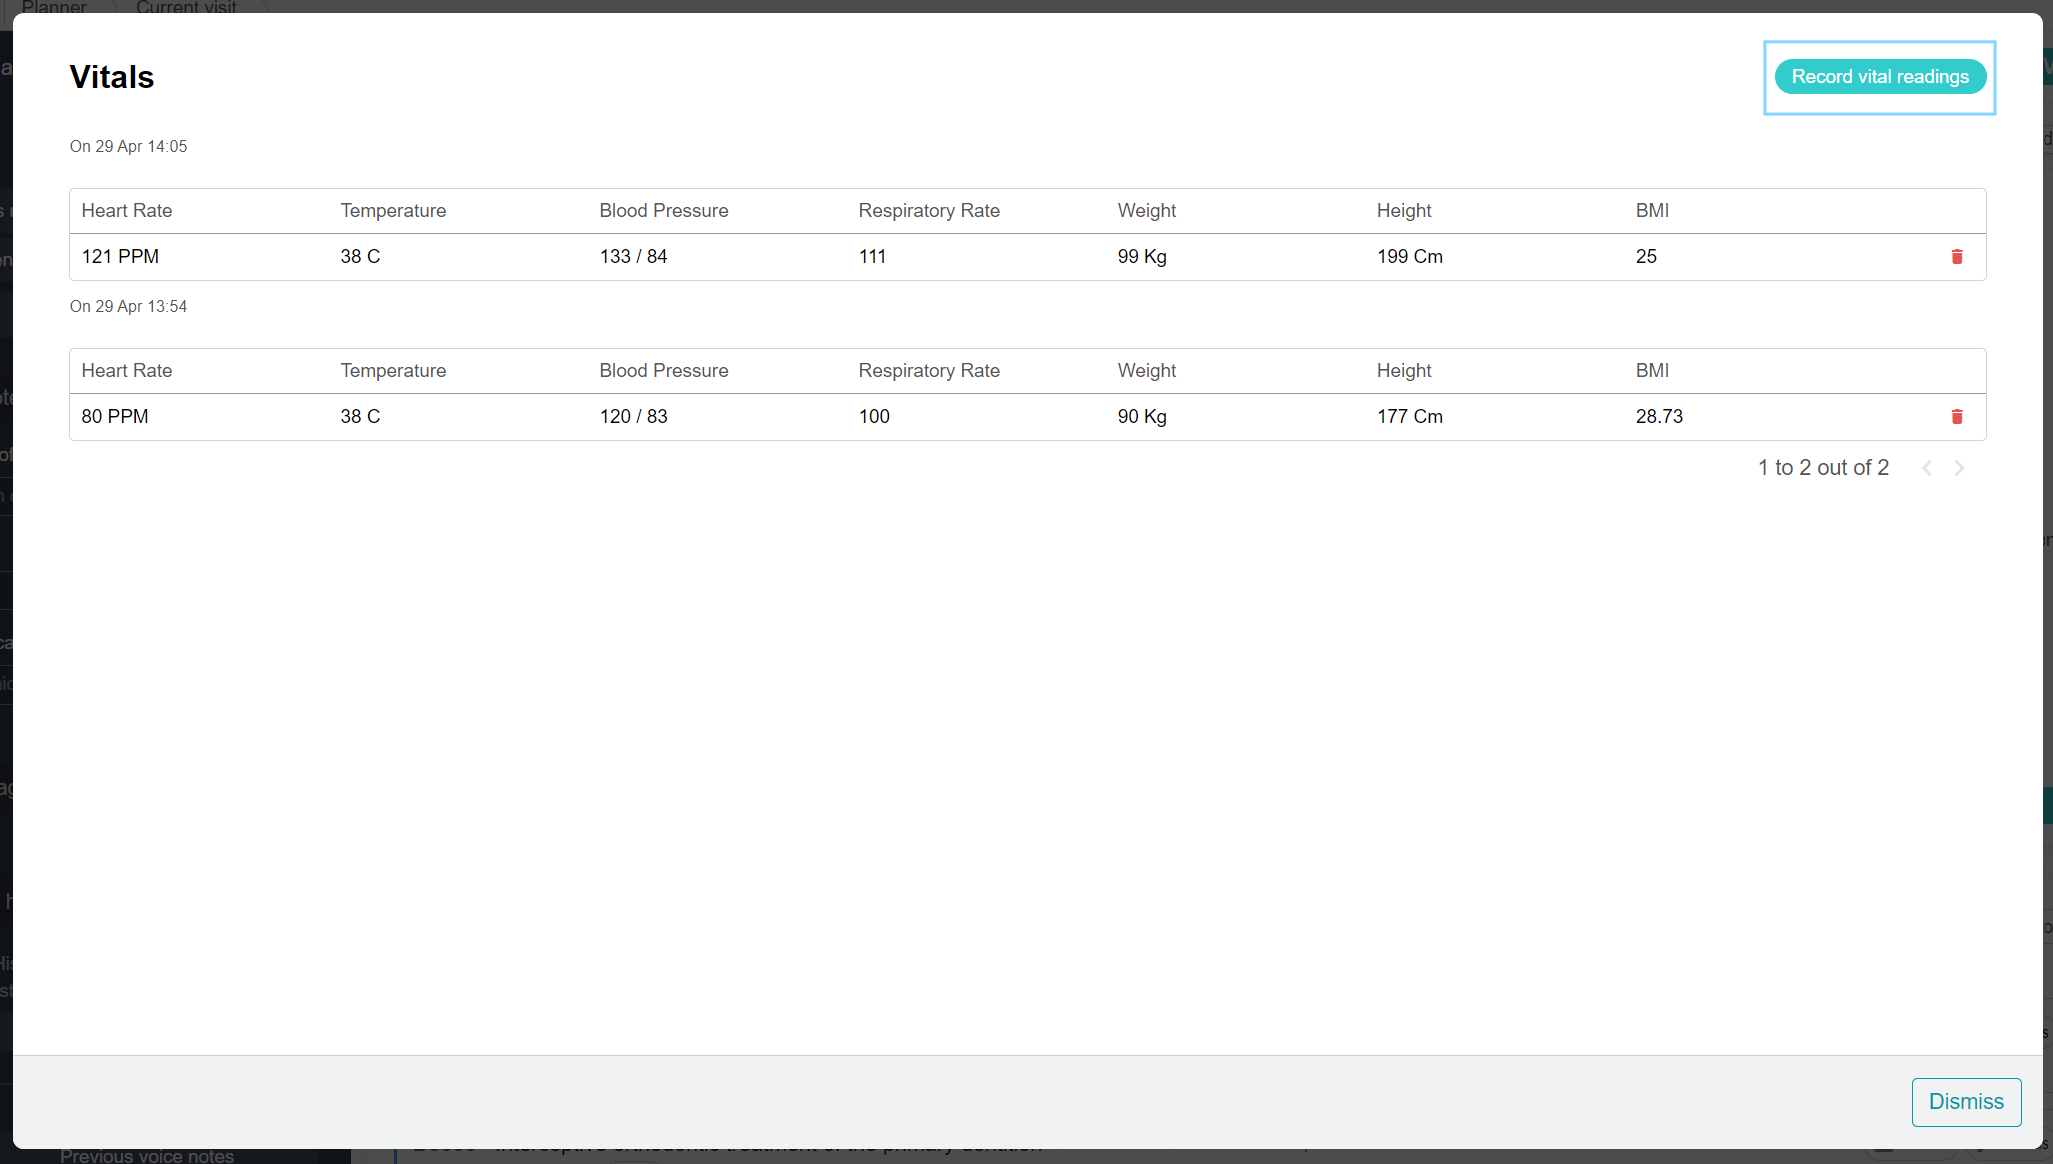
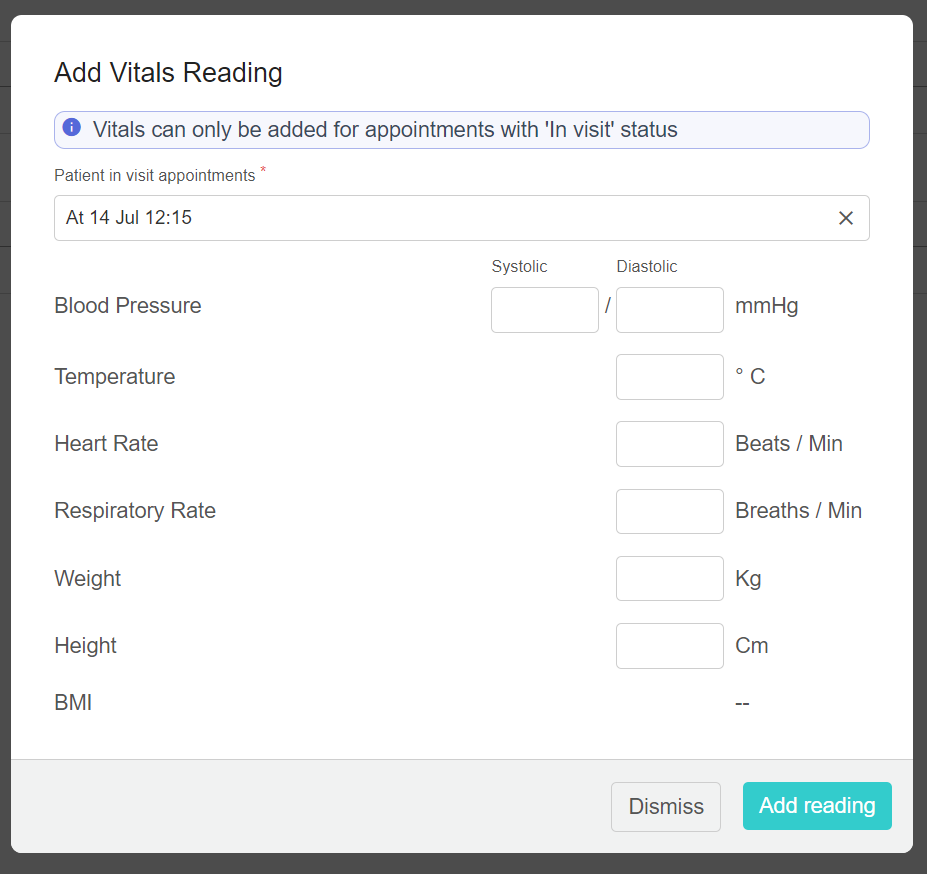
5. To add vitals to this patient, click on "Vitals" and then click on "Record Vital Readings." Fill it out and click on "Add Reading" after completing it. You can see all recorded vitals and dates in this view. Vitals can only be added for appointments with an “In Visit” status.
6. By clicking on "Generate Form," you can see all the forms in the system. Select the form you want to create and select the doctor's name from the doctor list. Click on "Generate Form" and then you will see a URL under the QR code to open the link in a new tab. The form automatically appears in the webform system on a tablet. Click on "Sign Form" to sign it if needed. You can see all forms generated for this patient in the patient reports on the patient profile.
7. In the visit notes, you must fill out medical data for every visit, including the duration of illness, chief complaint (C/O), and visit clinical notes.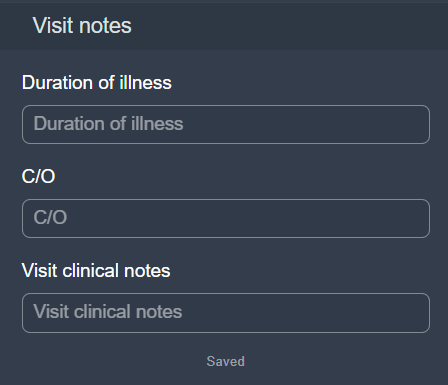
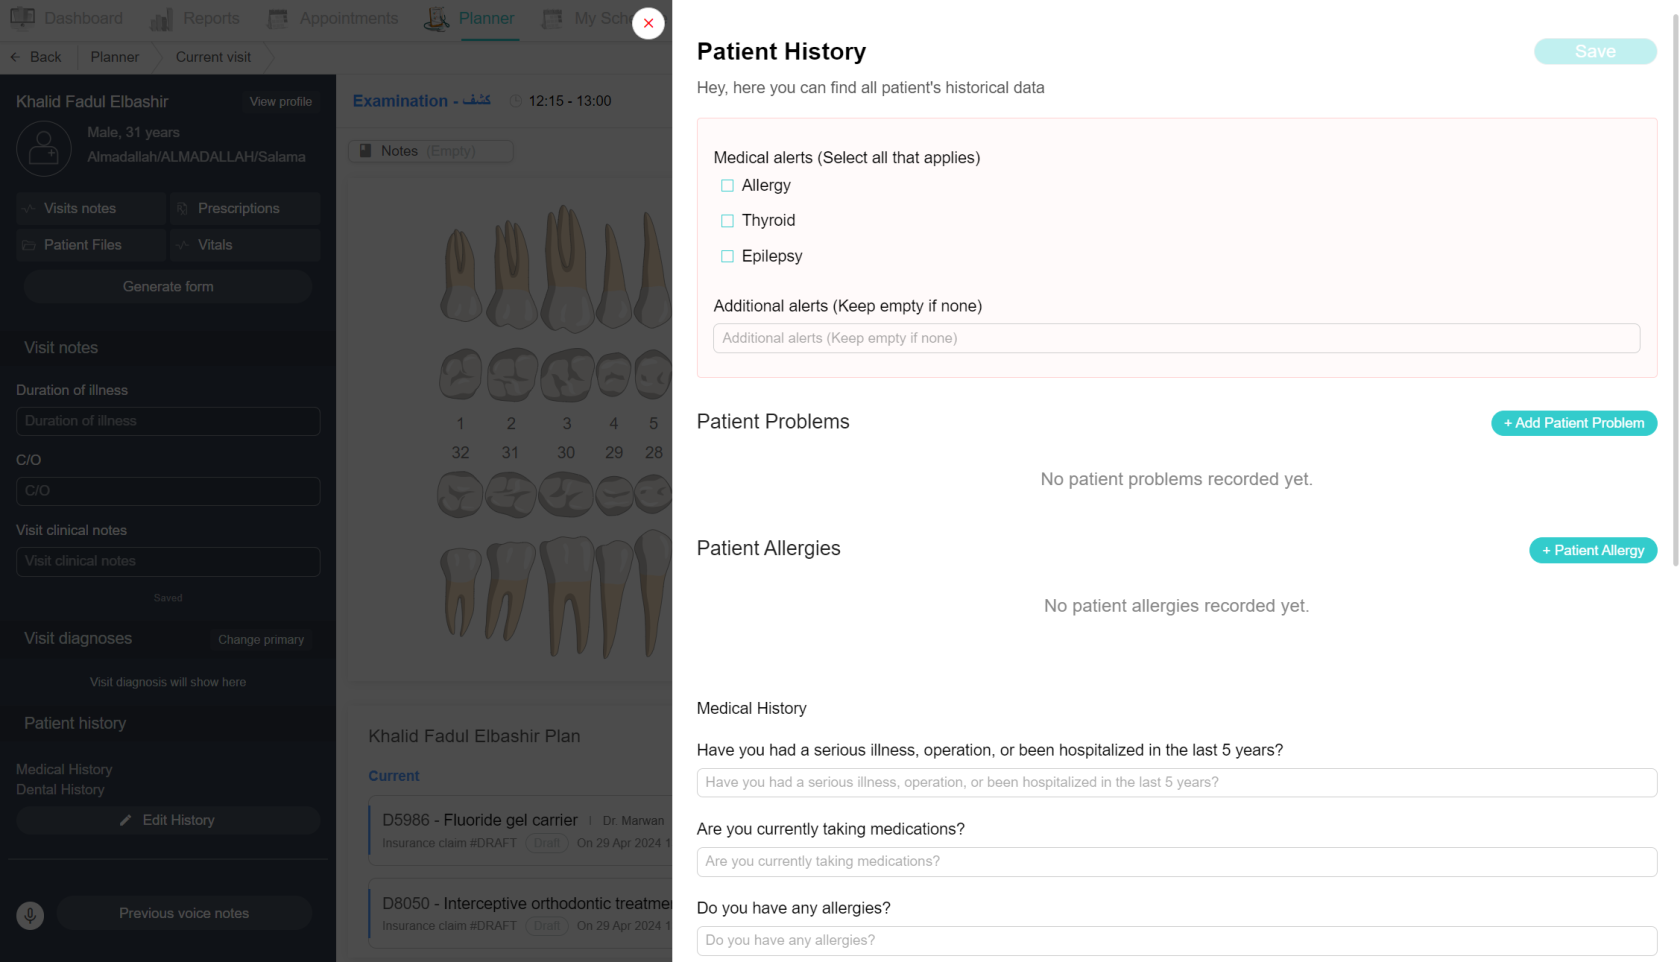
8. To add medical and dental history, click on the "Edit History" button. Once clicked, you can see the patient history with the latest edit. At the top are the medical alerts that are displayed as alerts - in red - above the dental chart. Then, add patient problems by clicking on the "Add Patient Problem" button, selecting patient problems and diagnoses from the diagnosis and problem list, and selecting the life cycle and onset date and resolution date. After completing it, click on the "Save" button to save it. You can add patient allergies by clicking on the "+ Patient Allergy" button, selecting allergy type from the allergy list and allergy from the allergy list, and then clicking on "Save." Fill out the medical history. You can see all previous patient problems and patient allergies that were added.
Note: The fields in the Medical History and Dental History Sections are fully customizable. You can use the default system questionnaire or request some changes to the form from the Customer Success team. The team will gather the desired questions and add them to your account.
9. You can add voice notes by clicking on the "Previous Voice Notes" button and clicking on the "Record Voice Note" button to record your voice.
10. On the right side, you will see the dental chart. Once you click on a tooth, you can mark its status as missing, fractured, or carious. Then, select the treatment by clicking on the "Add New Treatment" button. Treatments are divided into groups and you can search for them by clicking on "All Items" and searching by treatment name and treatment CPT code. After clicking on the treatment you want to add, you must select a diagnosis from the diagnosis list and then click on the "Add and Start Treatment" button to start the treatment. Every treatment has two statuses: "current" (meaning the treatment is still active) and "completed" (meaning the treatment is finished). All treatments added are shown under the dental chart, first current treatments, then completed treatments, and then deleted treatments. Deleted treatments are still shown in this section. You must add progress notes to any treatment by clicking on the "Details" button next to the treatment name.
Note: During your visit, you can click the "Hide chart" button to hide the dental chart and view the full list of treatments.
11. If you want to schedule the next visit, simply click on the "Select Date" button at the top of the page and choose a date. After completing the treatment, click on the "Finish Visit" button.




No Comments