
Administration
Administration
The Administration section contains tools for managing system settings and clinic workflow automation. It includes the following pages:
-
Settings
-
Automation
Settings
The assignments settings page allows you to configure system preferences and operational settings.
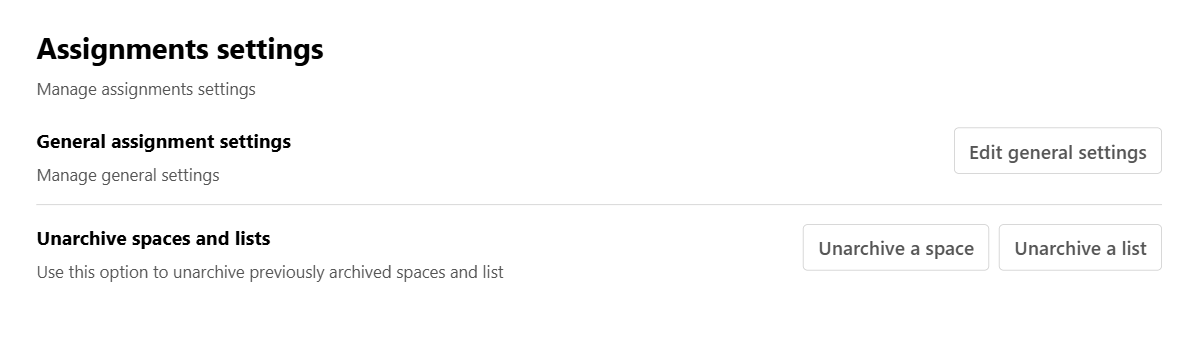
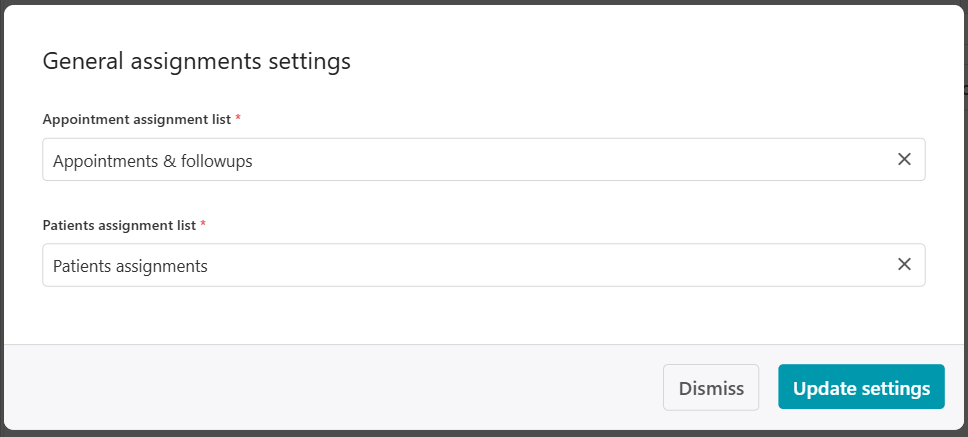
General settings:
To manage the general settings of the assignment page, navigate to the assignment page and under the administration section, click on the settings page, and click on “Edit general settings”. In here, you can allocate the assignments relating to appointments and patients to appear in certain lists.
At the top is the appointment assignment list. Click on the drop-down list and choose the appropriate list.
At the bottom is the patients assignment list. Click on the drop-down list and choose the appropriate list.
At the end, click the “Update settings” button.
Unarchive spaces and lists:
Spaces and lists can be archived to be removed from the main page. You can unarchive them at any moment. Navigate to the administration section of the assignments page. Open the settings page, and you can find the “Unarchive a space” and “Unarchive a list” buttons.
To unarchive a space, click on the “Unarchive a space” button. A list of archived spaces opens, and you can select the desired space from the drop-down list and click on the “Unarchive” button. After completing, the space goes back to the main assignment page.
To unarchive a list, click on the “Unarchive a list” button. A list of archived lists opens, and you can select the desired list from the drop-down list and click on the “Unarchive” button. After completing, the list goes back to the main assignment page.
Note: If a list belongs to an archived space, the space must be unarchived before the list can be restored and displayed. Attempting to unarchive the list while its parent space remains archived will require the space to be unarchived first.
Automation
Automation allows clinics to automatically create and manage assignments based on predefined workflow rules. This will help you reduce manual work and ensure operational consistency.
How it works:
Automation rules use triggers, conditions, and actions to establish a rule.
-
Triggers define when automation should start.
Ex: Appointment Created, Appointment Time, Appointment Status Update, Treatment Completed, Patient Created -
Conditions define the criteria required before the automation executes.
Ex: Appointment Visit type equals Examination, and Patient Priority equals True -
Actions define what the system should do automatically
Ex: Create assignment
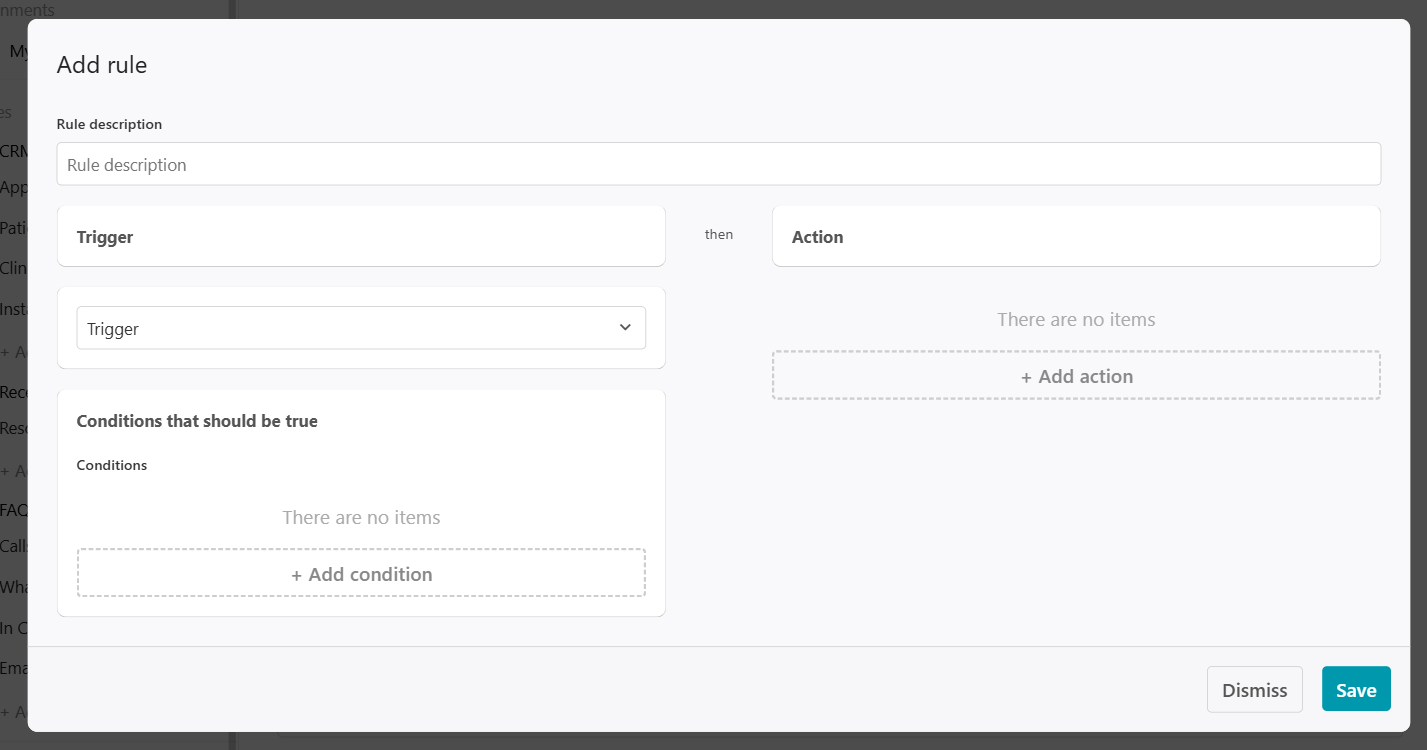
Add new rule:
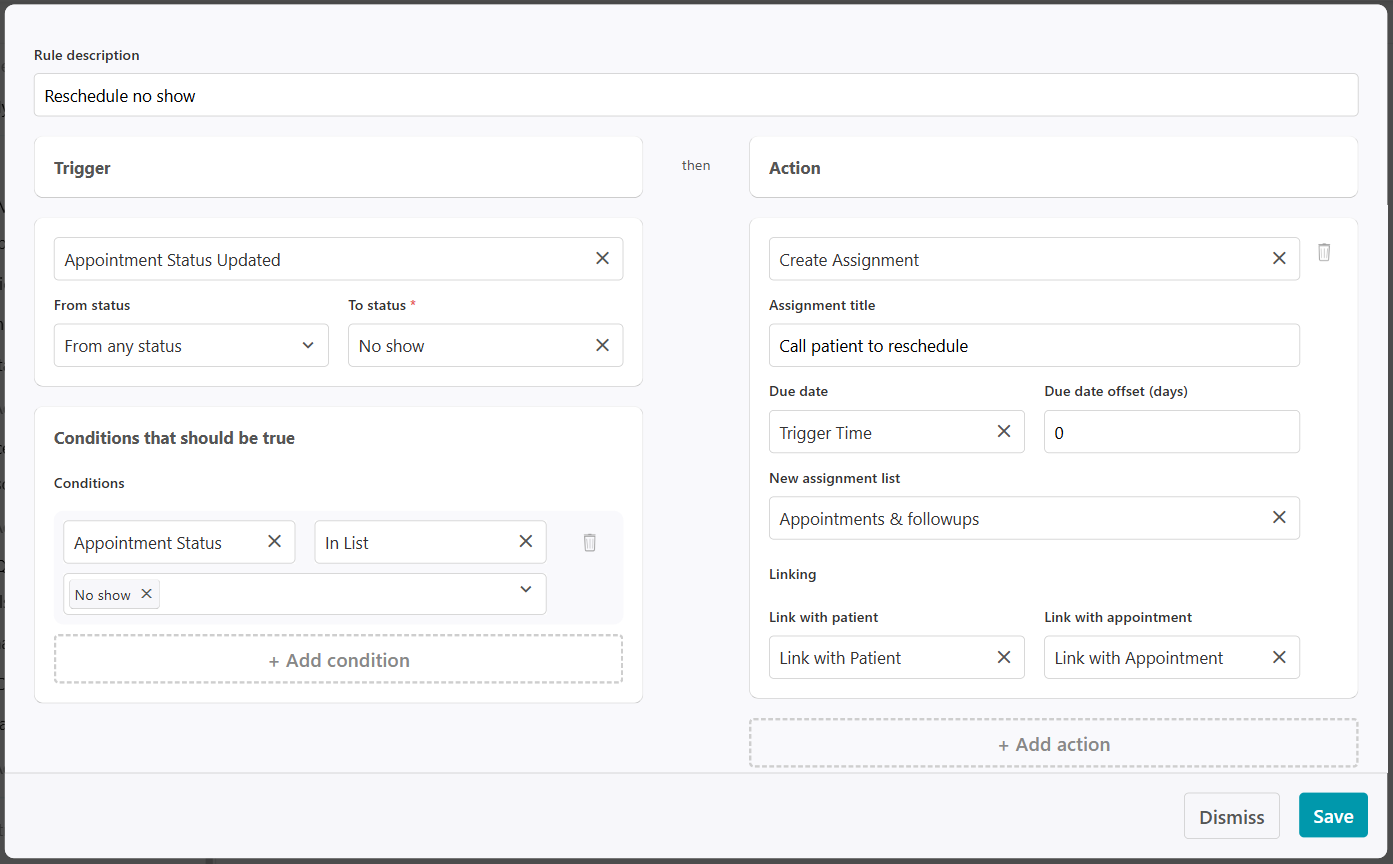
In this box, you can add a rule description to help identify the rule workflow. For example, “Prophylaxis followups”. Then you can add a trigger and an action. In the Trigger section, choose a trigger from the drop-down list that will then determine the conditions. To make the rule even more specific, you should add a condition. You can add as many conditions as you need.
Then, in the action section, click on the “+ Add action” button and choose “Create Assignment” from the drop-down list. Add an assignment that will happen once the trigger is created by a user in the system. Add the assignment title, and choose the due date from the drop-down list. The due date offset is when the assignment will be created after the due date has passed. If you want the assignment to happen on the same day as the due date trigger, you can write 0 in the days field. Next, choose which list the assignment should be saved to. Additionally, you can have this assignment be linked to a patient and/or appointment. You can add more actions to this rule.
Use case:
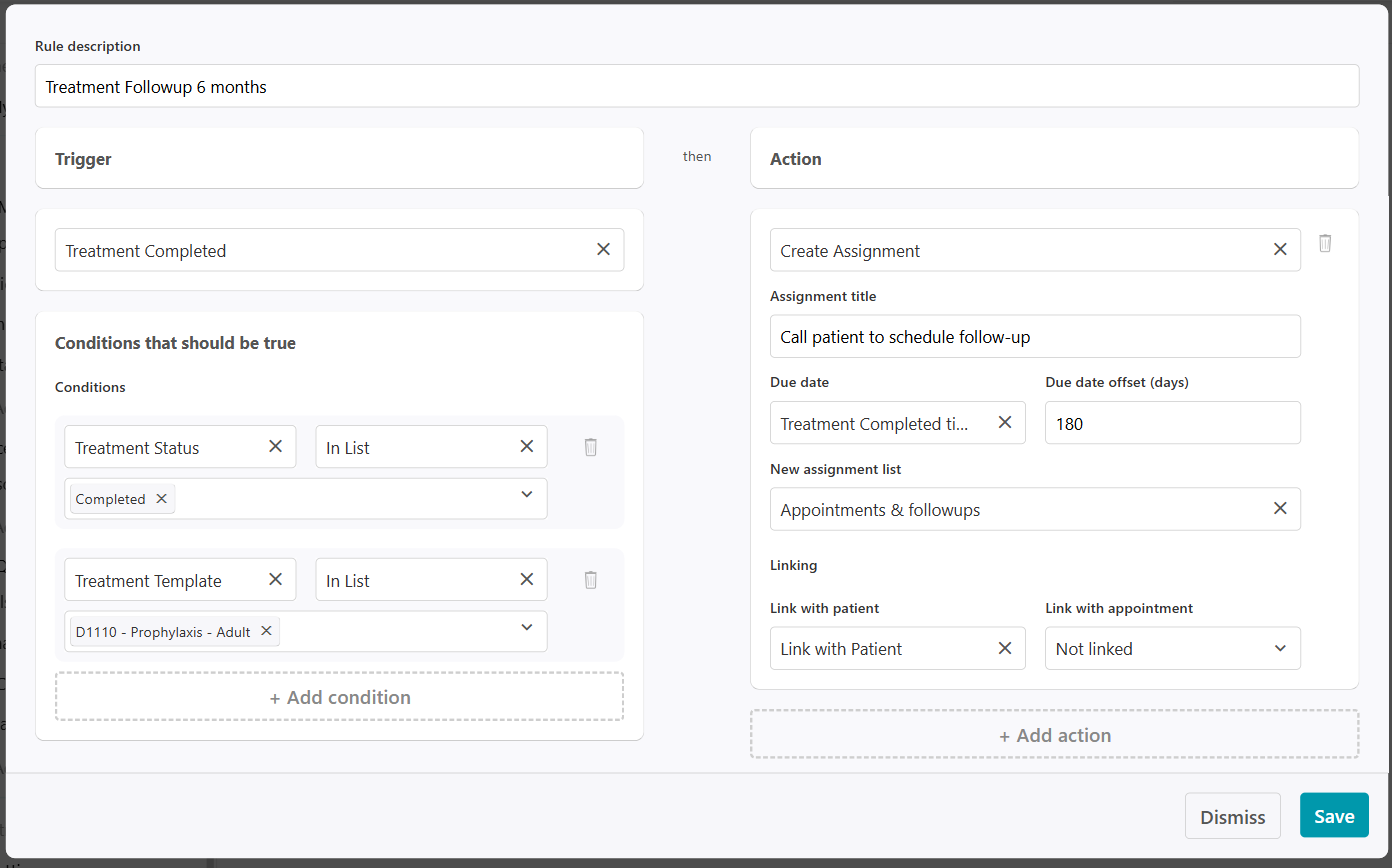
Prophylaxis follow-up rule is created to help you monitor and schedule follow-ups to patients after 6 months of treatment completion. Write “Prophylaxis follow-ups 6-months” in the rule description. Choose “Treatment Completed” from the trigger list, choose the treatment template from the conditions drop-down list; choose “In List” from the operator list and choose the treatment(s) in the value list.
Click the add action button, choose the create assignment from the list and write “Call patient to schedule follow-up”. You can choose either “Trigger time” or “Treatment completion time” from the due date list. In the due date offset days, you can write 180 as the 6-month timeline. Let's choose the “Appointment and followups” list and link it to a patient. Finally, click Save.
Edit existing rule:
There are many reasons to edit an existing rule; you can add an extra assignment or change the conditions of the trigger.
No Comments