
Spaces
Organising Workflow
Spaces
Spaces are high-level organizational categories used to separate departments, teams, or workflows. They are found on the left side of a side menu. Some default spaces are:
-
CRM
- Management
Add new space:
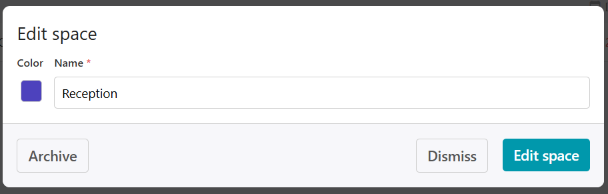
Edit space:
Find the desired space and click on the settings icon next to the name. You can edit the space and edit the statuses. Click on edit the space. A box opens up, you can change the color and name of the space. Once the changes are made, click on edit space button.
Archive space:
Spaces are not designed to be deleted. You can archive the space to remove it from the spaces section. To archive, click the settings icon next to the space name. Click on the edit space to open the “Edit space” box. At the bottom, you can find the Archive button. Click on the Archive button, click the confirmation button and the space will be removed from the spaces section.
Lists
Lists are used inside Spaces to organize assignments further. Some default lists are:
-
Appointments & followups
-
Patients assignments
Add new list:
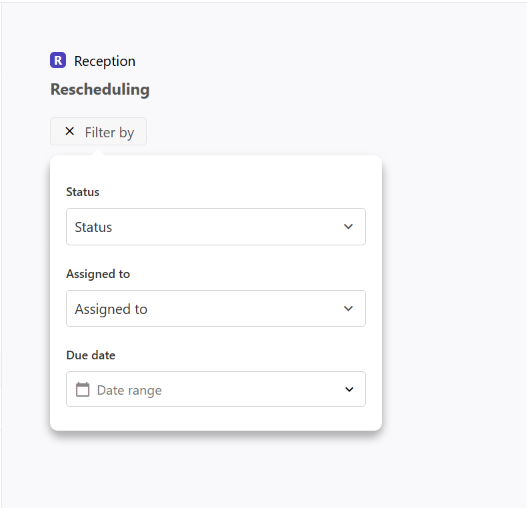
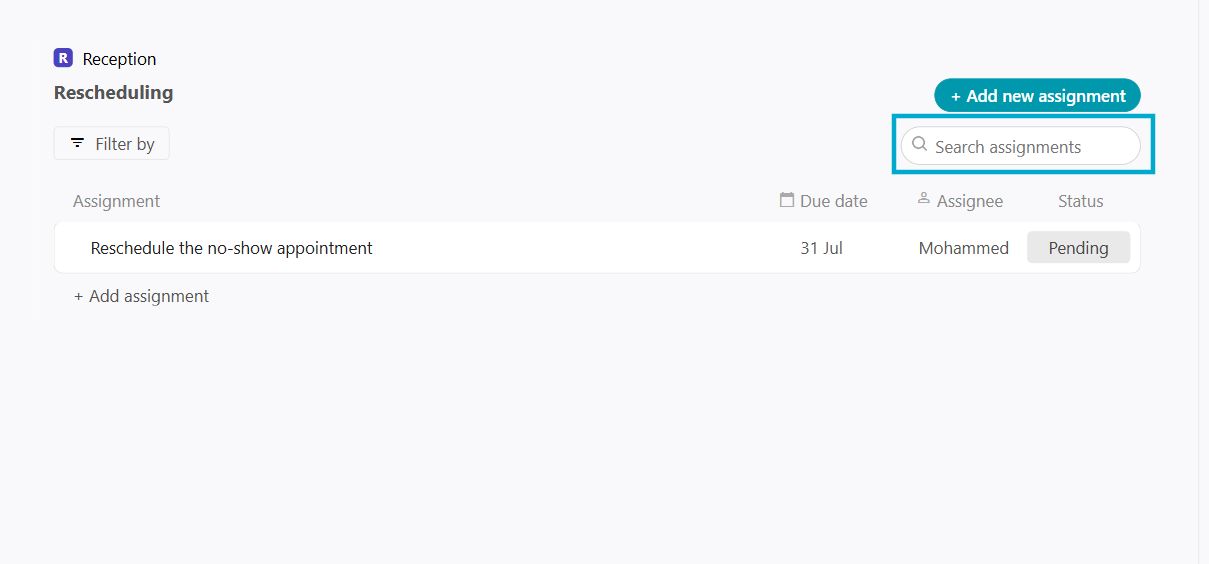
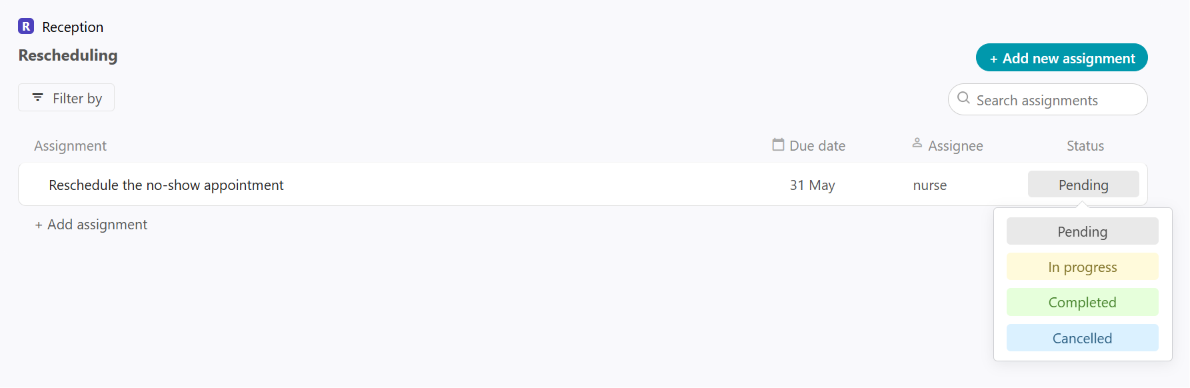
Upon opening the list page, all the assignments are found. Going from the top, the first button is the filter by. Next on the top right side is the “+Add new assignment” button and the search field. Beneath them is the assignment list, with the name of the assignment, due date, assignee name and status of assignment. And finally at the bottom is another “+Add assignment” button for quicker addition.
Edit List:
Archive List:
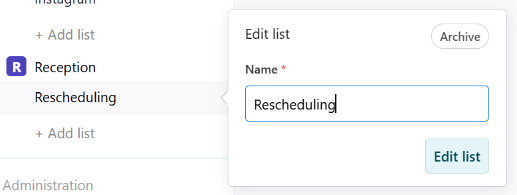
Lists are not designed to be deleted. You can archive the list to remove it from the list section. To archive, hover on the list name and click on the edit button. On the top is the Archive button. Click on the Archive button, click the confirmation button and the list will be removed from the list.
Edit Statuses:
Each assignment found in a list has a list of default statuses to help track the assignment. By default, the statuses are “Pending”, “In progress”, and “Completed”. You can edit the statuses, add more, rearrange or delete the existing ones.
To edit the statuses, hover over the space name, and a settings button appears. Click on edit statuses, and a box appears. You can rearrange the order of statuses. Click the edit button next to each status to change its name or colour and click “Edit status” button.
To add a new status, click on the edit button next to the space name, and choose the Edit Status option. At the bottom of the box, click Add status button, and choose a colour, and write the new status name in the pop-up box and finally click the blue highlighted Add status.
What is a closed status? Any status set as closed doesn’t show by default in the list. The cause is to allow the clinic to track everything. Even tasks that are no longer needed to ensure nothing falls through the cracks and maintain accountability.
To delete a status, click on the edit button next to the name and click on the delete icon underneath the name. Confirm the deletion, and the status is now removed.
Assignments
Assignments are found in Lists, and they help you track all clinic-related tasks.
Add new assignment:
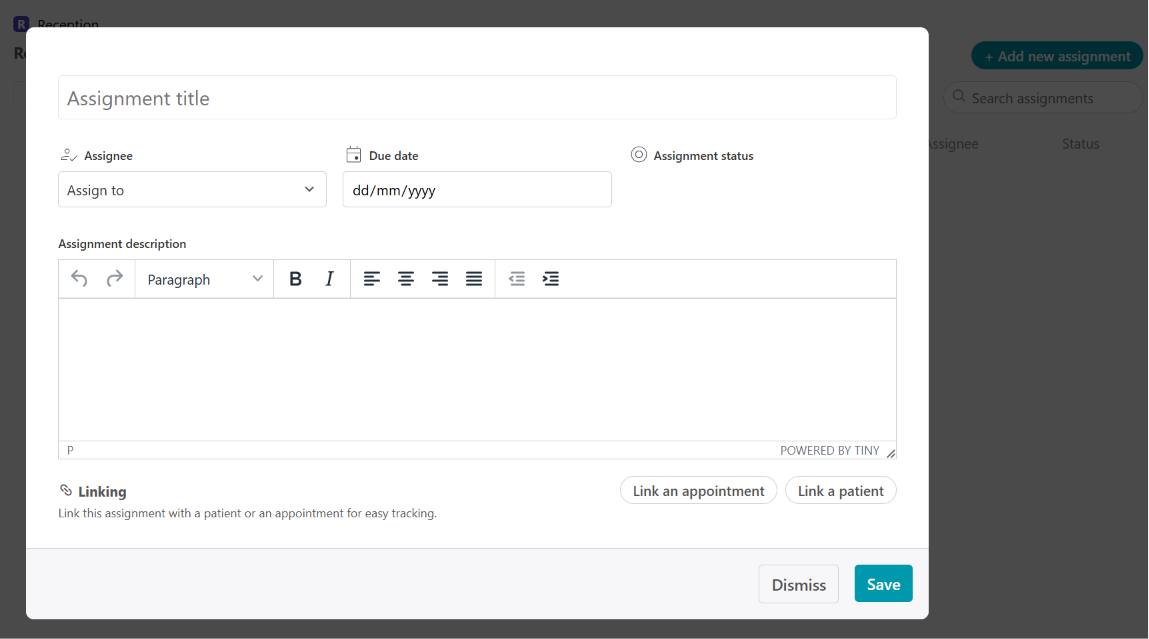
Open the desired list and click on “+ Add new assignment” button. A new assignment box opens up.
-
Assignment title: Type the name of the assignment, for example, Reschedule the no-show appointment.
-
Assignee: Choose the name of the user who is assigned to this task
-
Due Date: Choose the date by which the assignment should be completed
-
Assignment description: Describe the assignment in more details if needed
-
Linking: You can link this assignment to an appointment found in the system and/or to a patient.
Finally, click Save.
Linking assignment to an appointment:
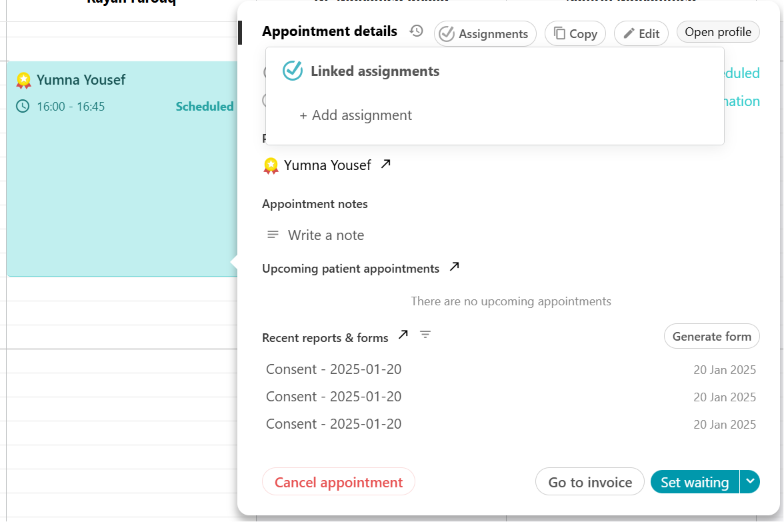
When an assignment is linked to an appointment, a notification is shown in the assignments section of the appointment details box. Open the appointment details box and click the Assignments option at the top to view all assignments linked. Assignments linked to the appointments could be manually created or automatically created upon a trigger.
Linking assignment to a patient:
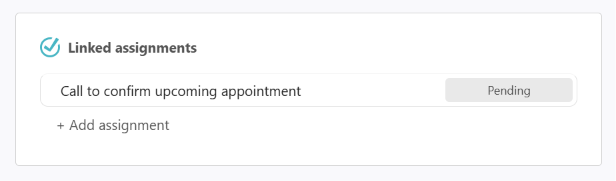
All assignments linked to a patient are found in the patient profile. Open the patient profile page, and on the basic information page, there is the linked assignments section. In there, you can view all assignments linked; they could be manually created or automatically created upon a trigger.
View assignment details:
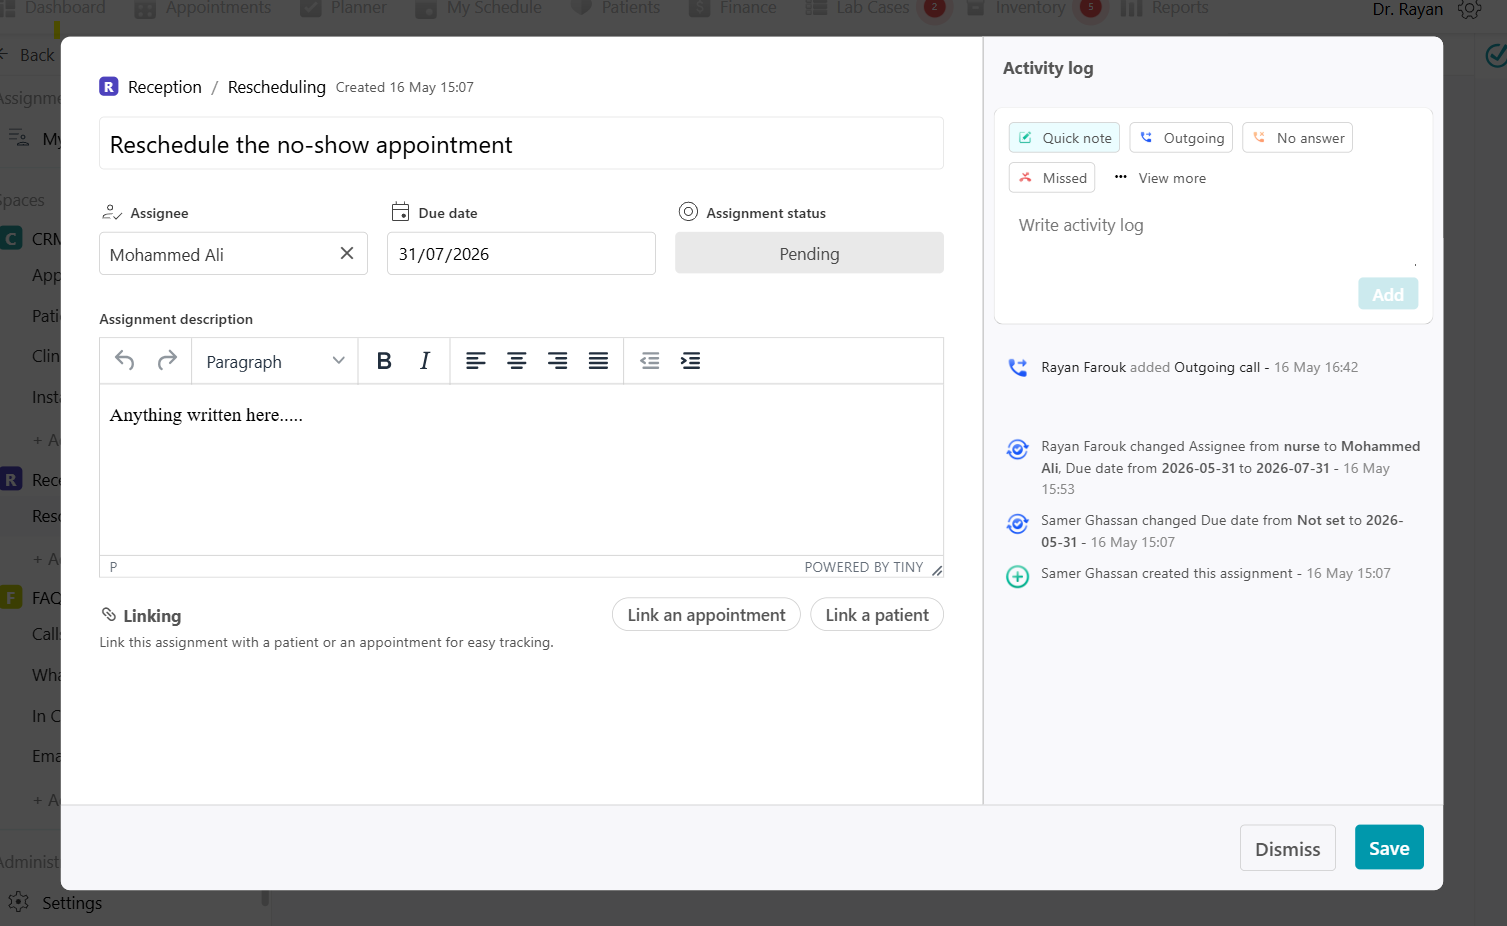
Choose the desired assignment and click to open it. When you open an assignment, you will notice the page is divided into the assignment details and the activity log.
Search assignment:
When many assignments are found in the list, you can use the search field to look for a specific assignment. Open the list and click on the search assignment field. Type the title of the assignment and find the desired one.
Drag to change the order of assignments in the List:
Many assignments are found in a specific list, and you notice the order isn’t what you desire. You can drag the assignments to be placed in the order you need. Find the assignment and notice in each assignment row, there is a drag handle icon on the left side. Click the drag handle icon and hold it. The selected assignment can then be dragged vertically to a new position. Drag the assignment to the desired location in the list and release the icon. The update order is automatically reflected in the assignments list.
Change assignment status:
Assignment statuses are used to track the progress of each assignment. By default, the three available statuses are “Progress”, “In progress”, and “Completed”. You can add as many as you need.
To change the status, you can change it from the main list view or after opening each assignment.
In the main list view, find the desired assignment row and at the far right is the status column. Click on the status to find the full list of statuses and choose the new desired status, and it's now updated.
You can also click on the assignment after its addition to view the assignment details box. At the top is the Assignment status, and clicking on it to change to the new status. Finally, click Save.
Edit assignment:
To edit any assignment, look for the desired assignment. Once you find it, click on it to view the full assignment details box. Edit as needed, you can:
-
Change the title name,
-
Choose a different assignee,
-
Change to another due date,
-
Change the status,
-
Edit the description, and
-
Link to an appointment or a patient
Finally, click Save.
Activity Log
Every assignment includes a built-in Activity Log that tracks all assignment-related actions. The Activity Log provides full visibility into assignment history and team actions.
View the activity log:
Click on a desired assignment to view the assignment details box. On the right side is the activity log section. It records assignment creation, updates, any status changes, any modifications happening in the assignment details and automation-generated actions. Each log entry will include the action performed, whether it's user or system-created, and the timestamp of the action.
Add new activity log:
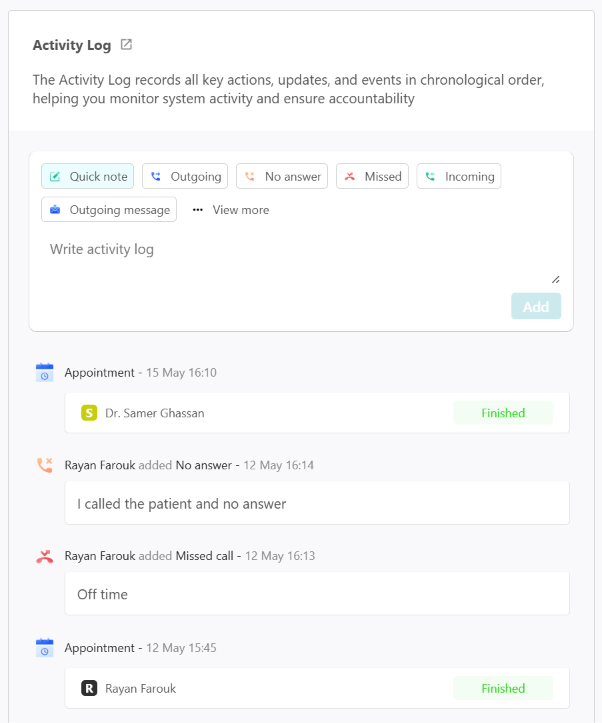
Users can manually add new logs to the assignment. Open the assignment, and in the activity log section, you can choose an action from the previously prepared list and/or add your manual activity log. For example, the assignment was to reschedule the no-show appointment, the receptionist chose the “No answer” action, wrote “Left voicemail”, and clicked the Add button. This way, all communication is stored in one place.
Delete activity log:
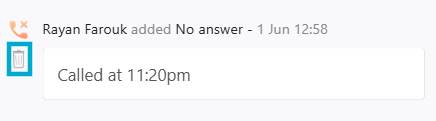
If an incorrect note or action has been added to the activity log, it can be removed and replaced with the correct information. Navigate to the relevant assignment and click it to open its details. On the right side of the screen is the Activity Log section, and find the incorrect log entry. Hover over or select the log entry to display the delete icon. Click the delete icon to remove the activity log entry. Add a new note or action with the correct information if required.
View patient’s activity log:
Every activity log in an assignment linked to a patient or an appointment will be found in the patient’s profile. Open the patient profile, and in the basic information page, you will find the activity log section. In here, you can find all actions that took place there. You can add a new log and view the previously added ones. To view the full list of logs, click on the Load more button at the bottom of the section. A side page opens with all the logs in one place.
No Comments